The latest update from Crunchyroll Games gave us a sneak peek into the Tower of Luna event for the EN/WW server. Starting in September of 2021, we'll be getting the event for the first time and will likely have an update every month from now. Let's dig right into the event and go over some basics.
Tower of Luna Basics:
Tower of Luna will be available during the event period once you have completed Main Quest 9-1 on normal. This will be a whole separate event section similar to story events. You will be climbing up the Tower of Luna starting from floor 1 all the way to the highest floor. The highest floor will change with each time the Tower of Luna is reintroduced. The starting highest floor will be floor 70 and will also come with an EX stage once completed.

Some basics for the event is as follows:
You can use to up 15 characters a day toward Tower of Luna. (HP and TP will carry over between floors and days.)- Good news, the EN/WW server got earlier quality of life updates. You can use all of your characters for climbing as long as they are level 10 or above.
- Attempting each floor does not cost any stamina.
- If the battle times out, your entire party will wipe. This is similar to the EX dungeon except it happens once you time out so there is no way to avoid it.
- You have one reset each day to reset all your characters to full HP. This will also reset their TP.
- Each day, you may borrow one character for support.
- Princess Heart, the item for unique equipment is implemented and rewarded on select floors.
- Tower of Luna will return in future updates with more challenges and rewards.
You can think of Tower of Luna as bonus content almost. It is essentially a series of dungeon floors/boss floors. Each floor will have enemy monsters, shadow versions of characters, and bosses in an assortment of settings. This event tests flexibility and different team compositions. It is definitely possible to clear it during the event period but don't worry if you can't. It will come back and be easier the next time around as you will have more characters, a higher level cap, and more equipment and stats to fight the previous floors.
Tower of Luna Floors 331-350 Information:
For our Tower of Luna guide, we'll be listing the enemies on each of the boss floors (every 10th floor) and posting some recommendations near the end. Of course, there are floors in between each of the boss floors but you can use most of the recommended boss teams and adjust as needed. Most of the standard floors just require a team that can withstand the enemies' damage and be able to do enough damage to clear the floors.
360th Floor
 Small Goblin (Lvl. 153) Small Goblin (Lvl. 153)243,775 HP |
 Shadow Ayane (Lvl. 153) Shadow Ayane (Lvl. 153)250,500 HP |
 Shadow Rin (Lvl. 153) Shadow Rin (Lvl. 153)204,563 HP |
 Crimson Birb (Lvl. 153) Crimson Birb (Lvl. 153)2,400,000 HP |
 Mad Flower (Lvl. 153) Mad Flower (Lvl. 153)160,228 HP |
|---|
For floors 351 to 360, the boss is Crimson Birb. The details for the boss can be found here:
| Difficulty | HP | Union Burst | Skill 1 | Skill 2 |
|---|---|---|---|---|
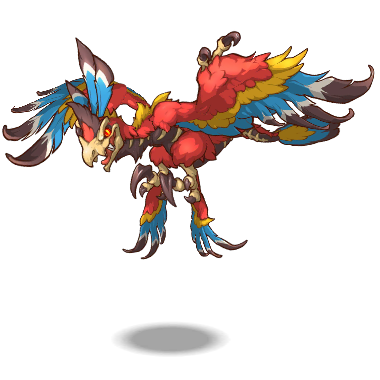 Floors 360 Floors 360 Lvl. 153 |
2,400,000 | Deals large physical damage to all enemies. Deals an additional medium amount of physical damage to all magic damage characters. | Deal small physical damage in an area around the second enemy and stuns them. | Deals medium physical damage to all enemies within front range and blows them back. |
This boss is annoying from the get-go. The boss deals a lot of physical damage and does extra damage to magic damage dealers.
Tower of Luna Floors 351-360 Guide
We'll now go into detail on some of the teams that will help tackle the boss floors. Most of these teams were tested at max level at the time and should work at lower levels as well for some of the lower floors. These are of course recommendations, feel free to make changes as needed. You'll find this set of floors to be much harder and the bosses will usually require two or more teams to complete them. This is fairly normal as the content starts to ramp up in difficulty.
360th Floor
 Karyl (6★) (w/ UE) Karyl (6★) (w/ UE) |
 Kasumi (w/ UE) Kasumi (w/ UE) |
 Neneka Neneka |
 Kokoro (6★) (w/ UE) Kokoro (6★) (w/ UE) |
 Kuka (w/ UE) Kuka (w/ UE) |
|---|
 Chika (w/ UE) Chika (w/ UE) |
 Christina Christina |
 Djeeta (w/ UE) Djeeta (w/ UE) |
 Makoto (w/ UE) Makoto (w/ UE) |
 Jun (w/ UE) Jun (w/ UE) |
|---|
With these teams, we're taking care of the mobs first. Our first team is going to be a magic team that deals both AOE damage and can help do some damage against the boss. The second team will be physical to help take down the boss.
| Karyl (6★) (w/ UE) |
Kasumi (w/ UE) |
Neneka |
Kokoro (6★) (w/ UE) |
Kuka (w/ UE) |
|---|
 Yui (New Year) Yui (New Year) |
 Saren (Summer) Saren (Summer) |
 Makoto (Summer) Makoto (Summer) |
Makoto (w/ UE) |
 Muimi Muimi |
|---|
You can change out the second team to be more offensive. If you have Yui (New Year) and Saren (Summer), you can get through this with Yui (New Year)'s heal alone.
EX 360th Floor
 Shadow Tomo (Lvl. 153) Shadow Tomo (Lvl. 153)248,000 HP |
 Shadow Mimi (Lvl. 153) Shadow Mimi (Lvl. 153)217,000 HP |
Crimson Birb (Lvl. 173) 2,300,000 HP |
 Shadow Nanaka (Lvl. 153) Shadow Nanaka (Lvl. 153)135,250 HP |
 Luna Pod (Lvl. 153) Luna Pod (Lvl. 153)57,000 HP |
|---|
Honestly, this set of enemies can be dealt with the same way as the regular floor.
| Difficulty | HP | Union Burst | Skill 1 | Skill 2 |
|---|---|---|---|---|
|
EX Floors 360 Lvl. 173 |
2,300,000 | Deals large physical damage to all enemies. Deals an additional medium amount of physical damage to all magic damage characters. | Deal small physical damage in an area around the second enemy and stuns them. | Deals medium physical damage to all enemies within front range and blows them back. |
As usual, we're looking to clear the mobs first and then working on the boss.
Suggested Teams
| Karyl (6★) (w/ UE) |
Kasumi (w/ UE) |
 Io (Summer) Io (Summer) |
 Yukari (w/ UE) Yukari (w/ UE) |
Kuka (w/ UE) |
|---|
| Kokoro (6★) (w/ UE) |
Christina |
Djeeta (w/ UE) |
Makoto (w/ UE) |
Jun (w/ UE) |
|---|
This two party team is probably the best for dealing with this boss. Survival is important here so we'll slot in Io (Summer) into the first team as well as Yukari (w/ UE). The second team is a physical team that will deal with the boss. Feel free to dump a third team in between or make substitutions as necessary.
| Karyl (6★) (w/ UE) |
Io (Summer) |
Neneka |
 Akari (w/ UE) Akari (w/ UE) |
 Lima (6★) (w/ UE) Lima (6★) (w/ UE) |
|---|
 Shiori (w/ UE) Shiori (w/ UE) |
Kokoro (6★) (w/ UE) |
 Chloe Chloe |
Makoto (w/ UE) |
 Ruka (w/ UE) Ruka (w/ UE) |
|---|
This is an alternative team you can use. The idea behind it is the exact same. Just using some of the new characters such as Lima (6★).
Tower of Luna October 2022 Phantom Passage Information:
Starting in September of 2022, you'll be able to attempt the Phantom Passage daily once you reach the top floor of Tower of Luna, not including the EX stage. For October of 2022, that would be floor 360. Phantom Passage is a set of 3 waves that is similar to previous floors or Tower of Luna. However, you cannot change teams between floors until your party either wipes or times out. Each floor gives you 1:30 as usual. It also shares the same pool of units of your regular Tower of Luna so you want to be wary of your units you sacrifice if any. Once you complete it the first time, you can use skip tickets to clear it again. Clearing the stage will give you item drops well worth your time since the stage doesn't use stamina. You can do this up to five times a day.
Wave 1
 Tanuki (Lvl. 153) Tanuki (Lvl. 153) |
 Shadow Shizuru (Lvl. 153) Shadow Shizuru (Lvl. 153) |
 Treant (Lvl. 153) Treant (Lvl. 153) |
 Shadow Misaki (Lvl. 153) Shadow Misaki (Lvl. 153) |
|---|
Wave 2
 Shadow Ruka (Lvl. 153) Shadow Ruka (Lvl. 153) |
 Bird (Lvl. 153) Bird (Lvl. 153) |
 Shadow Tamaki (Lvl. 153) Shadow Tamaki (Lvl. 153) |
 Shadow Yukari (Lvl. 153) Shadow Yukari (Lvl. 153) |
 Nymth (Lvl. 153) Nymth (Lvl. 153) |
|---|
Wave 3
 Shadow Miyako (Lvl. 153) Shadow Miyako (Lvl. 153) |
 Strawberry Snake (Lvl. 153) Strawberry Snake (Lvl. 153) |
 Shadow Mitsuki (Lvl. 153) Shadow Mitsuki (Lvl. 153) |
 Shadow Rino (Lvl. 153) Shadow Rino (Lvl. 153) |
 Furry (Lvl. 153) Furry (Lvl. 153) |
|---|
As you can see, the waves are fairly straightforward. You can keep throwing units at the waves as it saves progress even after your daily reset. We'll also provide some teams to help you ease through this and get the sweet, sweet, rewards.
Suggested Teams
 Karyl (Summer) (w/ UE) Karyl (Summer) (w/ UE) |
 Misato (w/ UE) Misato (w/ UE) |
Neneka |
Yukari (w/ UE) |
 Nozomi (w/ UE) Nozomi (w/ UE) |
|---|
 Maho (w/ UE) Maho (w/ UE) |
Djeeta (w/ UE) |
Makoto (w/ UE) |
Muimi |
Jun (w/ UE) |
|---|
This is the easiest clear for the October 2022 Phantom Passage. You can basically throw any units you have remaining at it as well if needed. Don't forget, you can also borrow a character. Good luck!
Tower of Luna Floors 331-350 Information:
Below you'll find information for the boss floors 331 to 350.
340th Floor
 Shadow Akino (Lvl. 150) Shadow Akino (Lvl. 150)270,113 HP |
 Seahorse Knight (Lvl. 150) Seahorse Knight (Lvl. 150)256,924 HP |
 Suicorin (Lvl. 150) Suicorin (Lvl. 150)2,000,000 HP |
 Shadow Suzuna (Lvl. 150) Shadow Suzuna (Lvl. 150)153,064 HP |
|---|
350th Floor
 Sealidon (Lvl. 151) Sealidon (Lvl. 151)314,777 HP |
Shadow Tamaki (Lvl. 151) 251,300 HP |
Shadow Rino (Lvl. 151) 222,235 HP |
Suicorin (Lvl. 151) 2,200,000 HP |
 Magic Ray (Lvl. 151) Magic Ray (Lvl. 151)116,457 HP |
|---|
For floors 331 to 350, the boss is Suicorin. The details for the boss can be found here:
| Difficulty | HP | Union Burst | Skill 1 | Skill 2 |
|---|---|---|---|---|
 Floors 331-350 Floors 331-350Lvl. Varies |
Varies | Deals large magic damage to all enemies and inflicts fear. All enemies inflicted with fear will only do 50% damage and healing during their UB. | Deals medium physical damage in the front range and increases own physical defense based on the number of hits. Creates a damaging field that does magic damage. | Deals large magic damage to the character in the front and consumes own HP (5% of maximum) to deal medium magic damage to all enemies. Increases own physical attack and magic attack. |
This boss is annoying from the get-go. The boss deals massive amounts of magic damage and hits most of your units if they're too close. A magic team is recommended here.
Tower of Luna Floors 331-350 Guide
We'll now go into detail on some of the teams that will help tackle the boss floors. Most of these teams were tested at max level at the time and should work at lower levels as well for some of the lower floors. These are of course recommendations, feel free to make changes as needed. You'll find this set of floors to be much harder and the bosses will usually require two or more teams to complete them. This is fairly normal as the content starts to ramp up in difficulty.
340th Floor
| Karyl (Summer) (w/ UE) |
Misato (w/ UE) |
Neneka |
Akari (w/ UE) |
Kokoro (6★) (w/ UE) |
|---|
This is by far the easiest single team to clear this boss floor with. Kokoro (6★) and Misato will keep your team alive while Neneka and Karyl (Summer) dishes out the damage. You can easily replace Akari (w/ UE) with another buffer or Saren (Summer)
 Kyoka (Halloween) Kyoka (Halloween) |
Karyl (Summer) (w/ UE) |
Misato (w/ UE) |
Neneka |
Kokoro (6★) (w/ UE) |
|---|
The same team as above but making use of Kyoka (Halloween). She's a very strong magic support and you might as well use her if you have her.
| Karyl (6★) (w/ UE) |
Misato (w/ UE) |
Kasumi (w/ UE) |
Yukari (w/ UE) |
 Miyako (w/ UE) Miyako (w/ UE) |
|---|
| Chika (w/ UE) |
Djeeta (w/ UE) |
 Tomo (w/ UE) Tomo (w/ UE) |
Makoto (w/ UE) |
Jun (w/ UE) |
|---|
This set of teams is if you don't have a strong magic team. You can use Karyl (6★) as your main source of damage on the first team. The second team should take care of the boss. You'll just need to be careful as the boss does a lot of magic damage that ends up hitting the majority of the field.
350th Floor
| Karyl (Summer) (w/ UE) |
Karyl (6★) (w/ UE) |
Misato (w/ UE) |
Neneka |
Kokoro (6★) (w/ UE) |
|---|
Since we're on the last floor before the Phantom Passage, we can throw most of our magic units on to clear the floor. The above team should be able to clear this entire floor within the time limit. If not, throw a team before it to soften up some of the units and the boss.
| Karyl (Summer) (w/ UE) |
Io (Summer) |
Neneka |
 Kurumi (w/ UE) Kurumi (w/ UE) |
Kuka (w/ UE) |
|---|
 Kyoka (w/ UE) Kyoka (w/ UE) |
Karyl (Summer) (w/ UE) |
Misato (w/ UE) |
Kasumi (w/ UE) |
Kokoro (6★) (w/ UE) |
|---|
This is a more spread out magic team if you're looking for a two team clear. Just be aware that you want to save some units for the Phantom Passage. We'll cover that a bit later on.
EX 350th Floor
 Shadow Matsuri (Lvl. 151) Shadow Matsuri (Lvl. 151)270,480 HP |
Shadow Yukari (Lvl. 151) 151,690 HP |
Suicorin (Lvl. 171) 2,000,000 HP |
 Shadow Kasumi (Lvl. 151) Shadow Kasumi (Lvl. 151)115,200 HP |
Luna Pod (Lvl. 151) 57,000 HP |
|---|
This EX floor has an annoying mix of units. Magic teams are just better here due to the boss.
| Difficulty | HP | Union Burst | Skill 1 | Skill 2 |
|---|---|---|---|---|
|
EX Floor 350 Lvl. 171 |
2,000,000 | Deals large magic damage to all enemies and inflicts fear. All enemies inflicted with fear will only do 50% damage and healing during their UB. | Deals medium physical damage in the front range and increases own physical defense based on the number of hits. Creates a damaging field that does magic damage. | Deals large magic damage to the character in the front and consumes own HP (5% of maximum) to deal medium magic damage to all enemies. Increases own physical attack and magic attack. |
Once again, we'll want to try to defeat all the enemies first and then work our way through the large HP pool of the boss. Magic teams are once again much better here.
Suggested Teams
| Karyl (6★) (w/ UE) |
Yui (New Year) |
Neneka |
 Rin (w/ UE) Rin (w/ UE) |
Kuka (w/ UE) |
|---|
| Kyoka (w/ UE) |
Karyl (Summer) (w/ UE) |
Misato (w/ UE) |
Akari (w/ UE) |
Kokoro (6★) (w/ UE) |
|---|
I think throwing magic teams at the EX floor is an apt description of the above teams. You basically wear down the boss and kill all the mobs and shadow units with the first team. The second team should be more than powerful enough to push through the HP bar of the boss.
| Karyl (6★) (w/ UE) |
Misato (w/ UE) |
Neneka |
Rin (w/ UE) |
Kokoro (6★) (w/ UE) |
|---|
 Yui (w/ UE) Yui (w/ UE) |
Shiori (w/ UE) |
 Aoi (Student) Aoi (Student) |
Yukari (w/ UE) |
Jun (w/ UE) |
|---|
This is probably about as good as it gets if you're lacking magic damage. The second team should stay far back enough in order to survive and take down the boss.
Tower of Luna September 2022 Phantom Passage Information:
Starting in September of 2022, you'll be able to attempt the Phantom Passage daily once you reach the top floor of Tower of Luna, not including the EX stage. For September of 2022, that would be floor 350. Phantom Passage is a set of 3 waves that is similar to previous floors or Tower of Luna. However, you cannot change teams between floors until your party either wipes or times out. Each floor gives you 1:30 as usual. It also shares the same pool of units of your regular Tower of Luna so you want to be wary of your units you sacrifice if any. Once you complete it the first time, you can use skip tickets to clear it again. Clearing the stage will give you item drops well worth your time since the stage doesn't use stamina. You can do this up to five times a day.
Wave 1
 Shadow Kuka (Lvl. 151) Shadow Kuka (Lvl. 151) |
Treant (Lvl. 151) |
 Shadow Illya (Lvl. 151) Shadow Illya (Lvl. 151) |
Magic Ray (Lvl. 151) |
|---|
Wave 2
 Shadow Lima (Lvl. 151) Shadow Lima (Lvl. 151) |
 Wild Boar (Lvl. 151) Wild Boar (Lvl. 151) |
 Shadow Hiyori (Lvl. 151) Shadow Hiyori (Lvl. 151) |
 Land Snake (Lvl. 151) Land Snake (Lvl. 151) |
 Shadow Yuki (Lvl. 151) Shadow Yuki (Lvl. 151) |
|---|
Wave 3
 Shadow Jun (Lvl. 151) Shadow Jun (Lvl. 151) |
 Shadow Kaori (Lvl. 151) Shadow Kaori (Lvl. 151) |
 Alt Bird (Lvl. 151) Alt Bird (Lvl. 151) |
 Shadow Hatsune (Lvl. 151) Shadow Hatsune (Lvl. 151) |
 Wise Wand (Lvl. 151) Wise Wand (Lvl. 151) |
|---|
As you can see, the waves are fairly straightforward. You can keep throwing units at the waves as it saves progress even after your daily reset. We'll also provide some teams to help you ease through this and get the sweet, sweet, rewards.
Suggested Teams
| Karyl (Summer) (w/ UE) |
Misato (w/ UE) |
Neneka |
Akari (w/ UE) |
Kokoro (6★) (w/ UE) |
|---|
If you saved this magic team from earlier, you can clear all three waves easily.
| Karyl (6★) (w/ UE) |
Kasumi (w/ UE) |
Neneka |
Kokoro (6★) (w/ UE) |
 Pecorine (6★) (w/ UE) Pecorine (6★) (w/ UE) |
|---|
Want to flex your 6★ prowress? Well, now you can. This team will easily make it through just between the tanking of Kokoro and the tanking of Pecorine. Combine that with Neneka and Karyl, you're making short work of this section.
If you need any additional teams, feel free to throw what you have left. Your physical teams should mostly be intact since the boss required mostly magic units.
Tower of Luna Floors 311-330 Information:
Below you'll find information for the boss floors 311 to 330.
320th Floor
 Hammer Cancer (Lvl. 147) Hammer Cancer (Lvl. 147)205,200 HP |
 Shadow Nozomi (Lvl. 147) Shadow Nozomi (Lvl. 147)226,480 HP |
 Shadow Ayumi (Lvl. 147) Shadow Ayumi (Lvl. 147)111,440 HP |
 Killer Orca (Lvl. 147) Killer Orca (Lvl. 147)2,000,000 HP |
|---|
330th Floor
| Sealidon (Lvl. 148) 211,102 HP |
Shadow Ruka (Lvl. 148) 285,090 HP |
 Jellyfish (Lvl. 148) Jellyfish (Lvl. 148)105,597 HP |
Killer Orca (Lvl. 148) 2,400,000 HP |
 Shadow Kyoka (Lvl. 148) Shadow Kyoka (Lvl. 148)120,982 HP |
|---|
For floors 311 to 330, the boss is Killer Orca. The details for the boss can be found here:
| Difficulty | HP | Union Burst | Skill 1 | Skill 2 |
|---|---|---|---|---|
 Floors 311-330 Floors 311-330Lvl. Varies |
Varies | Deals large magic damage to the first four characters and decreases their physical attack power by a moderate amount. Increases TP of all allies by a small amount. | Deals medium physical damage in the front range and reduces their TP by a large amount. | Deals medium physical damage around the second character from the back and reduces their magic attack power by a large amount. |
This boss is a little annoying to say the least. It has both a magic and physical damage reduction making it challenging to build teams for it. The good news is that with the right team, this boss is easily cleared. So much so, you can actually clear it with a single team.
Tower of Luna Floors 311-330 Guide
We'll now go into detail on some of the teams that will help tackle the boss floors. Most of these teams were tested at max level at the time and should work at lower levels as well for some of the lower floors. These are of course recommendations, feel free to make changes as needed. You'll find this set of floors to be much harder and the bosses will usually require two or more teams to complete them. This is fairly normal as the content starts to ramp up in difficulty.
320th Floor
| Kyoka (w/ UE) |
Karyl (6★) (w/ UE) |
Misato (w/ UE) |
Kasumi (w/ UE) |
Kuka (w/ UE) |
|---|
| Chika (w/ UE) |
Makoto (w/ UE) |
Muimi |
Nozomi (w/ UE) |
Jun (w/ UE) |
|---|
This is going to be a pretty standard team going forward for dealing with both floor 320 and 330. The first team should help you clear up everything up to the boss. Kuka or any tank that can taunt is essential to make sure the boss targets them instead of your other units or your backline. The second team is here to clean up the remaining HP on the boss. Chika can be replaced with another healer such as Yui or Yui (New Year). Her bird is just useful here to help take some of the boss skills when Nozomi's taunt is not up.
| Kyoka (w/ UE) |
Karyl (Summer) (w/ UE) |
Io (Summer) |
Neneka |
Kuka (w/ UE) |
|---|
| Chika (w/ UE) |
Makoto (w/ UE) |
Muimi |
Nozomi (w/ UE) |
Jun (w/ UE) |
|---|
This team is essentially the same as the above team except we're slotting in Karyl (Summer) and Neneka. If you can build this team, you're more likely to be able to try the one punch team below.
| Karyl (Summer) (w/ UE) |
Karyl (6★) (w/ UE) |
Yui (New Year) |
Neneka |
Saren (Summer) |
|---|
If you have the right combination of units and rolled for all of these important characters, you can run this one punch. It utilizes a high amount of magic damage and uses Yui (New Year) to help mitigate some of the debuffs and damage from the boss. You can also replace Saren (Summer) with Kokoro (6★) (w/ UE) if you have her prepared. This might take a few resets, so be sure to watch your team here.
330th Floor
| Kyoka (w/ UE) |
Karyl (6★) (w/ UE) |
Misato (w/ UE) |
Kasumi (w/ UE) |
 Lima (w/ UE) Lima (w/ UE) |
|---|
| Aoi (Student) |
Kokoro (6★) (w/ UE) |
Djeeta (w/ UE) |
Makoto (w/ UE) |
 Kuka (Oedo) Kuka (Oedo) |
|---|
This team is pretty similar to the one used for floor 320. The first team makes some adjustments as it uses Lima instead to deal with the pressure from Shadow Ruka and Shadow Kyoka. Our second team here is a slightly different physical team that takes advantage of Aoi (Student). You can replace her with another sniper but it's preferred to use Aoi (Student) or Suzuna (Summer). If these two teams don't kill the boss, just throw what you have left at it.
| Kyoka (w/ UE) |
Karyl (6★) (w/ UE) |
Misato (w/ UE) |
Kasumi (w/ UE) |
Lima (w/ UE) |
|---|
 Nanaka(w/ UE) Nanaka(w/ UE) |
Io (Summer) |
 Anne Anne |
Akari (w/ UE) |
Kuka (w/ UE) |
|---|
The first team here stays the same but we can use any remaining magic characters for our second team to take out the boss and Shadow Kyoka in the back. This is assuming you don't have Neneka. If you do, you can use a one punch team.
| Kyoka (w/ UE) |
Karyl (Summer) (w/ UE) |
Misato (w/ UE) |
Neneka |
Kuka (w/ UE) |
|---|
This is the first one punch team. It takes a similar approach to the floor 320 one punch.
| Karyl (Summer) (w/ UE) |
Karyl (6★) (w/ UE) |
Yui (New Year) |
Neneka |
Kokoro (6★) (w/ UE) |
|---|
This is the second one punch team. It might again take a few tries to get either of these one punch teams to work but once you get it, the boss floor is pretty easy.
EX 330th Floor
| Shadow Miyako (Lvl. 148) 239,250 HP |
 Shadow Ninon (Lvl. 148) Shadow Ninon (Lvl. 148)200,100 HP |
Killer Orca (Lvl. 168) 2,200,000 HP |
Shadow Yuki (Lvl. 148) 168,744 HP |
Luna Pod (Lvl. 148) 42,000 HP |
|---|
This EX floor has an annoying mix of units. Magic teams are just better here due to the combination of shadow units and the boss skills.
| Difficulty | HP | Union Burst | Skill 1 | Skill 2 |
|---|---|---|---|---|
|
EX Floor 330 Lvl. 168 |
2,200,000 | Deals large magic damage to the first four characters and decreases their physical attack power by a moderate amount. Increases TP of all allies by a small amount. | Deals medium physical damage in the front range and reduces their TP by a large amount. | Deals medium physical damage around the second character from the back and reduces their magic attack power by a large amount. |
Once again, we'll want to get rid of the shadow units up front and work our way to the boss and the units in the back. Magic teams are just miles ahead better than physical teams here.
Suggested Teams
| Karyl (6★) (w/ UE) |
Neneka |
Kokoro (6★) (w/ UE) |
Yukari (w/ UE) |
Kuka (w/ UE) |
|---|
| Kyoka (w/ UE) |
Nanaka(w/ UE) |
Misato (w/ UE) |
Akari (w/ UE) |
Ruka (w/ UE) |
|---|
As suggested above, it is best to run two magic teams in a row. This one is more F2P friendly if you mostly farmed and rolled only for Neneka. Remember, you can borrow a unit to use in Tower of Luna. The first team mostly focuses on survivability and having Neneka and Karyl clear out the shadow units and the Luna Pod. The second team focuses mostly on the boss. You can throw in a third team if you need to here.
 Misaki (w/ UE) Misaki (w/ UE) |
Karyl (6★) (w/ UE) |
Kokoro (6★) (w/ UE) |
Yukari (w/ UE) |
 Shizuru (w/ UE) Shizuru (w/ UE) |
|---|
| Shiori (w/ UE) |
 Mitsuki (w/ UE) Mitsuki (w/ UE) |
Rin (w/ UE) |
 Tamaki (w/ UE) Tamaki (w/ UE) |
Jun (w/ UE) |
|---|
| Kyoka (w/ UE) |
Nanaka(w/ UE) |
Misato (w/ UE) |
Akari (w/ UE) |
Ruka (w/ UE) |
|---|
Do you happen not to have a lot of the core magic units including Neneka? Well look no further than this three team monstrosity. The first team will deal with all the shadow units up front and the Luna Pod. The second team will damage the boss and deal with Shadow Yuki in the back. The final team will clear out what is left of the boss.
| Misaki (w/ UE) |
Karyl (6★) (w/ UE) |
Kokoro (6★) (w/ UE) |
Yukari (w/ UE) |
Shizuru (w/ UE) |
|---|
| Karyl (Summer) (w/ UE) |
Yui (New Year) |
Neneka |
Saren (Summer) |
Kuka (w/ UE) |
|---|
This is also a fairly straightforward two team clear. Not much to say other than the second team will only have to deal with the boss and Shadow Yuki.
| Kyoka (w/ UE) |
 Chika (Christmas) Chika (Christmas) |
Neneka |
Akari (w/ UE) |
Kokoro (6★) (w/ UE) |
|---|
It is technically possible to one punch this boss. Want to start playing around and abusing UB loops due to Chika (Christmas)? Well, this team is right for you. With this team, you can even leave it on auto. You just need to find someone with a Chika (Christmas) at rank 11 and not fully equipped (There's probably a skill level requirements too.) Are you feeling eSports yet?
Tower of Luna Floors 291-310 Information:
Below you'll find information for the boss floors 291 to 310.
300th Floor
 Crystal Golem (Lvl. 144) Crystal Golem (Lvl. 144)900,000 HP |
Shadow Nanaka (Lvl. 144) 152,280 HP |
Shadow Misaki (Lvl. 144) 133,245 HP |
 Ice Fish (Lvl. 144) Ice Fish (Lvl. 144)147,671 HP |
|---|
310th Floor
| Crystal Golem (Lvl. 145) 1,000,000 HP |
Seahorse Knight (Lvl. 145) 186,905 HP |
Shadow Kasumi (Lvl. 145) 150,400 HP |
 Shadow Chika (Lvl. 145) Shadow Chika (Lvl. 145)144,840 HP |
Wise Wand (Lvl. 145) 143,076 HP |
|---|
For floors 291 to 310, the boss is Crystal Golem. The details for the boss can be found here:
| Difficulty | HP | Union Burst | Skill 1 | Skill 2 |
|---|---|---|---|---|
 Floors 291-310 Floors 291-310Lvl. Varies |
Varies | Remove all debuffs from self and increases own physical and magical defense. Also increases physical and magical defense of all allies. | Deals medium physical damage to all enemies and stuns them. | Deals large physical damage to all enemies in the front range and increase physical and magic attack power of all allies. Recovers a medium amount of TP. |
This boss is actually quite annoying since it is beefy in both HP and stats. It also stuns your team and inhibits your progress while standing at the front. The buff to allies also makes the enemy units much more dangerous.
Tower of Luna Floors 291-310 Guide
We'll now go into detail on some of the teams that will help tackle the boss floors. Most of these teams were tested at max level at the time and should work at lower levels as well for some of the lower floors. These are of course recommendations, feel free to make changes as needed. You'll find this set of floors to be much harder and the bosses will usually require two or more teams to complete them. This is fairly normal as the content starts to ramp up in difficulty.
300th Floor
| Saren (Summer) |
Mitsuki (w/ UE) |
Rin (w/ UE) |
 Kaori (Summer) Kaori (Summer) |
Lima (w/ UE) |
|---|
| Christina |
Djeeta (w/ UE) |
 Eriko (w/ UE) Eriko (w/ UE) |
Makoto (w/ UE) |
Jun (w/ UE) |
|---|
Our first set of teams makes use of the new Summer units in Saren (Summer) and Kaori (Summer). The first team will help take care of the shadow units and deal some damage to the boss. Lima is best used here to help push the golem backwards and bring in the back-line enemies. The second team will deal with the boss. You'll find the boss quite tanky and the defense downs will help as long as the boss does not UB to cleanse debuffs.
 Yuki (w/ UE) Yuki (w/ UE) |
 Arisa (w/ UE) Arisa (w/ UE) |
Mitsuki (w/ UE) |
Rin (w/ UE) |
Lima (w/ UE) |
|---|
| Djeeta (w/ UE) |
Eriko (w/ UE) |
Makoto (w/ UE) |
Muimi |
Jun (w/ UE) |
|---|
Our second set of teams here is more appropriate for players with less strong boxes. The concept is the same but you use Arisa to deal the damage instead of Kaori (Summer). You'll find the boss itself doesn't do that much damage but the magic dealers will hurt. That's where Rin really shines.
310th Floor
| Kyoka (w/ UE) |
Karyl (Summer) (w/ UE) |
Akari (w/ UE) |
Eriko (w/ UE) |
Kuka (w/ UE) |
|---|
| Djeeta (w/ UE) |
Tomo (w/ UE) |
Makoto (w/ UE) |
Nozomi (w/ UE) |
Jun (w/ UE) |
|---|
The 310th floors requires a switch in strategy since a heavily defended Shadow Kasumi will wreck havoc on any physical team you try to build. You're going to need to burst down the boss and deal with the shadow units afterward. That's why we're tossing in a magic team with a powerful physical attack damage dealer. If you're having trouble using Eriko, you can replace her with Mitsuki or Aoi. The second team will make short work of the shadow units and mobs.
EX 310th Floor
 Shadow Kurumi (Lvl. 145) Shadow Kurumi (Lvl. 145)187,440 HP |
Crystal Golem (Lvl. 165) 900,000 HP |
Shadow Suzuna (Lvl. 145) 138,805 HP |
 Shadow Maho (Lvl. 145) Shadow Maho (Lvl. 145)153,360 HP |
Luna Pod (Lvl. 145) 42,000 HP |
|---|
This EX floor is painful. The combination of Shadow Kurumi and the Crystal Golem in the front is hard to break through. This is on top of dealing with Shadow Suzuna and Shadow Maho.
| Difficulty | HP | Union Burst | Skill 1 | Skill 2 |
|---|---|---|---|---|
|
EX Floor 310 Lvl. 165 |
900,000 | Remove all debuffs from self and increases own physical and magical defense. Also increases physical and magical defense of all allies. | Deals medium physical damage to all enemies and stuns them. | Deals large physical damage to all enemies in the front range and increase physical and magic attack power of all allies. Recovers a medium amount of TP. |
You'll definitely want to deal with the Shadow units here as soon as possible. The Luna Pod also must be killed otherwise the boss will just continue to buff itself and allies while removing all debuffs.
Suggested Teams
| Karyl (Summer) (w/ UE) |
Misaki (w/ UE) |
Kasumi (w/ UE) |
Io (Summer) |
Lima (w/ UE) |
|---|
 Aoi (w/ UE) Aoi (w/ UE) |
Christina |
 Ninon (Oedo) Ninon (Oedo) |
Eriko (w/ UE) |
Jun (w/ UE) |
|---|
This is a very specific two party composition found online. The first party deals with Shadow Kurumi, Shadow Suzuna, and the Luna Pod at the back. The second party finishes off Shadow Maho and the boss.
| Karyl (Summer) (w/ UE) |
Misaki (w/ UE) |
Kasumi (w/ UE) |
Io (Summer) |
Lima (w/ UE) |
|---|
| Christina |
Eriko (w/ UE) |
Makoto (w/ UE) |
Muimi |
Jun (w/ UE) |
|---|
| Aoi (w/ UE) |
Shiori (w/ UE) |
Arisa (w/ UE) |
Mitsuki (w/ UE) |
Rin (w/ UE) |
|---|
The thought process is similar to the parties found above. The third team is there to finish off Shadow Maho and/or the boss if they are still alive.
Tower of Luna Floors 271-290 Information:
Below you'll find information for the boss floors 271 to 290.
280th Floor
 Mine Lizard (Lvl. 141) Mine Lizard (Lvl. 141)174,173 HP |
Shadow Ruka (Lvl. 141) 265,788 HP |
 Shadow Tsumugi (Lvl. 141) Shadow Tsumugi (Lvl. 141)174,900 HP |
 Sea Drake (Lvl. 141) Sea Drake (Lvl. 141)2,000,000 HP |
|---|
290th Floor
| Hammer Cancer (Lvl. 142) 249,200 HP |
Shadow Ayane (Lvl. 142) 200,160 HP |
Shadow Illya (Lvl. 142) 181,800 HP |
Sea Drake (Lvl. 142) 2,200,000 HP |
Wise Wand (Lvl. 142) 79,476 HP |
|---|
For floors 271 to 290, the boss is Sea Drake. The details for the boss can be found here:
| Difficulty | HP | Union Burst | Skill 1 | Skill 2 |
|---|---|---|---|---|
 Floors 271-290 Floors 271-290Lvl. Varies |
Varies | Deals magic damage to all enemies. | Creates a field in front that deals constant magic damage, lowers physical attack, and magic defense. (10 Seconds) | Deals large magic damage to the second and third enemy. |
This is another one of those annoying bosses due to mechanics. You'll just want to have units that can tank the magic damage field and also have units in the 2nd and 3rd slot that are not too squishy.
Tower of Luna Floors 271-290 Guide
We'll now go into detail on some of the teams that will help tackle the boss floors. Most of these teams were tested at max level at the time and should work at lower levels as well for some of the lower floors. These are of course recommendations, feel free to make changes as needed. You'll find this set of floors to be much harder and the bosses will usually require two or more teams to complete them. This is fairly normal as the content starts to ramp up in difficulty.
280th Floor
| Kyoka (w/ UE) |
 Karyl (w/ UE) Karyl (w/ UE) |
Misato (w/ UE) |
Akari (w/ UE) |
Kuka (w/ UE) |
|---|
| Shiori (w/ UE) |
Rin (w/ UE) |
Christina |
Eriko (w/ UE) |
Jun (w/ UE) |
|---|
This will probably be the easiest set of teams used to clear this boss. You want to be able to clear out all the mobs up to the boss with the first team and do some damage to it as well. The first team badly needs Kuka and less squishy position 2 due to Shadow Tsumugi. You can consider using Kurumi (w/ UE) in the spot of Karyl if you have her. For team 2, this is basically the kill team. You can also replace Eriko with another archer at the back to avoid the field and kill the boss from distance. Just be aware the boss targets the 2nd and 3rd units with its second skill.
| Io (Summer) |
 Illya (w/ UE) Illya (w/ UE) |
Akari (w/ UE) |
 Pecorine (w/ UE) Pecorine (w/ UE) |
Kuka (Oedo) |
|---|
| Kyoka (w/ UE) |
Karyl (Summer) (w/ UE) |
Yui (New Year) |
Anne |
Nozomi (w/ UE) |
|---|
If your dream is to clear this boss with 2 magic teams, here is your chance. This team composition is pretty specific as it doesn't leave too much to work with for your floor 290 team if you are doing it without a reset. This also requires a lot of units with Unique Equipment. Not to mention harder to obtain units such as Kuka (Oedo) and Anne. On the bright side, you can put Io (Summer) to good use.
290th Floor
| Misaki (w/ UE) |
 Hatsune (w/ UE) Hatsune (w/ UE) |
Io (Summer) |
Yukari (w/ UE) |
Kuka (Oedo) |
|---|
| Rin (w/ UE) |
 Shinobu (w/ UE) Shinobu (w/ UE) |
Christina |
Eriko (w/ UE) |
Jun (w/ UE) |
|---|
This team for floor 290 basically uses what we have left in terms of magic damage dealers if you used the first set of teams for floor 280. The reason we have to use AOE magic damage is to also deal with the annoying magic mob in the back too. If you used a reset for this, you can use Karyl (w/ UE) and Kyoka (w/UE) or Karyl (Summer) (w/ UE) for the magic damage dealers in the back. Effectively, you could use the same team as floor 280 if you do. If you do not have Kuka (Oedo), you can substitute in Nozomi. The second team operates similar to most physical teams to kill the boss. At this point, you can throw whatever units you have left to clear this floor.
| Kyoka (w/ UE) |
Karyl (Summer) (w/ UE) |
Yui (New Year) |
Anne |
Kuka (w/ UE) |
|---|
| Rin (w/ UE) |
Shinobu (w/ UE) |
Christina |
Tomo (w/ UE) |
Jun (w/ UE) |
|---|
If you followed the second set of teams for floor 280, you should still have a lot of powerful mages left. If you did, you can use them again as the first team with Kuka in front. The second team is basically your typical boss killing physical team. Feel free to throw more teams in between or after if you need it.
EX 290th Floor
| Shadow Lima (Lvl. 142) 214,640 HP |
Shadow Tamaki (Lvl. 142) 139,850 HP |
Sea Drake (Lvl. 162) 1,800,000 HP |
Shadow Misaki (Lvl. 142) 120,120 HP |
Luna Pod (Lvl. 142) 42,000 HP |
|---|
The EX stage is quite a tough combo since magic damage is recommended against this boss but there is a Shadow Tamaki. The good thing is using Kuka is effective and will help you get through her before she kills your mages.
| Difficulty | HP | Union Burst | Skill 1 | Skill 2 |
|---|---|---|---|---|
|
EX Floor 290 Lvl. 162 |
1,800,000 | Deals magic damage to all enemies. | Creates a field in front that deals constant magic damage, lowers physical attack, and magic defense. (10 Seconds) | Deals large magic damage to the second and third enemy. |
You'll still want to be able to deal with the Luna Pod. Taking multiple UBs is not exactly fun even with enough magic defense and healing.
Suggested Teams
| Hatsune (w/ UE) |
Karyl (w/ UE) |
Misato (w/ UE) |
Io (Summer) |
Kuka (w/ UE) |
|---|
| Kyoka (w/ UE) |
Karyl (Summer) (w/ UE) |
Akari (w/ UE) |
Rin (w/ UE) |
Yukari (w/ UE) |
|---|
If you're lucky enough to build two magic teams, this will do the trick for the EX stage. Note: Io (Summer) will likely need to be 4-stars for this to work as she is quite squishy. (If you're in a competitive CB clan, you might want to ask if you can star her up to 4 first.) If you want an alternative, you'll need to work on a three party clear.
| Kyoka (w/ UE) |
Misato (w/ UE) |
Akari (w/ UE) |
Yukari (w/ UE) |
Kuka (w/ UE) |
|---|
| Yui (w/ UE) |
Shiori (w/ UE) |
Arisa (w/ UE) |
Rin (w/ UE) |
Lima (w/ UE) |
|---|
| Djeeta (w/ UE) |
Makoto (w/ UE) |
Nozomi (w/ UE) |
Kuka (Oedo) |
Jun (w/ UE) |
|---|
This team is probably the easiest team to build if you do not have too many mages built up. It mostly consists of easy to obtain characters and focuses and chipping away at the boss.
The general idea for this EX floor is to throw as many magic dealers as you have at it and then cleanup if you need to with a physical team. The big problem with physical teams is the field that reduces physical attack and magic defense while taking magic damage over time.
Tower of Luna Floors 251-270 Information:
Below you'll find information for the boss floors 251 to 270.
260th Floor
| Wild Boar (Lvl. 138) 161,290 HP |
Shadow Miyako (Lvl. 138) 243,000 HP |
 Shadow Djeeta (Lvl. 138) Shadow Djeeta (Lvl. 138)185,925 HP |
 Mad Clown (Lvl. 138) Mad Clown (Lvl. 138)2,000,000 HP |
|---|
270th Floor
| Sealidon (Lvl. 139) 195,994 HP |
Shadow Shizuru (Lvl. 139) 261,120 HP |
 Shadow Monika (Lvl. 139) Shadow Monika (Lvl. 139)195,840 HP |
Mad Clown (Lvl. 139) 2,200,000 HP |
 Sleepy Owl (Lvl. 139) Sleepy Owl (Lvl. 139)129,120 HP |
|---|
For floors 251 to 270, the boss is Mad Clown. The details for the boss can be found here:
| Difficulty | HP | Union Burst | Skill 1 | Skill 2 |
|---|---|---|---|---|
 Floors 251-270 Floors 251-270Lvl. Varies |
Varies | Deals large magic damage to all enemies and puts them in darkness. | Randomly deals small physical damage six times to one enemy and deals large physical damage to all enemies. (More likely to hit front row enemies) | Summons a time bomb that explodes for large physical damage to all enemies in range after 8 seconds. If the bomb drops below 1% HP before it explodes, it deals 15% of Mad Clown's HP physical damage to itself. (Does not occur when boss is below 40% HP/enraged.) |
There's a reason why clowns are scary and found in horror films. This boss ranges from very difficult to very easy. It depends on RNG from skill 1 and how quickly you can kill the bomb in skill 2.
Tower of Luna Floors 251-270 Guide
We'll now go into detail on some of the teams that will help tackle the boss floors. Most of these teams were tested at max level at the time and should work at lower levels as well for some of the lower floors. These are of course recommendations, feel free to make changes as needed. You'll find this set of floors to be much harder and the bosses will usually require two or more teams to complete them. This is fairly normal as the content starts to ramp up in difficulty.
260th Floor
| Misato |
Anne |
 Yori (w/ UE) Yori (w/ UE) |
 Anna (w/ UE) Anna (w/ UE) |
Pecorine (w/ UE) |
|---|
| Yui (New Year) |
Eriko (w/ UE) |
Makoto |
Muimi |
Jun |
|---|
This is a fairly standard combination for dealing with the boss. You want to take care of the mob and Shadow units before moving on to the boss. The first team will easily take care of Miyako with all the magic damage. If you do not have Yori (w/ UE), you can replace her with Akari (w/ UE). Yori is preferred because she does more damage and the buff from Akari is less useful here. The second party is our standard boss killing party. It should easily deal with the bombs that get summoned as well.
270th Floor
| Yui (New Year) |
Yukari (w/ UE) |
Tomo (w/ UE) |
Muimi |
Kuka (w/ UE) |
|---|
| Yui (w/ UE) |
Eriko (w/ UE) |
Djeeta (w/ UE) |
Makoto |
Jun |
|---|
The 270th floor is really a tougher floor than the 260th. The mob and the Shadow units are beefy and the owl in the back makes it harder to use a magic team. Two physical teams is recommended to help yoyu get through it. You can also throw in a third team if necessary. You really need healers here since the boss does both AOE damage and randomly targets an enemy.
EX 270th Floor
| Shadow Nozomi (Lvl. 139) 209,360 HP |
Shadow Akino (Lvl. 139) 174,600 HP |
Mad Clown (Lvl. 159) 1,800,000 HP |
Shadow Hatsune (Lvl. 139) 116,880 HP |
Luna Pod (Lvl. 139) 42,000 HP |
|---|
The EX stage here can be quite tough since the front liners are very tanky. Shadow Hatsune also provides a lot of magic damage pressure while the boss continues to deal large amounts of damage to your team.
| Difficulty | HP | Union Burst | Skill 1 | Skill 2 |
|---|---|---|---|---|
|
EX Floor 270 Lvl. 159 |
1,800,000 | Deals large magic damage to all enemies and puts them in darkness. | Randomly deals small physical damage six times to one enemy and deals large physical damage to all enemies. (More likely to hit front row enemies) | Summons a time bomb that explodes for large physical damage to all enemies in range after 8 seconds. If the bomb drops below 1% HP before it explodes, it deals 15% of Mad Clown's HP physical damage to itself. (Does not occur when boss is below 40% HP/enraged.) |
Dealing with the Luna Pod is even harder than usual due to having Shadow Nozomi up front and Shadow Hatsune in front of the Luna Pod.
Suggested Teams
| Karyl (w/ UE) |
Anne |
Akari (w/ UE) |
Anna (w/ UE) |
Lima (w/ UE) |
|---|
| Misato (w/ UE) |
Kasumi |
Rin (w/ UE) |
Illya (w/ UE) |
Kurumi (w/ UE) |
|---|
| Yui (New Year) |
Djeeta (w/ UE) |
Tamaki (w/ UE) |
Makoto |
Jun |
|---|
This one is a three team clear focusing on magic damage for the first two teams. The first team should get through Shadow Nozomi and at least 50% of the HP of Shadow Akino. The second team must be able to kill both Shadow Hatsune and the Luna Pod with the magic damage and displacement from Kurumi. The third team should clear out the boss while Tamaki will stop the boss from using their UB as often.
| Karyl (Summer) |
Karyl (w/ UE) |
Yui (New Year) |
Misato (w/ UE) |
Lima (w/ UE) |
|---|
 Shizuru (Valentine) Shizuru (Valentine) |
Djeeta (w/ UE) |
Makoto (w/ UE) |
Muimi |
Nozomi (w/ UE) |
|---|
There is also a possible two party clear. It basically brute forces through the boss as quickly as possible. With two healers and a large amount of magic damage on the first team, it should be able to clear out everything but the boss. The second team should clear out the boss with high damage and support from Shizuru (Valentine). You can also attempt this with Jun instead of Nozomi for the defense down. If you don't have Shizuru (Valentine), you can replace her with Yukari (w/ UE).
Tower of Luna Floors 231-250 Information:
Below you'll find information for the boss floors 231 to 250.
240th Floor
| Mine Lizard (Lvl. 134) 165,773 HP |
Shadow Kaori (Lvl. 134) 157,200 HP |
Shadow Akino (Lvl. 134) 206,325 HP |
 Kaz Alma (Lvl. 134) Kaz Alma (Lvl. 134)2,480,000 HP |
|---|
250th Floor
| Mine Lizard (Lvl. 136) 164,670 HP |
Shadow Ayane (Lvl. 136) 187,530 HP |
 Shadow Eriko (Lvl. 136) Shadow Eriko (Lvl. 136)171,903 HP |
Kaz Alma (Lvl. 136) 2,550,000 HP |
|---|
For floors 231 to 250, the boss is Kaz Alma. The details for the boss can be found here:
| Difficulty | HP | Union Burst | Skill 1 | Skill 2 |
|---|---|---|---|---|
 Floors 231-250 Floors 231-250Lvl. Varies |
Varies | Deals large physical damage to all enemies and reduces their physical and magical defense greatly. | Deals medium physical damage to all enemies within range of the first enemy and reduces their physical defense and stuns them. | Deals physical damage to all enemies and curses them. If they are below 40% HP, the curse damage is doubled. |
The boss is a little different from the Little Lyrical event boss as the skills deal more damage and the defense shred can get quite annoying.
Tower of Luna Floors 231-250 Guide
We'll now go into detail on some of the teams that will help tackle the boss floors. Most of these teams were tested at max level at the time and should work at lower levels as well for some of the lower floors. These are of course recommendations, feel free to make changes as needed. You'll find this set of floors to be much harder and the bosses will usually require two or more teams to complete them. This is fairly normal as the content starts to ramp up in difficulty.
240th Floor
| Kyoka |
Karyl (w/ UE) |
Misato |
Akari (w/ UE) |
Pecorine (w/ UE) |
|---|
| Yui (New Year) |
Eriko (w/ UE) |
Makoto |
Muimi |
Jun |
|---|
This is a fairly standard team for dealing with bosses. Pecorine (w/ UE) makes for a great tank here as she sustains fairly well and allows you to save your other tanks for later as well. The first team should deal with the mob and the Shadow units. The second team should clear out the boss. If you're lacking the damage to clear it with two teams, feel free to add a team in between these two here.
250th Floor
| Anna (w/ UE) |
Illya |
Yukari |
Kurumi (w/ UE) |
Miyako |
|---|
| Yui (New Year) |
Christina |
Djeeta (w/ UE) |
Makoto |
Muimi |
|---|
The above team should help you easily clear out this floor. If you don't have Kurumi (w/ UE) built up, you can replace her with Nozomi or Shizuru. If you do, you'll likely need to add a third team in between to damage the boss a bit first. You can essentially go tankless once you get to the boss. Damage is king here and Yui (New Year) will be more than enough to keep your team healthy.
EX 250th Floor
| Shadow Ruka (Lvl. 136) 234,813 HP |
Shadow Tomo (Lvl. 136) 183,540 HP |
Kaz Alma (Lvl. 156) 2,200,000 HP |
Luna Pod (Lvl. 136) 52,000 HP |
|---|
As with before the EX stage is probably easier than the standard stages with the right combination of units. The Shadow Ruka here is quite tanky, so we'll want to push through her as soon as possible.
| Difficulty | HP | Union Burst | Skill 1 | Skill 2 |
|---|---|---|---|---|
|
EX Floor 250 Lvl. 156 |
2,200,000 | Deals large physical damage to all enemies and reduces their physical and magical defense greatly. | Deals medium physical damage to all enemies within range of the first enemy and reduces their physical defense and stuns them. | Deals physical damage to all enemies and curses them. If they are below 40% HP, the curse damage is doubled. |
Dealing with the Luna Pod in the back is a little tougher due to having Shadow Ruka up front.
Suggested Teams
| Karyl (w/ UE) |
Misato (w/ UE) |
Akari (w/ UE) |
 Saren Saren |
Miyako |
|---|
| Yui (New Year) |
Djeeta (w/ UE) |
Tomo (w/ UE) |
Makoto (w/ UE) |
Lima (w/ UE) |
|---|
| Mitsuki (w/ UE) |
 Mifuyu (w/ UE) Mifuyu (w/ UE) |
Yukari (w/ UE) |
Shinobu (w/ UE) |
Jun (w/ UE) |
|---|
The above team is probably a less conventional team but a safer one. The first team will deal with the front two Shadow units. The second team will deal with the Luna Pod and deal damage to the boss. The final team will be able to clear the remainder of the boss while staying alive.
| Karyl (Summer) |
Misato (w/ UE) |
Akari (w/ UE) |
Yukari (w/ UE) |
Miyako |
|---|
| Shizuru (Valentine) |
Christina |
Makoto (w/ UE) |
Muimi |
Lima (w/ UE) |
|---|
This is an easier two team clear but requires a lot more in terms of units. You can add a third team to clear out the boss if the two teams above does not manage to do it. You can also add a team in the middle to kill the Luna Pod first as it would make the second team here much better at killing the boss.
Tower of Luna Floors 211-230 Information:
Below you'll find information for the boss floors 211 to 230.
220th Floor
| Shadow Jun (Lvl. 130) 148,590 HP |
Shadow Tamaki (Lvl. 130) 101,600 HP |
 Basilisk (Lvl. 130) Basilisk (Lvl. 130)2,380,000 HP |
Luna Pod (Lvl. 130) 50,000 HP |
|---|
230th Floor
| Shadow Miyako (Lvl. 132) 174,150 HP |
Shadow Akino (Lvl. 132) 145,125 HP |
Basilisk (Lvl. 132) 2,500,000 HP |
Luna Pod (Lvl. 132) 50,000 HP |
|---|
For floors 211 to 230, the boss is Basilisk/Chicken. The details for the boss can be found here:
| Difficulty | HP | Union Burst | Skill 1 | Skill 2 |
|---|---|---|---|---|
 Floors 211-230 Floors 211-230Lvl. Varies |
Varies | Deals large magical damage to all enemies and petrifies them. Petrified enemies take 80% maximum HP magic damage. | Deals a small amount of magic damage the front 3 enemies and petrifies them if they are poisoned. | Deals medium magic damage to all enemies in the front range and poisons them. If boss is enraged, it pushes enemies back and summons a bird. The bird does physical damage to the enemy with the highest physical attack in the front range and poisons them. When it gets below 35% HP, it will charge their TP. |
There's a lot to read through on the second skill. All you need to know is that when the boss is enraged, it summons an additional enemy. This enemy attacks and poisons your highest physical attack front liner.
Tower of Luna Floors 211-230 Guide
We'll now go into detail on some of the teams that will help tackle the boss floors. Most of these teams were tested at max level at the time and should work at lower levels as well for some of the lower floors. These are of course recommendations, feel free to make changes as needed. You'll find this set of floors to be much harder and the bosses will usually require two or more teams to complete them. This is fairly normal as the content starts to ramp up in difficulty.
220th Floor
| Kyoka |
Karyl (Summer) |
Karyl (w/ UE) |
Akari |
Kuka |
|---|
| Yui (New Year) |
Eriko (w/ UE) |
Makoto |
Muimi |
Jun |
|---|
This is probably the easiest 2 clear team for this floor. You can go without the majority of your mage team for clearing the 230th floor. The second team should be able to clear the boss without losing a single unit. If you're close to timing out or if a unit dies, feel free to throw in a team in between the first and second to make the clear smoother.
230th Floor
| Anne |
Anna (w/ UE) |
Illya |
Yukari |
Miyako |
|---|
| Yui (New Year) |
Eriko (w/ UE) |
Makoto |
Muimi |
Jun |
|---|
Pretty similar concept to the last boss floor. The unit combination isn't problematic for the most part and the first magic team will deal with the majority of the front enemies and the Luna Pod. The second team is basically your go-to kill team here. Again, if you're struggling to clear with with 2 teams, feel free to add in a filler in between.
EX 230th Floor
| Shadow Kuka (Lvl. 132) 193,500 HP |
Shadow Eriko (Lvl. 132) 141,900 HP |
Basilisk (Lvl. 132) 1,580,000 HP |
Luna Pod (Lvl. 132) 40,000 HP |
|---|
As with before the EX stage is probably easier than the standard stages with the right combination of units.
| Difficulty | HP | Union Burst | Skill 1 | Skill 2 |
|---|---|---|---|---|
|
EX Floor 230 Lvl. 132 |
1,580,000 | Deals large magical damage to all enemies and petrifies them. Petrified enemies take 80% maximum HP magic damage. | Deals a small amount of magic damage the front 3 enemies and petrifies them if they are poisoned. | Deals medium magic damage to all enemies in the front range and poisons them. If boss is enraged, it pushes enemies back and summons a bird. The bird does physical damage to the enemy with the highest physical attack in the front range and poisons them. When it gets below 35% HP, it will charge their TP. |
As usual, you'll want to deal with that Luna Pod in the back before the boss just constantly petrifies your units.
Suggested Teams
| Kyoka |
Misato |
Akari (w/ UE) |
Anna (w/ UE) |
Yukari |
|---|
 Suzuna Suzuna |
Shiori (w/ UE) |
Arisa (w/ UE) |
Mitsuki |
Rin |
|---|
| Eriko (w/ UE) |
Makoto |
Nozomi |
 Kaori Kaori |
Jun |
|---|
This is the standard 3 team clear you're used to seeing for the EX stages. Shadow Kuka and Shadow Eriko provide a lot of pressure early for you. You'll want to deal with them quickly using mages to clear them out first. The second team will deal with the Luna Pod and deal damage to the boss. The final team is on boss cleanup duty.
| Kyoka |
Karyl (Summer) |
Misato |
Akari (w/ UE) |
Yukari |
|---|
| Yui (New Year) |
Christina |
Makoto |
Muimi |
Jun |
|---|
If your units are strong enough, you can actually two party clear it. If you're lacking a bit of damage, feel free to stick in a team either between these two teams or at the end to clear out the boss.
Tower of Luna Floors 191-210 Information:
Below you'll find information for the boss floors 191 to 210.
200th Floor
 Mine Lizard (Lvl. 127) Mine Lizard (Lvl. 127)118,030 HP |
 Sand Boar (Lvl. 127) Sand Boar (Lvl. 127)130,518 HP |
Shadow Ayane (Lvl. 127) 148,800 HP |
 Dark Knight of Corruption (Lvl. 127) Dark Knight of Corruption (Lvl. 127)2,300,000 HP |
Shadow Maho (Lvl. 127) 83,700 HP |
|---|
210th Floor
| Wild Boar (Lvl. 128) 135,879 HP |
Treant (Lvl. 128) 167,425 HP |
 Shadow Misogi (Lvl. 128) Shadow Misogi (Lvl. 128)142,500 HP |
Dark Knight of Corruption (Lvl. 128) 2,470,000 HP |
 Shadow Aoi (Lvl. 128) Shadow Aoi (Lvl. 128)80,750 HP |
|---|
For floors 191 to 210, the boss is Dark Knight of Corruption. The details for the boss can be found here:
| Difficulty | HP | Union Burst | Skill 1 | Skill 2 |
|---|---|---|---|---|
 Floors Floors191-210 Lvl. Varies |
Varies | Deals large physical damage to all enemies lowers their physical defense. | Deals physical damage to the front rannge. Reduces physical attack and TP of higest 2 physical damage enemies. Greatly reduces own physical defense. | Deals medium physical damage to the front 3 enemies and increases own physical attack. |
This boss deals a lot of physical damage and makes it hard to use physical attackers due to TP drain and the physical attack reduction. We'll suggest some teams below to help you defeat this boss.
Tower of Luna Floors 191-210 Guide
We'll now go into detail on some of the teams that will help tackle the boss floors. Most of these teams were tested at max level at the time and should work at lower levels as well for some of the lower floors. These are of course recommendations, feel free to make changes as needed. You'll find this set of floors to be much harder and the bosses will usually require two or more teams to complete them. This is fairly normal as the content starts to ramp up in difficulty.
200th Floor
The two set of boss floors for this update is actually fairly easy once you run the right team composition. The boss is a bit annoying with the physical attack reduction and the TP drain but otherwise, it should be smooth sailing.
| Kyoka |
Karyl (Summer) |
Misato |
Akari |
Kuka |
|---|
 Kokkoro (Summer) Kokkoro (Summer) |
Eriko (w/ UE) |
Makoto |
Muimi |
Nozomi |
|---|
Floor 200 can be a bit of a pain if you don't have a magic team ready to go. The first team is used mostly to deal with the front 3 units including the 2 trash mobs and Shadow Ayane. This team should also deal a pretty significant amount of damage to the boss. The second team is one combination of our go-to boss killing team. We're using Nozomi here for the healing and the taunt to take some of the Maho blinds. Muimi, Makoto, and Eriko (w/ UE) should easily take out the boss. Kokkoro (Summer) provides buff and a heal for our lowest HP unit. You might need to throw a team in between the first and second team to make sure you kill the boss to save your DPS team for later.
| Kyoka |
Karyl |
Anna (w/ UE) |
Miyako |
Lima |
|---|
| Shiori |
Mitsuki |
 Kokkoro Kokkoro |
Mifuyu |
 Tsumugi Tsumugi |
|---|
| Eriko (w/ UE) |
Makoto |
Nozomi |
Kaori |
Jun |
|---|
This second team is more of a poverty team with mostly farmable characters. The first team will deal with the front 3 units as with the teams above. The second team will deal with Shadow Maho and deal damage to the boss. The last team is your boss killer and should work if you've done enough damage to the boss. If not, throw another team in between to make sure your last team lives.
210th Floor
Floor 210 is a little tougher just based on unit composition as Shadow Aoi does more damage than you would think. Not to mention, Shadow Misogi is annoying and increases the difficulty of the floor.
| Yui (New Year) |
Anna (w/ UE) |
Illya |
Yukari |
Miyako |
|---|
| Maho |
Shiori |
Arisa (w/ UE) |
Mitsuki |
Lima |
|---|
| Eriko (w/ UE) |
Makoto |
Muimi |
Nozomi |
Jun |
|---|
The thinking behind these three teams is similar to the 200th Floor. Our first team will take care of the front 3 units. This means it must be able to kill Shadow Misogi and the 2 front mobs. The second team will deal with Shadow Aoi who eventually moves up due to Lima. This team will also deal damage to the boss. Our final team is all in on damage to kill the boss with Jun and Nozomi to tank.
| Kyoka |
Yui |
Akari |
Yukari |
Shizuru |
|---|
| Yuki |
Hatsune |
Misato |
Kasumi |
Pecorine |
|---|
| Eriko (w/ UE) |
Makoto |
Nozomi |
Kaori |
Jun |
|---|
This second team is one that uses two magic teams and allows for a more diverse cast of characters. The idea is still the same with the first team clearing the first 3 units. The second team should take care of Aoi and deal damage to the boss. The third team will take care of the boss.
EX 210th Floor
| Shadow Jun (Lvl. 128) 162,500 HP |
Shadow Tomo (Lvl. 128) 150,000 HP |
Dark Knight of Corruption (Lvl. 148) 1,500,000 HP |
Shadow Chika (Lvl. 128) 106,250 HP |
Luna Pod (Lvl. 128) 35,000 HP |
|---|
This EX stage actually is easier than some of the previous ones. If you use the right team, you can pretty easily clear this EX stage.
| Difficulty | HP | Union Burst | Skill 1 | Skill 2 |
|---|---|---|---|---|
|
Special Lvl. 148 |
1,500,000 | Deals large physical damage to all enemies lowers their physical defense. | Deals physical damage to the front rannge. Reduces physical attack and TP of higest 2 physical damage enemies. Greatly reduces own physical defense. | Deals medium physical damage to the front 3 enemies and increases own physical attack. |
Don't forget about the Luna Pod in the back that gives TP to the boss. You'll want to make sure you deal with it as soon as possible.
Suggested Teams
| Misato |
Arisa (w/ UE) |
 Miyako (Halloween) Miyako (Halloween) |
Shizuru |
Miyako |
|---|
| Kyoka |
Yui (New Year) |
Akari |
Yukari |
Lima |
|---|
| Eriko (w/ UE) |
Makoto |
Muimi |
Nozomi |
Jun |
|---|
This team composition will deal with the Luna Pod first. The first team using Miyako (Halloween) will do exactly that. There is also a chance it is able to clear out Shadow Chika as well. The second magic team will burst down Jun and Tomo while the last team will clean up the boss and Shadow Chika if she is still alive.
| Kyoka |
Maho |
Yui (New Year) |
Akari |
Lima |
|---|
| Shiori |
Arisa (w/ UE) |
Rin |
Tsumugi |
Nozomi |
|---|
| Yui |
Eriko (w/ UE) |
Makoto |
Kaori |
Jun |
|---|
This team takes a more traditional approach with the first team killing Shadow Jun and Shadow Tomo with a mage focused team. The second team here will deal with Chika and the Luna Pod in the back by forcing them up front to be sniped. The last team will deal with the boss.
| Hatsune |
Karyl |
Yui (New Year) |
Kasumi |
Nozomi |
|---|
| Shizuru (Valentine) |
Eriko (w/ UE) |
Makoto |
Muimi |
Jun |
|---|
This is a two team composition we found while doing research. We haven't really tested this team but we thought it would be cool to post it. You can probably throw in a third team if you need to.
Tower of Luna Floors 171-190 Information:
Below you'll find information for the boss floors 171 to 190.
180th Floor
| Shadow Kuka (Lvl. 125) 183,000 HP |
Wild Boar (Lvl. 125) 113,768 HP |
Treant (Lvl. 125) 160,200 HP |
 Iwanozuchi (Lvl. 125) Iwanozuchi (Lvl. 125)2,380,000 HP |
Shadow Hatsune (Lvl. 125) 109,800 HP |
|---|
190th Floor
| Wild Boar (Lvl. 126) 127,408 HP |
Shadow Nozomi (Lvl. 126) 157,440 HP |
Shadow Mimi (Lvl. 126) 118,080 HP |
Iwanozuchi (Lvl. 126) 2,550,000 HP |
 Cactus Flower (Lvl. 126) Cactus Flower (Lvl. 126)80,925 HP |
|---|
For floors 171 to 190, the boss is Iwanozuchi. The details for the boss can be found here:
| Difficulty | HP | Union Burst | Skill 1 | Skill 2 |
|---|---|---|---|---|
 Floors 171-190 Floors 171-190Lvl. Varies |
Varies | Large physical damage to all enemies and lowers TP. | Medium physical damage to the front two enemies and poisons them. | Medium physical damage to the front three enemies. Front character also takes large physical damage and reduces magical and physical defense. |
As you can see, the boss here does a lot of physical damage. Your tank upfront will be taking a lot of damage pressure. This is on top of the UB which also reduces TP for your units. You'll certainly want to prepare properly for this fight.
Tower of Luna Floors 171-190 Guide
We'll now go into detail on some of the teams that will help tackle the boss floors. Most of these teams were tested at max level at the time and should work at lower levels as well for some of the lower floors. These are of course recommendations, feel free to make changes as needed. You'll find this set of floors to be much harder and the bosses will usually require two or more teams to complete them. This is fairly normal as the content starts to ramp up in difficulty.
180th Floor
Welcome to the latest set of boss floors. We're over having trash mobs as the enemy mobs are now enemy units you'll see in other quests. Shadow Kuka is really deceptive here and might make you think Magic Teams are bad but quite the opposite actually.
| Kyoka |
Yui |
Karyl (Summer) |
Akari |
Pecorine |
|---|
| Miyako (Halloween) |
Mitsuki |
Shizuru |
Tamaki |
Miyako |
|---|
| Christina |
Eriko (w/ UE) |
Makoto |
Nozomi |
Jun |
|---|
Floor 180 is actually fairly easy with the right teams. The first team will help you deal with Shadow Kuka and the two mob enemies behind them. The second team will deal with Shadow Hatsune and deal some damage to the boss. Your final team will clear out the remainder of the boss. If you don't have Eriko UE, we suggest you use another flex DPS or throw another team in before using your clearing team.
| Kyoka |
Yui |
Karyl (Summer) |
Akari |
Miyako |
|---|
| Miyako (Halloween) |
Mitsuki |
Yukari |
Tamaki |
Pecorine |
|---|
| Shizuru (Valentine) |
Christina |
 Tamaki (Summer) Tamaki (Summer) |
Makoto |
Jun |
|---|
Again, this party has a similar idea to the one above. The third team has some minor tweaks to it with the inclusion of Shizuru (Valentine) in case you geared her and have her ready. She's pretty useful in Tower of Luna and proves to be an excellent support. Tamaki (Summer) is used in our flex DPS slot to provide additional damage and to reduce the number of times the boss UBs.
190th Floor
| Yui (New Year) |
Saren |
Illya |
Yukari |
Miyako |
|---|
| Maho |
Arisa |
Kokkoro (Summer) |
Kokkoro |
Lima |
|---|
| Christina |
Eriko (w/ UE) |
Makoto |
Nozomi |
Jun |
|---|
For this team, we're still dealing with the front units first. This team revolves around Illya and will make short work of the mob upfront, Shadow Nozomi, and Shadow Mimi. Having Miyako and Yukari upfront means Mimi will not be killing your Illya right away. The second team works with Lima and the two Kokkoro units to push the mob in the back until it walks upfront to get killed by Arisa. The Boss will also take quite a few UBs from Arisa increasing your overall damage on it too. Lastly, our final team will make short work of what HP the boss may have left.
| Yui (New Year) |
Arisa |
Christina |
Shizuru |
Nozomi |
|---|
| Misato |
Kokkoro (Summer) |
 Shinobu (Halloween) Shinobu (Halloween) |
Shinobu |
Lima |
|---|
| Shizuru (Valentine) |
Tamaki (Summer) |
Makoto |
Muimi |
Jun |
|---|
This second set of teams requires a lot more investment. The idea is the same with the first team clearing out the mob, Shadow Nozomi, and Shadow Mimi. The second team will make short work of the mob in the back and start dealing damage to the boss. The final team will take care of the boss pretty easily. Not to mention, you get to use Muimi and Shizuru (Valentine) if you rolled them. Truly, the optimal box team.
EX 190th Floor
| Shadow Shizuru (Lvl. 126) 177,120 HP |
Shadow Rin (Lvl. 126) 105,165 HP |
Iwanozuchi (Lvl. 146) 1,300,000 HP |
 Shadow Yori (Lvl. 126) Shadow Yori (Lvl. 126)85,793 HP |
Luna Pod (Lvl. 126) 24,000 HP |
|---|
This EX stage may actually feel easier than the last one. The boss just has less HP and the combination of units isn't quite as annoying as the last EX floor.
| Difficulty | HP | Union Burst | Skill 1 | Skill 2 |
|---|---|---|---|---|
 Floors 190 EX Floors 190 EXLvl. 146 |
Varies | Large physical damage to all enemies and lowers TP. | Medium physical damage to the front two enemies and poisons them. | Medium physical damage to the front three enemies. Front character also takes large physical damage and reduces magical and physical defense. |
Don't forget about the Luna Pod in the back that gives TP to the boss. You'll want to make sure you deal with it as soon as possible.
Suggested Teams
| Yui |
Miyako (Halloween) |
Mitsuki |
Yukari |
Miyako |
|---|
| Kyoka |
Karyl |
Misato |
Akari |
Lima |
|---|
 Rei (w/ UE) Rei (w/ UE) |
Eriko (w/ UE) |
Makoto |
Nozomi |
Jun |
|---|
We're going to take the same approach as the previous EX floor and start from the back. We want the first team to kill the Luna Pod and the Shadow Yori. The second team will get you through Shadow Shizuru and Shadow Rin while dealing damage to the boss. Beware of the high magic defense due to Shadow Rin. The final team will make short work of the boss and help you clear out this EX stage.
| Miyako (Halloween) |
Mitsuki |
Shinobu (Halloween) |
Yukari |
Miyako |
|---|
| Arisa (w/ UE) |
Shizuru (Valentine) |
Tomo |
Tsumugi |
Lima |
|---|
| Christina |
Eriko (w/ UE) |
Makoto |
Nozomi |
Jun |
|---|
This team works off of the previous team idea and does it a bit differently. We deal with the back units using the first team still. The second team uses Tsumugi and Lima to move the enemies around which allows for Arisa and Tomo to take them out. The final team should have to only deal with the boss and potentially Shadow Rin but since you have no magic damage, the extra magic defense won't make much of a difference.
Tower of Luna Floors 151-170 Information:
Below you'll find information for the boss floors 151 to 170.
160th Floor
 Command Ukiki (Lvl. 123) Command Ukiki (Lvl. 123)125,580 HP |
Command Ukiki (Lvl. 123) 125,580 HP |
Shadow Eriko (Lvl. 123) 128,700 HP |
 Master Ukiki (Lvl. 123) Master Ukiki (Lvl. 123)2,540,000 HP |
Shadow Chika (Lvl. 123) 76,500 HP |
|---|
170th Floor
| Command Ukiki (Lvl. 124) 126,080 HP |
Command Ukiki (Lvl. 124) 126,080 HP |
Shadow Djeeta (Lvl. 124) 129,773 HP |
Master Ukiki (Lvl. 124) 2,700,000 HP |
Shadow Aoi (Lvl. 124) 94,380 HP |
|---|
For floors 151 to 170, the boss is Master Ukiki. The details for the boss can be found here:
| Difficulty | HP | Union Burst | Skill 1 | Skill 2 |
|---|---|---|---|---|
 Floors 151-170 Floors 151-170Lvl. Varies |
Varies | Large physical damage to all enemies. Does 1.8x more damage if the enemy is burned. | Medium physical damage to enemies in a medium range in front. | Medium magic damage to enemies in a small range in front. Also applies burn. |
This boss does quite a bit of damage with AOE for both the skills. You'll want to have a decent tank for this that can tank a lot of physical damage and a way to heal through it.
Tower of Luna Floors 151-170 Guide
We'll now go into detail on some of the teams that will help tackle the boss floors. Most of these teams were tested at max level at the time and should work at lower levels as well for some of the lower floors. These are of course recommendations, feel free to make changes as needed. You'll find this set of floors to be much harder and the bosses will usually require two or more teams to complete them. This is fairly normal as the content starts to ramp up in difficulty.
160th Floor
The last floors may have seemed tough but these ones are also quite hard. The boss does quite a bit of damage and it just has a lot of HP to grind through. We'll give you some team suggestions for this boss.
| Maho |
Hatsune |
Illya |
Kurumi (w/ UE) |
Miyako |
|---|
| Shiori |
Miyako (Halloween) |
Mitsuki |
Shinobu (Halloween) |
Shizuru |
|---|
| Yui (New Year) |
Christina |
Rei (w/ UE) |
Kaori |
Jun |
|---|
These three teams are pretty straightforward to use. The first team is used to kill all the mobs and the Shadow Eriko. The second team is used to deal damage to the boss and to kill Shadow Chika in the back. The third team is used to kill the boss and you can slot in any of your DPS or flex DPS to help you accomplish this.
| Misato |
Tomo |
 Akino Akino |
Makoto |
Miyako |
|---|
| Shiori |
Arisa |
Mitsuki |
Tamaki |
Kuka |
|---|
| Yui (New Year) |
Christina |
Rei |
Kaori |
Jun |
|---|
This second set of teams is similar to the top one. This one is just easier to build for the most part. You still want to clear Shadow Eriko + the mobs with the first team. The second team should kill Chika and deal enough damage to the boss. Your third team should clear the boss. If it doesn't feel free to use whatever units first so you can bring the last team forward.
170th Floor
| Kyoka |
Karyl |
Akari |
Miyako |
Lima |
|---|
| Yui |
Karyl (Summer) |
Arisa |
Kokkoro (Summer) |
Yukari |
|---|
| Yui (New Year) |
Christina |
Tamaki (Summer) |
Kaori |
Jun |
|---|
The goal of this team is similar to the boss fight on floor 160. The first team must clear the two mobs and Shadow Djeeta. Having two tanks upfront and 3 magic units in the back is the best way to achieve this. The second team will deal with Shadow Aoi and deal a decent amount of damage to the boss. Using Yukari and Kokkoro (Summer) will help push Aoi up to get killed by Arisa. The last boss will be cleared by your main damage party. Feel free to add a fourth team if needed to help clear the boss.
| Kyoka |
Karyl |
Akari |
Shizuru |
Nozomi |
|---|
| Miyako (Halloween) |
Mitsuki |
Saren |
 Mimi Mimi |
Pecorine |
|---|
| Yui (New Year) |
Christina |
Rei |
Kaori |
Jun |
|---|
Same plan as the last party found above. The first magic team with two front-liners will help deal with the mobs and Shadow Djeeta. The second team will help take care of Shadow Aoi in the back. The final party will clear the boss. With this, you should have access to the EX stage for floor 170.
EX 170th Floor
| Shadow Jun (Lvl. 124) 125,840 HP |
Shadow Tamaki (Lvl. 124) 99,825 HP |
Command Ukiki (Lvl. 144) 1,500,000 HP |
Shadow Maho (Lvl. 124) 65,340 HP |
Luna Pod (Lvl. 124) 30,000 HP |
|---|
The EX stage here can be quite annoying. For once, you'll want to start from the back and work to the front. The combination of Shadow Maho and Shadow Jun makes it difficult to work from the front.
| Difficulty | HP | Union Burst | Skill 1 | Skill 2 |
|---|---|---|---|---|
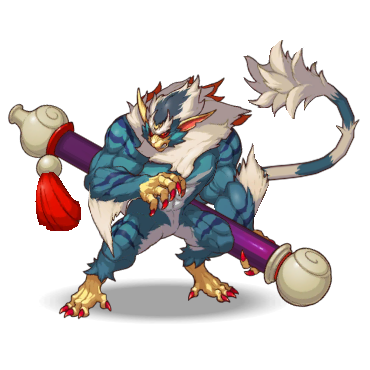 EX Floor 170 EX Floor 170Lvl. 144 |
Varies | Large physical damage to all enemies and lowers physical attack of physical damage units. Does 1.8x more damage if the enemy is burned. | Medium physical damage to enemies in a medium range in front. | Medium magic damage to enemies in a small range in front. Also applies burn. |
Don't forget about the Luna Pod in the back that gives TP to the boss. You'll want to make sure you deal with it as soon as possible.
Suggested Teams
| Maho |
Miyako (Halloween) |
Shinobu (Halloween) |
Yukari |
Shizuru |
|---|
| Kokkoro (Summer) |
Christina |
Makoto |
Nozomi |
Lima |
|---|
| Kyoka |
Karyl (Summer) |
Karyl |
Misato |
Akari |
|---|
As suggested above, we're going to work from the back first. The Luna Pod and Shadow Maho make this tough to do without dealing with the back units first and the boss will do too much damage when it constantly UBs. The first party will help us deal with Shadow Maho and the Luna Pod. The second party will deal with Shadow Jun and Shadow Tamaki and deal substantial damage to the boss. The final party will be able to easily kill the boss with a full magic team since Shadow Tamaki is no longer a danger.
You can make some changes to the team above but the thing to remember is the first team must be able to take out both Shadow Maho and the Luna Pod. The second team will deal with Shadow Jun and Shadow Tamaki. The final team should be a magic team since the boss UB now lowers the physical attack of physical damage enemies.
Tower of Luna Floors 131-150 Information:
Below you'll find information for the boss floors 131 to 150.
140th Floor
 Little Eye (Lvl. 120) Little Eye (Lvl. 120)109,080 HP |
Little Eye (Lvl. 120) 109,080 HP |
Shadow Ninon (Lvl. 120) 112,320 HP |
 Lord Ibiliy (Lvl. 120) Lord Ibiliy (Lvl. 120)2,450,000 HP |
 Shadow Suzume (Lvl. 120) Shadow Suzume (Lvl. 120)79,560 HP |
|---|
150th Floor
| Little Eye (Lvl. 122) 110,080 HP |
Little Eye (Lvl. 122) 110,080 HP |
Shadow Kurumi (Lvl. 122) 114,240 HP |
Lord Ibiliy (Lvl. 122) 2,500,000 HP |
Shadow Nanaka (Lvl. 122) 88,358 HP |
|---|
For floors 131 to 150, the boss is Lord Ibiliy. The details for the boss can be found here:
| Difficulty | HP | Union Burst | Skill 1 | Skill 2 |
|---|---|---|---|---|
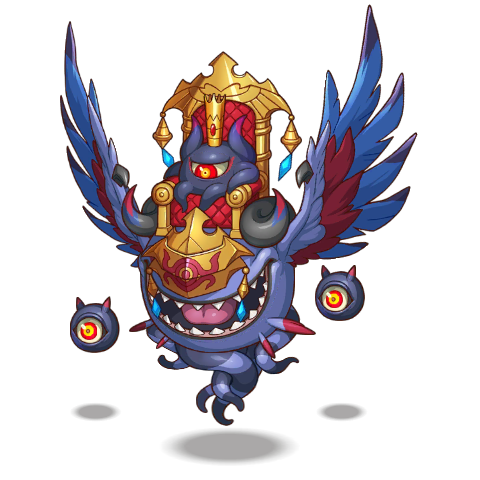 Floors 131-150 Floors 131-150Lvl. Varies |
Varies | Large magic damage to all enemies and lowers their magic defense. | Randomly deals magic damage to one enemy. Happens 6 times. | Inflicts magic damage and restrains the enemy third from the back. Also deals a small amount of magic damage to all enemies. |
This boss is quite annoying as it deals mostly magical damage and also has a restrain skill. You'll want to be careful about how you approach this boss.
Tower of Luna Floors 131-150 Guide
We'll now go into detail on some of the teams that will help tackle the boss floors. Most of these teams were tested at max level at the time and should work at lower levels as well for some of the lower floors. These are of course recommendations, feel free to make changes as needed. You'll find this set of floors to be much harder and the bosses will usually require two or more teams to complete them. This is fairly normal as the content starts to ramp up in difficulty.
140th Floor
If you thought the previous floors were hard, just wait until you see the latest boss floors. At first glance, this doesn't seem too difficult... Then you look at the enemy composition and more importantly the boss HP. It is quite the HP sponge, so even on JP, it required about 4 teams to clear. We'll just list the team below and go over potential changes and the strategy with the team.
| Yui |
Shiori |
Kokkoro |
Mifuyu |
Pecorine |
|---|
| Miyako (Halloween) |
Mitsuki |
Rin |
 Monika Monika |
Mimi |
|---|
| Rei |
Tamaki |
 Hiyori Hiyori |
Akino |
Kuka |
|---|
| Tomo |
Makoto |
Nozomi |
Kaori |
Jun |
|---|
This team is about as close as a F2P or easy to obtain character team you can make. The first team focuses on clearing as much of the mobs as possible and attempts to get to Ninon or even clears Ninon. The second team deals with Suzume in the back and does some small damage to the boss. The last 2 teams are purely DPS teams to take out the huge health pool that the boss has. Another alternative team can be found below. The idea is still the same.
| Kyoka |
Karyl |
Misato |
Akari |
Pecorine |
|---|
| Chika |
Saren |
Mimi |
Tamaki |
Miyako |
|---|
| Shiori |
Suzuna |
Yukari |
Makoto |
Kuka |
|---|
| Tomo |
Makoto |
Nozomi |
Kaori |
Jun |
|---|
This second team is a little less F2P friendly but gets the job done. You might need to manual or do some tests here but the idea is still the same. The first team should clear up to Ninon. The second team has to finish off Suzume. The final 2 teams are there to do damage to the boss.
150th Floor
| Kyoka |
Karyl |
Misato |
Akari |
Shizuru |
|---|
| Arisa |
Rin |
Kurumi |
Tsumugi |
Miyako |
|---|
| Christina |
Hiyori |
Nozomi |
Kaori |
Jun |
|---|
| Kokkoro (Summer) |
Tomo |
Akino |
Makoto |
Kuka |
|---|
The 150th floor is very similar in concept to the 140th floor. The first team should clear up to Kurumi. The second team is there to clear out Nanaka in the back. The final 2 teams are there to clear up the boss. On the bright side, you can throw just about everything and the kitchen sink at this boss as this is the last floor for this update.
EX 150th Floor
| Shadow Kuka (Lvl. 122) 76,755 HP |
Shadow Matsuri (Lvl. 122) 71,400 HP |
Lord Ibiliy (Lvl. 142) 920,000 HP |
 Shadow Akari (Lvl. 122) Shadow Akari (Lvl. 122)53,550 HP |
Luna Pod (Lvl. 122) 29,000 HP |
|---|
This EX stage can prove to be quite a challenge as the boss deals a lot of damage and the combination of Shadow units has a lot of disruption. Matsuri jumping into your team can displace your units and trying to use a magic team against Kuka is just a bad time.
| Difficulty | HP | Union Burst | Skill 1 | Skill 2 |
|---|---|---|---|---|
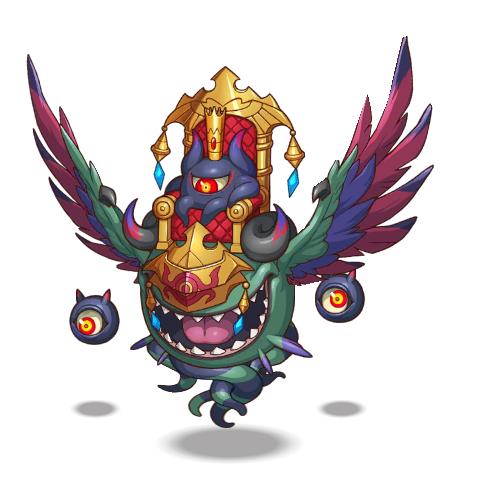 EX Floor 150 EX Floor 150Lvl. 142 |
920,000 | Large magic damage to all enemies and lowers their magic defense. | Randomly deals magic damage to one enemy. Happens 6 times. | Inflicts magic damage and restrains the enemy third from the back. Also deals a small amount of magic damage to all enemies. |
Don't forget about the Luna Pod in the back that gives TP to the boss. You'll want to make sure you deal with it as soon as possible.
Suggested Teams
| Misato |
Suzuna |
Kokkoro (Summer) |
Shizuru |
Kuka |
|---|
| Arisa |
Miyako (Halloween) |
Mitsuki |
Rin |
Yukari |
|---|
| Tamaki (Summer) |
Makoto |
Nozomi |
Kaori |
Jun |
|---|
The reasoning behind the EX team is pretty similar to the regular floor 150. The big difference is that the boss no longer has as much HP which makes this stage doable. The first team must be able to survive and take out Kuka and Matsuri. The second team is there to take out Akari and the Luna Pod in the back. Finally, our last team is used to clear out the boss.
| Kyoka |
Karyl (Summer) |
Karyl |
Akari |
Yukari |
|---|
| Suzuna |
Miyako (Halloween) |
Mitsuki |
Tamaki |
Kuka |
|---|
| Kokkoro (Summer) |
Christina |
Tamaki (Summer) |
Makoto |
Jun |
|---|
An alternative team would look as follows. You can actually still use a magic team against Kuka. It's a little counterintuitive but with enough damage, you can get through. Matsuri is much easier to clear out with this magic team. The second team deals with Akari and the Luna Pod. The final team should do just enough damage to take out the boss.
Tower of Luna Floors 111-130 Information:
Below you'll find information for the boss floors 111 to 130.
120th Floor
| Mine Lizard (Lvl. 116) 81,098 HP |
Mine Lizard (Lvl. 116) 81,098 HP |
Shadow Misogi (Lvl. 116) 88,140 HP |
 High Garoog (Lvl. 116) High Garoog (Lvl. 116)755,000 HP |
Shadow Rino (Lvl. 116) 67,094 HP |
|---|
130th Floor
| Mine Lizard (Lvl. 118) 84,280 HP |
Mine Lizard (Lvl. 118) 84,280 HP |
Shadow Tamaki (Lvl. 118) 85,100 HP |
High Garoog (Lvl. 118) 773,000 HP |
Shadow Maho (Lvl. 118) 81,765 HP |
|---|
For floors 111 to 130, the boss is High Garoog. The details for the boss can be found here:
| Difficulty | HP | Union Burst | Skill 1 | Skill 2 |
|---|---|---|---|---|
 Floors 111-130 Floors 111-130Lvl. Varies |
Varies | Large physical damage to all enemies and restores HP. | Deals physical damage to enemies in the back and stuns them. It also reduces physical defense of all enemies. | Deals physical damage to enemies in the front range and poisons them. |
This boss is a souped-up version of the one found in earlier stages in the Main Quest used as a more powerful boss. This boss does a lot of physical damage and heals itself when it uses its UB. There is also a stun attack that targets your units in the back. The final skill does more physical damage to your front units and also poisons them. If you're not careful, it is pretty easy to wipe against this boss.
Tower of Luna Floors 111-130 Guide
We'll now go into detail on some of the teams that will help tackle the boss floors. Most of these teams were tested at max level at the time and should work at lower levels as well for some of the lower floors. These are of course recommendations, feel free to make changes as needed. You'll find this set of floors to be much harder and the bosses will usually require two or more teams to complete them. This is fairly normal as the content starts to ramp up in difficulty.
120th Floor
| Shiori |
Suzuna |
Kokkoro |
Shizuru |
Miyako |
|---|
This is probably going to the first boss floor that requires 3 teams or so to complete outside of EX floors. You may be able to do it in two teams but you'll certainly need to test. Our gear is slightly ahead and the same as our character levels so maybe it is possible to use fewer teams.
Anyway, our first team involves using Miyako and Shizuru for survival from the damage that Shadow Misogi and Shadow Rino do to our team. Having two archers in the back to deal damage without taking damage from the enemies is essential. Kokkoro is here to help boost our damage output by giving attack speed and also having survivability from her own heal.
| Kyoka |
Karyl (Summer) |
Hatsune |
Karyl |
Misato |
|---|
Our second team here is a magic team to help clear up to the boss and to also help deal with Shadow Rino in the back. Since everyone is so far back, it should actually push Rino out to the front and should help you make short work of her. Alternatively, you can actually use a team that comprises of Mitsuki, Arisa, and Maho to deal with Rino. You can also add in Hatsune to make that team more consistent. The important part is having your units far back enough so that Rino moves forward.
| Kokkoro (Summer) |
Tomo |
Makoto |
Nozomi |
Jun |
|---|
Our last team here is a fairly standard kill team. You should only have to deal with the boss now. Between having the damage from Makoto and Tomo, you should be more than good to go to take care of the boss. You can easily any other flex DPS here you have left for Tomo. This includes Christina, Hiyori, and Kaori.
130th Floor
| Arisa |
Christina |
Kokkoro |
Shizuru |
Miyako |
|---|
If you thought floor 120 was annoying, floor 130 is probably even worse. The combination of Shadow Tamaki and Shadow Maho restricts what units you can really use until you make sure both of them are dealt with. This first team is used to deal with all the units up to and including Shadow Tamaki. Having Christina and Arisa should be more than enough damage for your team. The good thing is Shadow Tamaki and Shadow Maho will not really be affecting this team too much.
| Yui |
Miyako (Halloween) |
Mitsuki |
Yukari |
Pecorine |
|---|
This second team is here to deal with Maho in the back so your main/third team can deal enough damage to clear out the boss. We're using the combination of Mitsuki and Miyako (Halloween) here. You have quite a few options for replacements on this team. You can easily replace Yukari with Tamaki to be a bit more offensive and replace Yui with Maho for a better single target heal.
You can also use a team that involves Tsumugi in your teams to move enemies around making it easier to clear out back units. The important part is that your first two teams must take care of the mobs and Shadow Tamaki and Shadow Maho.
| Kokkoro (Summer) |
Tomo |
Makoto |
Nozomi |
Jun |
|---|
Now we bring back our main damage team to take out the trash. Again, you can easily slot in Hiyori or Kaori into the flex DPS slot. If you want even more damage, you can replace Kokkoro (Summer) with Tamaki (Summer).
Congrats! That should get you to complete the main floors for this Tower of Luna update. All that's left is the EX version of floor 130.
EX 130th Floor
| Shadow Nozomi (Lvl. 118) 87,400 HP |
Shadow Tomo (Lvl. 118) 75,900 HP |
High Garoog (Lvl. 138) 773,000 HP |
Shadow Hatsune (Lvl. 118) 51,750 HP |
Luna Pod (Lvl. 118) 3,300 HP |
|---|
This EX stage can prove to be quite a challenge as the boss deals a lot of damage and the combination of Shadow units makes it a lot harder to brute force through this one.
| Difficulty | HP | Union Burst | Skill 1 | Skill 2 |
|---|---|---|---|---|
 EX Floors 130 EX Floors 130Lvl. 138 |
773,000 | Large physical damage to all enemies and restores HP. | Deals physical damage to enemies in the back and stuns them. It also reduces physical defense of all enemies. | Deals physical damage to enemies in the front range and poisons them. |
Just a reminder that the Luna Pod in the back constantly gives TP to the boss so you want to make sure it gets cleared as soon as possible. This is especially bad since the boss restores HP on using its UB.
Suggested Teams
| Kyoka |
Karyl |
Misato |
Akari |
Shizuru |
|---|
| Mitsuki |
Yukari |
Mimi |
Tamaki |
Kuka |
|---|
| Christina |
Tomo |
Makoto |
Nozomi |
Jun |
|---|
The team above is probably the easiest to build. It involves using a magic team to deal with Shadow Nozomi, Shadow Tomo, and the Luna Pod in the back. The second team is there to deal with Shadow Hatsune. The final team is used to clear out the boss. You will want to put in as much damage as you can into this team as the boss is tankier than the non-EX version.
You can easily make replacements in this team. You can sub in Karyl (Summer) or Hatsune into the first team easily instead of using Karyl or Kyoka. Maho can sub in for Yukari. If you have Shinobu (Halloween), you can use her for the second team to help deal with Hatsune. The same can also be said for Miyako (Halloween). Finally, for the last team, you can bring in any flex DPS to replace Tomo or Christina. This includes using Hiyori or Kaori.
Tower of Luna Floors 71-110 Information:
Below you'll find information for the boss floors 70 to 110.
80th Floor
 Crazy Doggy (Lvl. 102) Crazy Doggy (Lvl. 102)59,378 HP |
Crazy Doggy (Lvl. 102) 59,378 HP |
Shadow Kurumi (Lvl. 102) 78,489 HP |
 Electro Gigas (Lvl. 102) Electro Gigas (Lvl. 102)520,800 HP |
Shadow Kyoka (Lvl. 102) 53,538 HP |
|---|
90th Floor
| Crazy Doggy (Lvl. 105) 67,453 HP |
Crazy Doggy (Lvl. 105) 67,453 HP |
Shadow Illya (Lvl. 105) 69,825 HP |
Electro Gigas (Lvl. 105) 581,250 HP |
Shadow Yuki (Lvl. 105) 66,334 HP |
|---|
100th Floor
| Crazy Doggy (Lvl. 111) 69,828 HP |
Crazy Doggy (Lvl. 111) 69,828 HP |
Shadow Ayane (Lvl. 111) 86,184 HP |
 Shadow Mifuyu (Lvl. 111) Shadow Mifuyu (Lvl. 111)86,184 HP |
Electro Gigas (Lvl. 111) 595,200 HP |
|---|
110th Floor
| Crazy Doggy (Lvl. 114) 70,778 HP |
Crazy Doggy (Lvl. 114) 70,778 HP |
Shadow Tomo (Lvl. 114) 79,088 HP |
Electro Gigas (Lvl. 114) 622,250 HP |
 Shadow Io (Lvl. 114) Shadow Io (Lvl. 114)56,021 HP |
|---|
For floors 71 to 110, the boss is Electro Gigas. The details for the boss can be found here:
| Difficulty | HP | Union Burst | Skill 1 | Skill 2 |
|---|---|---|---|---|
 Floors 71-110 Floors 71-110Lvl. Varies |
Varies | Large physical damage and paralysis to all enemies in the front range. Cancels own status-up effects and reduces own magic and physical defense. | Large magic damage to all enemies and increases own physical attack. | Increases own team action/attack speed. |
Tower of Luna Floors 71-110 Guide
We'll now go into detail on some of the teams that will help tackle the boss floors. Most of these teams were tested at max level at the time and should work at lower levels as well for some of the lower floors. These are of course recommendations, feel free to make changes as needed. You'll find this set of floors to be much harder and the bosses will usually require two teams to complete them. This is fairly normal as the content starts to ramp up in difficulty.
80th Floor
| Tomo |
Makoto |
Nozomi |
Jun |
Miyako |
|---|
This combination of shadow units and the boss is tough. It is technically possible to do it in a single hit with the above team but you're better off going for a two-party clear. You'll be seeing this combination of units a lot, this is the best team to clear the boss with. You can try replacing Tomo with Tamaki (Summer) or other flex DPS characters. She just needs to sit behind Nozomi since the boss hits the front three units. To do so see the team below:
| Saren |
Illya |
Shizuru |
Pecorine |
Kuka |
|---|
This is the majority of units you likely won't need to use again. Kuka is here to mostly tank the hit from Kyoka and the boss. Illya is used to clear up to Kurumi. Once she's gone, the stage gets much easier and you can use the team above to cleanup the boss and Kyoka.
90th Floor
| Kyoka |
Yui |
Karyl (Summer) |
Yukari |
Kuka |
|---|
Having to deal with Shadow Illya here means you'll need a team that can stand at the back and not get hit by Illya. Kuka + Yukari will keep your units alive and provide a good defense against both Yuki and Illya. You will then need a second team to clear the boss once Illya is defeated. You can sub in Shizuru or Kokkoro (Summer) for Yukari. If you have a higher level Akari, you can also replace Yui with Akari for additional damage.
You can also make use of archers instead of the mage team above but that is best saved for the later levels. Suzuna, Arisa, and Shizuru can slot in for the mages above.
| Tomo |
Makoto |
Nozomi |
Jun |
Miyako |
|---|
We'll continue to use this team against the boss as it is the safest team due to the use of 3 tanks which ensures they won't die to the boss as it hits hard and fast due to its skills.
100th Floor
| Shiori |
Suzuna |
Arisa |
Kokkoro |
Shizuru |
|---|
If you didn't use your archers for the boss on floor 90, now is the time for them to shine. Combine it with Shizuru to tank up front and Kokkoro to increase action speed. The combination of Shadow Ayane and Mifuyu is quite annoying and requires your use of ranged units to better deal damage to them. If you used your archers above, you can use a mage team here instead. You can also mix and match the mages and archers.
| Kyoka |
Maho |
Karyl (Summer) |
Akari |
Shizuru |
|---|
Once you've cleared up to Mifuyu, you can take out the regular team to clear out the boss stage.
| Tomo |
Makoto |
Nozomi |
Jun |
Miyako |
|---|
Well, we're almost there. Just one more boss floor before the EX floor.
110th Floor
| Kyoka |
Karyl (Summer) |
Akari |
Kokkoro (Summer) |
Kuka |
|---|
We're finally on the last boss floor. This floor really require some advance planning as the shadow unit combination is pretty deadly. Shadow Io and Tomo makes it difficult to plan a party as Io's charm can really wreck physical teams. Tomo also does a lot of damage and can soak up quite a bit of damage before you get to the boss. Thankfully, we can use the first team to at least clear up to Tomo. This team is actually quite flexible and can have various combinations.
You can replace Kokkoro (Summer) with Shizuru or Yukari if they are still available. If you need additional healing, you can replace one of the back mages with Yui.
| Tomo |
Makoto |
Nozomi |
Jun |
Miyako |
|---|
Once you clear up to the boss, this should be fairly simple. We can just throw the regular boss clearing team at it. Again, you can replace Tomo with any flex DPS unit. Tamaki (Summer) works really well in Tomo's spot if you don't have Tomo.
With that, we're done the regular Tower of Luna floors up to 110. We just have the EX 110 floor to go.
EX 110th Floor
| Shadow Lima (Lvl. 114) 88,800 HP |
 Shadow Anna (Lvl. 114) Shadow Anna (Lvl. 114)102,398 HP |
Electro Gigas (Lvl. 134) 680,000 HP |
Shadow Chika (Lvl. 114) 41,514 HP |
Luna Pod (Lvl. 114) 28,000 HP |
|---|
Another tough EX stage. If you're not careful, you'll have a pretty bad time. It might not look like Shadow Lima has a lot of HP but her defensive stats are very high. Recall that the Luna Pod at the back provides the boss with TP. He'll be using his UB a lot more often when it is still around.
| Difficulty | HP | Union Burst | Skill 1 | Skill 2 |
|---|---|---|---|---|
 EX Floor 110 EX Floor 110Lvl. 134 |
680,000 | Large physical damage and paralysis to all enemies in the front range. Cancels own status-up effects and reduces own magic and physical defense. | Large magic damage to all enemies and increases own physical attack. | Increases own team action/attack speed. |
The EX boss is much tougher and hits a lot harder. Beware as the boss will be using their UB more often due to the Luna Pod in the back.
Suggested Teams
 Io Io |
Djeeta |
Tsumugi |
Nozomi |
Kuka |
|---|
| Yui |
Miyako (Halloween) |
Mitsuki |
Yukari |
Shizuru |
|---|
| Tamaki |
Makoto |
Pecorine |
Jun |
Miyako |
|---|
The above party is very specialized and used to deal with specific threats on the EX floor. The first party mostly takes care of Lima and Anna. You can replace Djeeta with a caster too such as Kyoka or Karyl (Summer). Tsumugi is great here as she can help displace Lima and make it easier to reach Anna. The second party is used to kill the Luna Pod in the back and to finish off the other shadow units. Finally, our third boss will clear out the boss and help take care of Shadow Chika if she is still alive.
| Kyoka |
Karyl (Summer) |
Akari |
Shizuru |
Kuka |
|---|
| Suzuna |
Miyako (Halloween) |
Mitsuki |
Yukari |
Pecorine |
|---|
| Tomo |
Makoto |
Nozomi |
Jun |
Miyako |
|---|
This second team is probably easier to build. Most of these units already see use and we get to use the trusty old boss killing party. You should be pretty familiar with the third party. The concept is similar as you want to deal with Lima and Anna as soon as possible. Running a magic team helps reduce the damage taken from Anna when she is low on HP. The second team is there to deal with the back support units. The final team is going to deal with the boss. It has certainly done that before!
Tower of Luna Floors 1-70 Information:
Below you'll find information for the boss floors 10 to 70.
10th Floor
 Ikt Galadion (Lvl. 65) Ikt Galadion (Lvl. 65)144,200 HP |
|---|
20th Floor
 Ruin Doll (Lvl. 75) Ruin Doll (Lvl. 75)35,170 HP |
Ruin Doll (Lvl. 75) 35,170 HP |
Ikt Galadion (Lvl. 75) 185,400 HP |
|---|
30th Floor
| Ruin Doll (Lvl. 80) 50,920 HP |
Ruin Doll (Lvl. 80) 50,920 HP |
Shadow Akino (Lvl. 80) 91,464 HP |
Ikt Galadion (Lvl. 80) 247,200 HP |
|---|
40th Floor
| Ruin Doll (Lvl. 85) 64,301 HP |
Ruin Doll (Lvl. 85) 64,301 HP |
Shadow Ayane (Lvl. 85) 87,200 HP |
Ikt Galadion (Lvl. 85) 332,690 HP |
|---|
50th Floor
| Ruin Doll (Lvl. 90) 69,817 HP |
Ruin Doll (Lvl. 90) 69,817 HP |
Shadow Shizuru (Lvl. 90) 97,108 HP |
Ikt Galadion (Lvl. 90) 449,132 HP |
Shadow Aoi (Lvl. 90) 20,160 HP |
|---|
60th Floor
| Ruin Doll (Lvl. 95) 73,313 HP |
Ruin Doll (Lvl. 95) 73,313 HP |
Shadow Monika (Lvl. 95) 86,211 HP |
Ikt Galadion (Lvl. 95) 567,440 HP |
 Shadow Shiori (Lvl. 95) Shadow Shiori (Lvl. 95)38,624 HP |
|---|
70th Floor
| Ruin Doll (Lvl. 100) 76,067 HP |
Ruin Doll (Lvl. 100) 76,067 HP |
 Shadow Rei (Lvl. 100) Shadow Rei (Lvl. 100)70,265 HP |
Ikt Galadion (Lvl. 100) 604,200 HP |
Shadow Rino (Lvl. 100) 28,006 HP |
|---|
As you can see from the above, the boss for this set of boss is the Ikt Galadion. The details for the boss can be found here:
| Difficulty | HP | Union Burst | Skill 1 | Skill 2 |
|---|---|---|---|---|
 Floors 10-70 Floors 10-70Lvl. Varies |
Varies | Very large magic damage to all enemies and reduces magic defense. | Large physical damage to enemies in the front range. | Large magic damage to enemies in the front range and paralyzes them. |
Tower of Luna Floors 1-70 Guide
In this section, we'll list some team compositions for the various boss floors. These teams can also be used for the climb-up. Most of these teams were tested at max level at the time and should work at lower levels as well for some of the lower floors. These are of course recommendations, feel free to make changes as needed.
10th Floor to 40th Floors
| Kokkoro (Summer) |
Makoto |
Nozomi |
Kaori |
Jun |
|---|
This team composition should get you through the bosses on floors 10 to 40. The combination of Jun and Nozomi should take care of most damage from the boss and the shadow units. Kaori and Makoto are the main sources of damage on your team and Kokkoro (Summer) is there to provide support and heals to the rest of the team.
50th Floor
| Yukari |
Tomo |
Makoto |
Nozomi |
Jun |
|---|
This is where the boss starts getting tough. Just on stats alone, the boss is approaching the VH dungeon levels of HP. In addition, the support skills from Shizuru also severely hampers the damage you're able to deal with. Aoi in the backline can also do quite a bit of damage which necessitates the use of two tanks to survive. It is possible to make some adjustments to the above team but Tomo and Makoto make a great pair of attackers.
| Kokkoro (Summer) |
Makoto |
Kaori |
Jun |
Miyako |
|---|
An alternative team composition can include the usage of Miyako as the second tank. Kaori and Makoto are in a fairly safe spot and Kokkoro (Summer) can provide the heal necessary to survive.
60th Floor
| Mitsuki |
Kokkoro (Summer) |
Tomo |
Nozomi |
Jun |
|---|
| Yukari |
Makoto |
Kaori |
Jun |
Miyako |
|---|
This is probably the first floor where the boss can't be beaten on a single hit. This requires a two-team strategy as the combination of shadow units is quite annoying. They have a Monika shadow which increases their attack speed while also stunning your front unit. Shiori in the back does a significant amount of damage and her UB increases her physical attack as well. This two-team composition should help you take out the boss and break the floor 60 wall. It seems weird to borrow a Jun but trust us, this is one of the best units to borrow on the higher floors.
| Maho |
Shiori |
Suzuna |
Monika |
Pecorine |
|---|
| Yukari |
Akino |
Makoto |
Kaori |
Jun |
|---|
The above team is an alternative to the first team. Unfortunately, you'll still need Makoto and Kaori. The second team takes advantage of archers and is able to shoot from the back. Monika is there for the stun and the speed up to match the Monika shadow.
70th Floor
| Yui |
Tomo |
Makoto |
Nozomi |
Jun |
|---|
| Kokkoro (Summer) |
Yukari |
Mimi |
Kaori |
Jun |
|---|
The boss may have more HP than on floor 60 but the enemy composition is actually a little easier to deal with. You just have to make sure you can deal with Rino and not die from her UB. Shadow Rei actually moves up quite a bit so if you can take her down after using the first party, the second part should be fairly simple.
| Misato |
Shiori |
Suzuna |
Monika |
Miyako |
|---|
| Yui |
Yukari |
Makoto |
Kaori |
Jun |
|---|
This is an alternative set of parties that can be used. The first part takes advantage of the fact that your first party is likely to take a lot of damage. You can use archers first to chip away at the enemies and hopefully be able to clear up to Rei. The second team is where the majority of your damage lies with Makoto and Kaori. Yui and Yukari are there to provide the much-needed heal and survivability.
Tower of Luna EX Guide
Once you complete floor 70, you will unlock the first EX mission in Tower of Luna. The EX floors are basically a challenge floor and is some of the most difficult in the content. Even in JP, the EX floors of Tower of Luna can be very challenging and require very specific team compositions to beat. So don't feel too bad if you're not able to beat it this time around. You'll always get another chance to do so.
The difference with EX floors is that you can have as many tries as you like and your units are not tied to the same HP and TP as with regular floors. You can build 3 parties that attack the boss one at a time. You need to clear all the enemies with your 3 teams to complete it.
EX 70th Floor
| Shadow Miyako (Lvl. 100) 93,504 HP |
Shadow Mimi (Lvl. 100) 74,803 HP |
Ikt Galadion (Lvl. 120) 650,000 HP |
Shadow Suzume (Lvl. 100) 36,504 HP |
Luna Pod (Lvl. 100) 23,000 HP |
|---|
This combination of units is actually quite tough. Miyako is a really good tank and means your first team needs to be magic to counter it. Mimi also poses problems with her AOE damage as well as Suzume in the back. The Luna Pod provides TP to the boss and means they will UB way more often than normal. You'll need really decent teams to be able to clear this EX stage.
| Difficulty | HP | Union Burst | Skill 1 | Skill 2 |
|---|---|---|---|---|
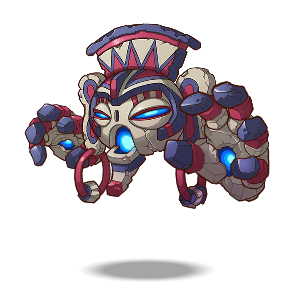 EX Floor 70 EX Floor 70Lvl. 120 |
650,000 | Very large magic damage to all enemies and reduces magic defense. | Large physical damage to enemies in the front range. | Large magic damage to enemies in the front range and paralyzes them. |
As you can see, the boss above will have a lot more HP. Combined with the Luna Pod increasing the frequency of the boss using their UB, you're set for a tough battle.
Suggested Teams
| Kyoka |
Karyl |
Akari |
Monika |
Kuka |
|---|
| Mitsuki |
Saren |
Mimi |
Nozomi |
Pecorine |
|---|
| Shiori |
Yukari |
Akino |
Kaori |
Jun |
|---|
The above party is the most friendly team to build and requires less of the 3*'s and limited characters. The idea behind the team is for the first party to clear out Miyako. The second team should be able to do some damage to Suzume and the Luna Pod. The third team is the main boss killer and should be able to take out the remaining HP on the boss while being able to survive.
| Kyoka |
Karyl (Summer) |
Akari |
Illya |
Shizuru |
|---|
| Shiori |
Mitsuki |
Tomo |
Nozomi |
Kuka |
|---|
| Kokkoro (Summer) |
Tamaki (Summer) |
Makoto |
Kaori |
Jun |
|---|
This set of teams is more suited for players that rolled a lot of the meta characters. There are quite a few changes you can make to the teams above. However, the idea remains the same with the first party taking out Miyako and having the second party do a nominal amount of damage to the boss. The third team is where the majority of your damage is and should easily clear the boss out.
Rewards

Clearing out each of the floors will provide a set of rewards to go along with the sense of accomplishment you'll be getting. Details posted below are from the JP server and we will update the list if anything changes.
| Rank | Rewards |
|---|---|
| Floors 1-9, 11-19, etc. (Non-boss floors) |
 30 Jewels 30 Jewels Equipment Equipment Mana Mana Princess Heart Fragment(s) Princess Heart Fragment(s)(From Floor 212, every 2 floors.) |
| Floor 10 & 20 |
100 Jewels5 EquipmentMana 1 Princess Heart 1 Princess Heart |
| Floor 30 |
100 Jewels 2 Memory ShardsMana1 Princess Heart 2 Memory ShardsMana1 Princess Heart |
| Floor 40 |
100 Jewels 2 Memory ShardsMana1 Princess Heart 2 Memory ShardsMana1 Princess Heart |
| Floor 50 |
100 Jewels 3 Memory ShardsMana1 Princess Heart 3 Memory ShardsMana1 Princess Heart |
| Floor 60 |
100 Jewels 3 Memory ShardsMana1 Princess Heart 3 Memory ShardsMana1 Princess Heart |
| Floor 70 |
100 Jewels 3 Memory ShardsMana1 Princess Heart 3 Memory ShardsMana1 Princess Heart |
| Floor 80 |
100 Jewels 3 Memory ShardsMana1 Princess Heart 3 Memory ShardsMana1 Princess Heart |
| Floor 90 |
100 Jewels 3 Memory ShardsMana1 Princess Heart 3 Memory ShardsMana1 Princess Heart |
| Floor 100 |
100 Jewels3 Memory ShardsMana1 Princess Heart |
| Floor 110 |
100 Jewels 3 Memory ShardsMana1 Princess Heart 3 Memory ShardsMana1 Princess Heart |
| Floor 120 |
100 Jewels3 Memory ShardsMana1 Princess Heart |
| Floor 130 |
100 Jewels 3 Memory ShardsMana1 Princess Heart 3 Memory ShardsMana1 Princess Heart |
| Floor 140 |
100 Jewels 3 Memory ShardsMana1 Princess Heart 3 Memory ShardsMana1 Princess Heart |
| Floor 150 |
100 Jewels 3 Memory ShardsMana1 Princess Heart 3 Memory ShardsMana1 Princess Heart |
| Floor 160 |
100 Jewels 3 Memory ShardsMana1 Princess Heart 3 Memory ShardsMana1 Princess Heart |
| Floor 170 |
100 Jewels 3 Memory ShardsMana1 Princess Heart 3 Memory ShardsMana1 Princess Heart |
| Floor 180 |
100 Jewels 3 Memory ShardsMana1 Princess Heart 3 Memory ShardsMana1 Princess Heart |
| Floor 190 |
100 Jewels 3 Memory ShardsMana1 Princess Heart 3 Memory ShardsMana1 Princess Heart |
| Floor 210 |
100 Jewels3 Memory ShardsMana1 Princess Heart |
| Floor 220 |
100 Jewels 3 Memory ShardsMana1 Princess Heart1 Princess Heart Fragment 3 Memory ShardsMana1 Princess Heart1 Princess Heart Fragment |
| Floor 230 |
100 Jewels3 Memory ShardsMana1 Princess Heart1 Princess Heart Fragment |
| Floor 240 |
100 Jewels 3 Memory ShardsMana1 Princess Heart1 Princess Heart Fragment 3 Memory ShardsMana1 Princess Heart1 Princess Heart Fragment |
| Floor 250 |
100 Jewels3 Memory ShardsMana1 Princess Heart1 Princess Heart Fragment |
| Floor 260 |
100 Jewels 3 Memory ShardsMana1 Princess Heart1 Princess Heart Fragment 3 Memory ShardsMana1 Princess Heart1 Princess Heart Fragment |
| Floor 270 |
100 Jewels3 Memory ShardsMana1 Princess Heart1 Princess Heart Fragment |
| Floor 280 |
100 Jewels 3 Memory ShardsMana1 Princess Heart2 Princess Heart Fragments 3 Memory ShardsMana1 Princess Heart2 Princess Heart Fragments |
| Floor 290 |
100 Jewels3 Memory ShardsMana1 Princess Heart2 Princess Heart Fragments |
| Floor 300 |
100 Jewels3 Memory ShardsMana1 Princess Heart2 Princess Heart Fragments |
| Floor 310 |
100 Jewels 3 Memory ShardsMana1 Princess Heart2 Princess Heart Fragments 3 Memory ShardsMana1 Princess Heart2 Princess Heart Fragments |
| Floor 320 |
100 Jewels 3 Memory ShardsMana1 Princess Heart2 Princess Heart Fragments 3 Memory ShardsMana1 Princess Heart2 Princess Heart Fragments |
| Floor 330 |
100 Jewels 3 Memory ShardsMana1 Princess Heart2 Princess Heart Fragments 3 Memory ShardsMana1 Princess Heart2 Princess Heart Fragments |
| Floor 340 |
100 Jewels3 Memory ShardsMana1 Princess Heart2 Princess Heart Fragments |
| Floor 350 |
100 Jewels3 Memory ShardsMana1 Princess Heart2 Princess Heart Fragments |
| Floor 360 |
100 Jewels3 Memory ShardsMana1 Princess Heart2 Princess Heart Fragments |
| Phantom Passage |
100 Jewels2 Princess Hearts 10 Divine Amulets 10 Divine Amulets |
| EX Floor 70, 110, 130, 150, 170, 190, 210, 230, 250, 270, 290, 310, 330, 350, 360 |
300 Jewels30 Divine AmuletsMana1 Princess Heart |
The rewards are well worth the effort. There are a lot of jewels up for grabs in addition to a few memory shards scattered here and there. Each floor also drops 5x of a single piece of equipment on completion and can help you stockpile some equipment.
Overall, Tower of Luna is another welcome addition to the rotation of monthly content. This is probably the closest thing to end-game content and requires quite a bit of effort. Hopefully, our guide can help you with some of the boss floors and give you a better understanding of the event. Let us know on Discord or our Twitter, if you have any questions, comments, or concerns. Best of luck!
Last Update: October 16, 2022