Welcome back to another edition of our Princess Connect! Re: Dive story event guides! We're here with 100% more Aoi and the introduction of the Friendship Club. Just when you thought school could never be this exciting. All the information is from the JP server when they first ran the event, and if past events are anything to go by, we should be following the same reward chart. Let the lessons begin!
The Woodland Loner and the Saintly School Lycéennes Story Event
This is the eighteenth story event in the EN/WW server. Events generally give a generous amount of items, mana, jewels, and character memory shards. The memory shards featured in this event are for Aoi and Ruka. On top of the rewards, it also adds event story chapters which can be viewed as you complete the event stages.
Boss Battle
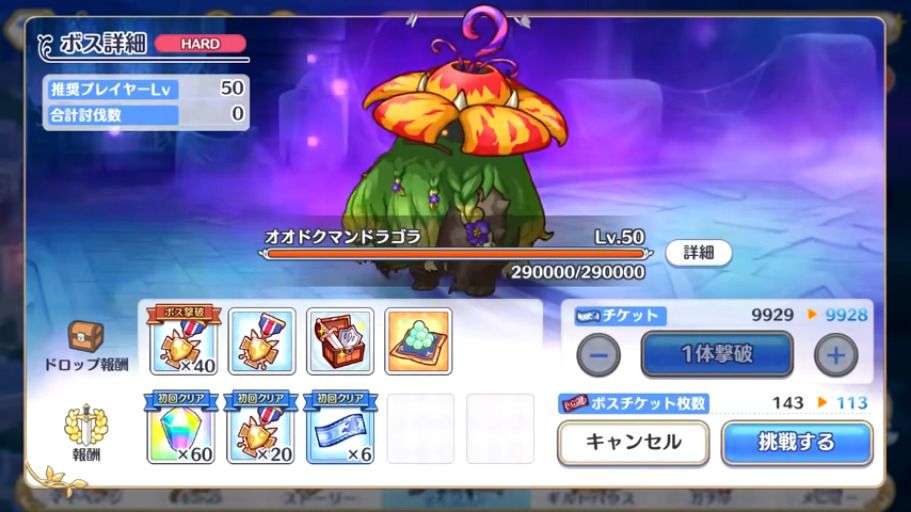
As with the previous Very Hard boss, this one is much easier just due to our wider variety of characters and increased levels and rank. Completing it in one hit is entirely possible. You get quite a bit more rewards from it and you can only complete it once a day. Don't worry, we've got you covered and will post some sample teams below.
To fight the boss you'll need to obtain enough boss tickets. Each of the stages you clear from the event will provide boss tickets. The boss will come in normal, hard, and very hard. The normal boss should be easily cleared with any team while hard may pose a bit more of a challenge. Very Hard, as previously stated will be a tougher one. Clearing bosses will also provide tokens to be used on the event treasure box. This is the real reason you'll be farming the event. We'll touch on this later on in the article.
The Hard boss can be done using skip tickets after clearing the boss 3 times. This will help speed up the process once you've done your daily Very Hard stage.
There is also another stage known as Special which you will unlock once you have beaten the Very Hard boss. This stage is where the majority of the difficulty for the event is. Clearing out missions related to this special stage will give a plethora of rewards. It'll just take a lot of boss tickets. We'll go more into it later on in the article.
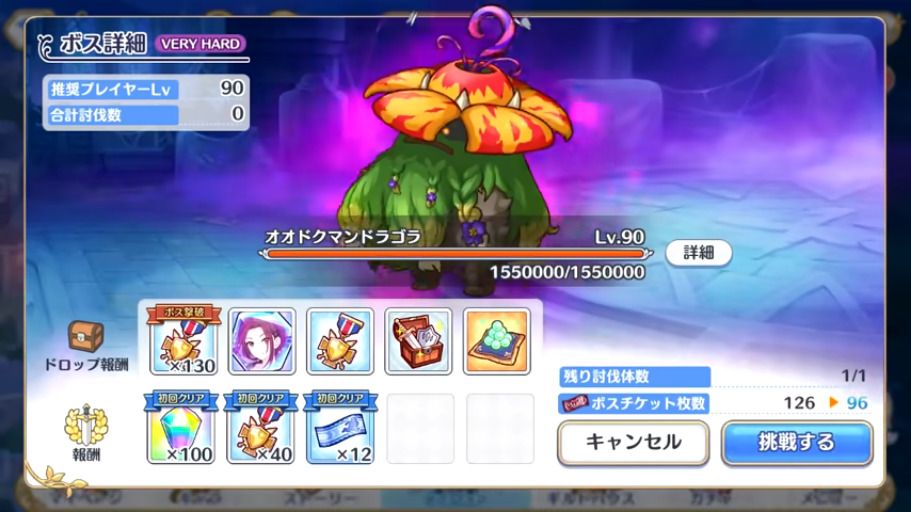
The hard, very hard, and special boss will have a larger pool of HP and also additional skills. Of course, with a more difficult boss, the rewards will also be greater. We will recommend some potential parties below for those struggling to clear the hard and very hard versions of the boss.
| Difficulty | HP | Union Burst | Skill 1 | Skill 2 |
|---|---|---|---|---|
|
Lvl. 25 |
40,000 | Deals large physical damage to all enemies and gains HP according to the damage dealt. | Deals continuous physical damage to all enemies and reduce their physical defense three times. | Increase TP while increasing own physical power. |
|
Lvl. 50 |
290,000 | Deals large physical damage to all enemies and gains HP according to the damage dealt. | Deals continuous physical damage to all enemies and reduce their physical defense three times. | Increase TP while increasing own physical power. |
|
Lvl. 90 |
1,550,000 | Deals large physical damage to all enemies and gains HP according to the damage dealt. | Deals continuous physical damage to all enemies and reduce their physical defense three times. | Increase TP while increasing own physical power. |
|
Lvl. 90 |
3,600,000 | Deals large physical damage to all enemies and gains HP according to the damage dealt. | Deals continuous physical damage to all enemies and reduce their physical defense three times. | Increase TP while increasing own physical power. |
The boss might look pretty easy looking at just the skills alone. We can assure you that is not the case when you get to the Special version of the boss. Due to various mechanics and the boss being generally strong, it gets quite hard to defeat it. We'll be sure to have a few teams to help you clear out the boss. One thing to be aware of is that the boss hits the front 2 units with its regular attacks.
Suggested Teams
Hard Boss

Honestly, you can throw just about any of your units at this and beat the Hard version of this boss. Let's just use about the easiest to farm units for this. This worked in JP assuming your characters are rank 9 and above and around level 90 or so. You may need to level up your characters or try different combinations to get a decent clear. The boss move set for Hard is the same as the normal boss with a higher health bar and more damage.
This is about a F2P composition that gets used a lot. Miyako will be able to tank the frontal damage while Kaori and Shiori should provide enough damage to kill the boss. If your Kaori is not strong enough to tank the boss, you might want to switch her out with a second tank and place different units behind for DPS.
Very Hard Boss

The Very Hard boss is where things got a bit interesting. You need a conbination of tanking and damage to be able to safely clear out the boss. Since the boss hits the front two units, you need to make sure they are tanky enough to not die. That's on top of the boss constantly healing off of their UB which they use more often due to their self buff and TP gain. The physical defense debuff also gets quite annoying combined with the damage coming from the boss. Technically, you can get away without a healer if you have the right tank up front.
This team relies on Jun for the brunt of the tanking while Muimi should be able to heal off of her damage dealt, especially with an earlier UB due to Saren (Summer). Makoto will need to be strong enough so that she doesn't die from the continuous physical damage from the boss. So make sure she's equipped enough to do so.
Our second team here relies on the tanking potential of Miyako and Jun. You basically only have to worry about the AOE damage since Jun and Miyako will be fine. Makoto, Djeeta, and Christina will make short work of the boss with their damage.
Our third team here makes use of a full magic team save for our two frontal tanks. Kuka (Oedo) and Shizuru will do a fine job of keeping our backline alive. Between Akari, Neneka, and Kyoka, you'll have more than enough damage to make sure the boss goes down.
Our last team takes advantage of Tamaki (Summer) as she can help alleviate damage by reducing the number of times the boss gets to UB. She also does a lot of damage with her UE and combined with Makoto, Djeeta, and Christina, the boss should go down fairly quickly.
Special Mode
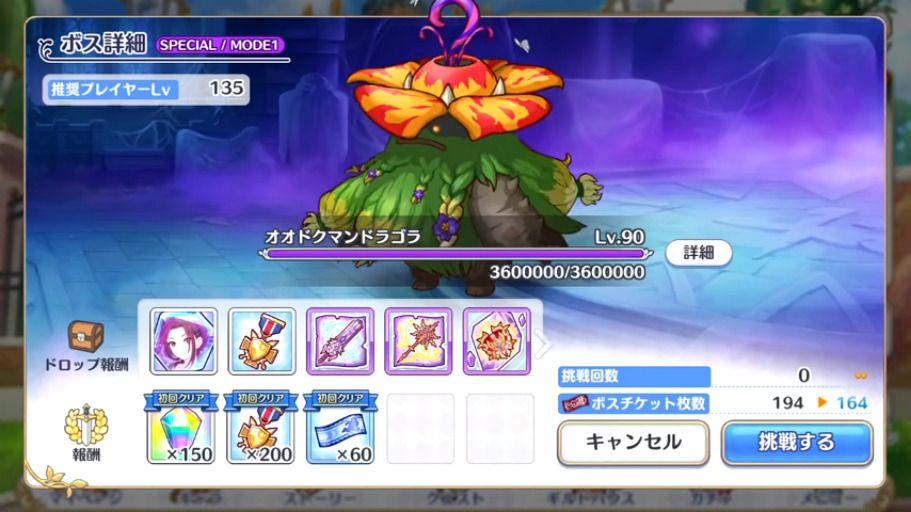
Once you clear the Very Hard boss, you will unlock the Special difficulty. This difficulty is geared toward end-game players and is very difficult. It will likely take 3+ teams to properly clear. It is broken into 3 sections/modes.
Mode 1
| Difficulty | HP | Union Burst | Skill 1 | Skill 2 | Notes |
|---|---|---|---|---|---|
|
Lvl. 90 |
3,600,000 to 2,700,001 | Deals large physical damage to all enemies and gains HP according to the damage dealt. Enemies take additional damage if they are poisoned. | Deals continuous physical damage to all enemies and reduce their physical defense three times. | Increase TP while increasing own physical power. | Normal attack hits front two enemies and poisons. |
The Mode 1 boss is pretty similar to the Very Hard version of the boss. The difference is that the auto attack that hits the front two enemies poisons. That means you'll badly need a tank since the UB does more damage if your units are poisoned.
Mode 2
| Difficulty | HP | Action 1 | Action 2 | Action 3 | Notes |
|---|---|---|---|---|---|
|
Lvl. 90 |
2,700,000 to 900,001 | Buries itself into the ground and becomes immune to damage. | Inflicts strong poison on all enemies. | Removes status down effects on self then greatly reduces self physical and magic defense. | Does the actions in order then loops back to the first action. |
The second mode is probably the most annoying. The posion really hurts and the immunity the boss gets makes it pretty tough to get through. A magic team is recommended but we'll have some alternatives as well.
Mode 3
| Difficulty | HP | Union Burst | Skill 1 | Skill 2 |
|---|---|---|---|---|
|
Lvl. 90 |
900,000 | Deals large physical damage to all enemies and gains HP according to the damage dealt. | Deals continuous physical damage to all enemies and reduce their physical defense three times. | Increase TP while increasing own physical power. |
This is essentially a buffed version of the Very Hard boss. There shouldn't be too much trouble here.
Suggested Teams
Mode 1:
The first team you can use here is basically the most defensively minded Very Hard team. Since the poison hits the first two units, you'll want them to be tanky enough to take the damage. Makoto, Djeeta, and Christina should be more than enough to take out the boss.
Our second team here makes use of the same idea as with the first. We're just using a bit more firepower and Tamaki (Summer) to reduce the boss TP. It requires more limited units and works just as well.
A magic team can also be used for dealing with Mode 1 of this boss. This is actually part of a two punch team. You can replace Io (Summer) with Yui (New Year) for better survivability.
Mode 2:
This is going to be the best physical team you can build here against Mode 2. Since the boss does AOE damage, you badly need a healer. You also want to make sure you do not UB when the boss cannot be hit. Yui (New Year) is probably the strongest healer due to the barrier and the heal. Otherwise, you can replace her with Yui or Io (Summer). Feel free to play around with the DPS units too. Shinobu and archers also work well here, especially Suzuna or her summer varient.
This is one of the potential magic teams you can run for just Mode 2. Yukari and Yui (New Year) will keep your team alive while Karyl (Summer) and Neneka will eventually chip away and kill the boss. Kasumi is very strong against this boss.
If you were following the two punch team from Mode 1, you can use this as your second team to clear the boss. This might take a few resets to get right due to timing.
Mode 3:
Feel free to use any of the Very Hard teams here to clear off the boss in Mode 3 as it is basically a buffed version of the Very Hard boss.
Another varient of the physical team. You can basically put two strong tanks up front and some combination of DPS in the back.
This final team is great here as well due to Tamaki (Summer) helping you reduce the number of times the boss gets to UB. :)
Rewards
We're finally onto the main point of each of these events: the rewards that come along with it. In addition to the first clear bonuses, there are also a set number of event treasure boxes. Think of it as a mini gacha machine but each one has a set number of items. To roll this treasure gacha box, you get pulls from defeating the event boss and completing daily missions. You do not need to clear out every single item in each box to move on to the next one. However, you will need to obtain the main items in the box. In this case, the main items are the memory shards for the characters. (You would want to collect these anyway.) The contents of each of the boxes are listed below.
| Box One | |
|---|---|
| Item | Quantity |
|
|
1 |
|
|
5 |
|
|
20 |
|
|
15 |
|
|
20 |
|
|
10 |
|
|
300 |
|
|
5 |
|
|
10 |
|
|
15 |
|
|
5 |
|
|
10 |
|
|
15 |
| Total | 431 |
| Box Two | |
|---|---|
| Item | Quantity |
|
|
1 |
|
|
10 |
|
|
25 |
|
|
20 |
|
|
30 |
|
|
15 |
|
|
380 |
|
|
7 |
|
|
12 |
|
|
17 |
|
|
7 |
|
|
12 |
|
|
17 |
| Total | 553 |
| Box Three | |
|---|---|
| Item | Quantity |
|
|
1 |
|
|
15 |
|
|
30 |
|
|
20 |
|
|
40 |
|
|
20 |
|
|
480 |
|
|
9 |
|
|
14 |
|
|
19 |
|
|
9 |
|
|
14 |
|
|
19 |
| Total | 690 |
| Box Four | |
|---|---|
| Item | Quantity |
|
|
1 |
|
|
20 |
|
|
35 |
|
|
25 |
|
|
50 |
|
|
30 |
|
|
550 |
|
|
11 |
|
|
16 |
|
|
21 |
|
|
11 |
|
|
16 |
|
|
21 |
| Total | 807 |
| Box Five+ | |
|---|---|
| Item | Quantity |
|
|
5 |
|
|
35 |
|
|
25 |
|
|
50 |
|
|
30 |
|
|
550 |
|
|
11 |
|
|
16 |
|
|
21 |
|
|
11 |
|
|
16 |
|
|
21 |
| Total | 791 |
Total Memory Shards
A breakdown of all the possible memory shards gained from missions, story, and the boxes are listed here:
| Location | Aoi | Ruka |
|---|---|---|
| Story Reward | 4 | 4 |
| Normal Quests | 2 | 2 |
| Hard Quests | 6 | 9 |
| Treasure Box | 50 | 65 |
| Event Missions | N/A | 26 |
| Total | 62 | 106 |
Note: This does not include memory shards from hard mission drops. These only include the ones you are guaranteed to get assuming you complete the tasks.
Well, there you have it! We've reached the end of our guide for The Woodland Loner and the Saintly School Lycéennes Story Event. Hopefully, this has been helpful to you. Just remember, the Friendship Club is a great guild and Aoi might make some more friends.
Last Update: August 10, 2022
