Welcome back to another installment of our Princess Connect! Re: Dive story event guides! This time, we're getting a story event featuring the characters from the Sarendia Orphanage which coincides with the release of Chika (Holiday). You will be able to obtain memory shards for Nozomi and Kurumi (Holiday) during the event from hard stages and the event treasure box. Today, we'll break down the event and other pertinent information. All the information is from the JP server when they first ran the event, and if past events are anything to go by, we should be following the same reward chart. So let's dive right into the festivities!
Chika (Holiday) Banner
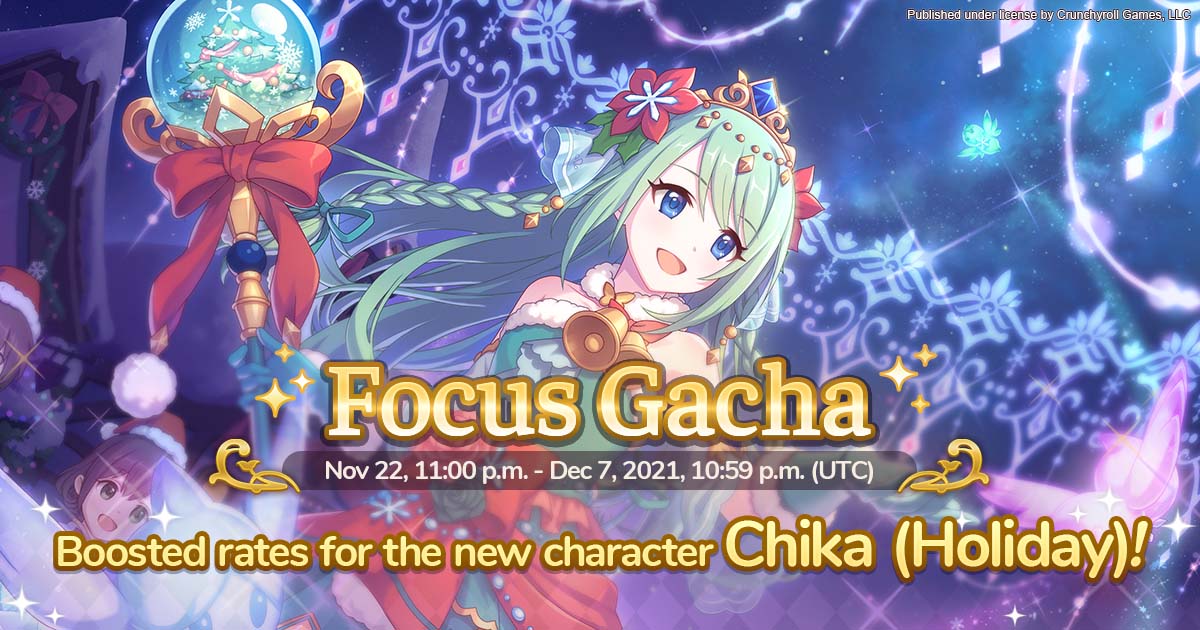
Along with the new event, we'll be getting this season's limited Holiday set of characters. The first of which is Chika (Holiday). I'm struggling a bit here to say whether you must pull for her or not. Part of the problem is that she wasn't used too much on JP release. However, the other servers have since seen the use of her for clan battle. The upside is that she enables team comps that no other unit really can. On the other hand, she's very much a niche character that requires very specific, levels, stars, bond levels, skill levels, and investment to get right. She enables some of the silliest timelines the JP server has ever seen. From endless NY Karyl Bursts to 15-minute clan battle attempts, you name it. We'll leave it up to you to decide whether she is worth the investment at this time.
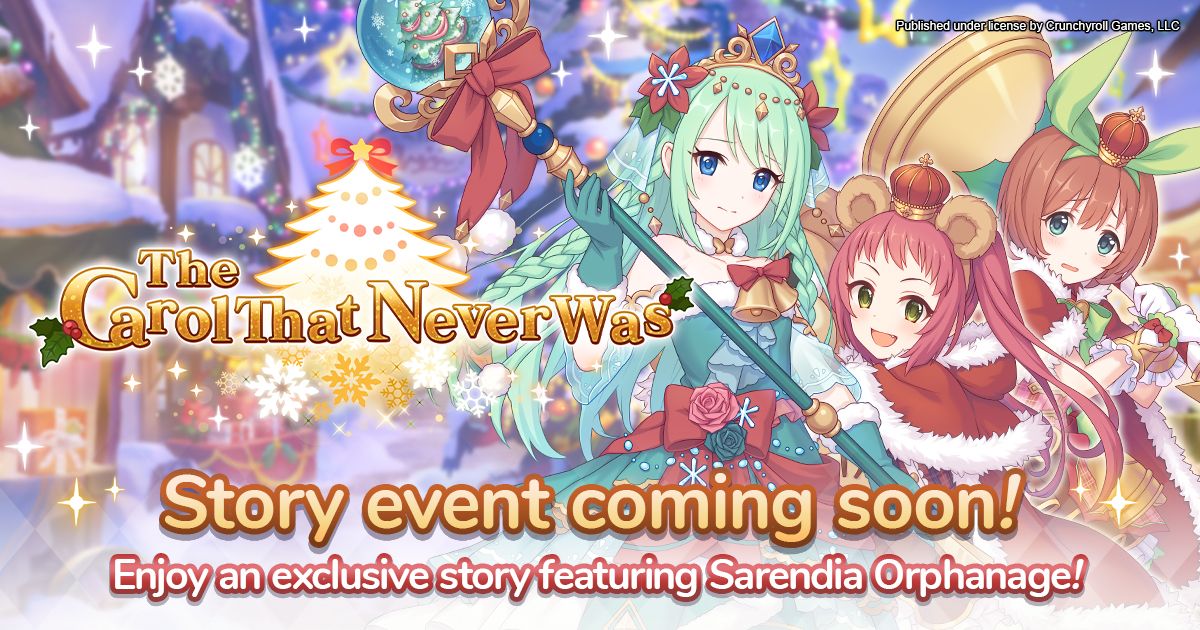
The Carol That Never Was Story Event

This is the ninth story event in the EN/WW server. Events generally give a generous amount of items, mana, jewels, and character memory shards. The memory shards featured in this event are for Nozomi and Kurumi (Holiday). You will also obtain a free 1* unit in Kurumi (Holiday) on defeating the boss 5 times on any difficulty. On top of the rewards, it also adds event story chapters which can be viewed as you complete the event stages.
Stages
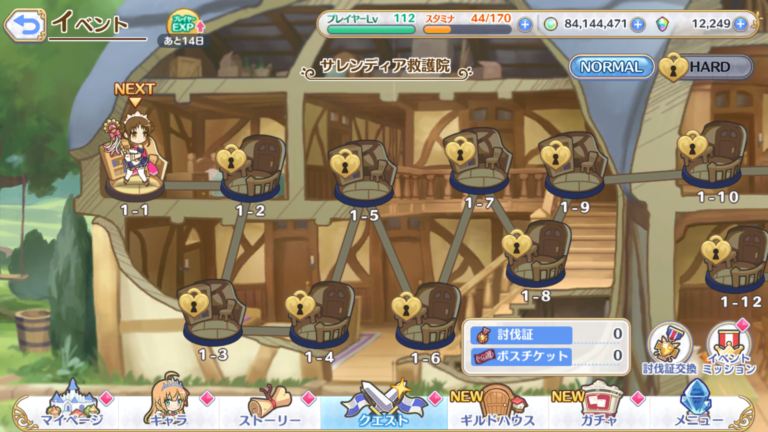
Events are broken down into two phases of stages similar to the main quest. However, you must clear all the normal stages and the normal boss before unlocking the hard stages. Normal stages start at 1-1 and go all the way up to 1-15. Clearing each stage for the first time also provides 30 jewels, an assortment of items, and boss tickets. After the first clear, they will still provide some items and more importantly boss tickets. These boss tickets are used to fight the boss of the event. We'll go over this more in-depth later.
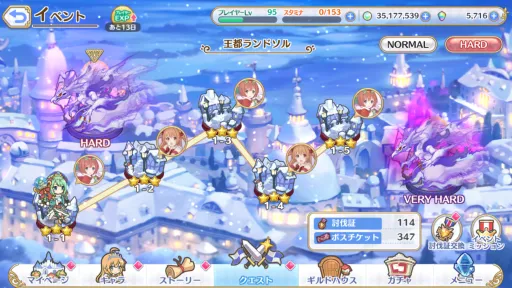
After clearing stages 1-1 through to 1-15 and the boss on normal, you'll unlock the hard missions. These missions are similar to the main quest hard missions and have a chance to drop memory shards. Each first clear will also provide 3 of the memory shards of the character indicated, boss tickets, items, and will also give the 30 jewel bonus. Each subsequent clear will then give a chance of dropping the memory shards. You can only clear each hard stage 3 times a day.
For the most part, you will want to clear each of these hard stages every day of the event to maximize your memory shard and boss tickets gain. This event features memory shards for Nozomi and Kurumi (Holiday). There is a large amount of luck involved with the hard missions but the memory shards and the boss tickets are generally worth it.
Boss Battle
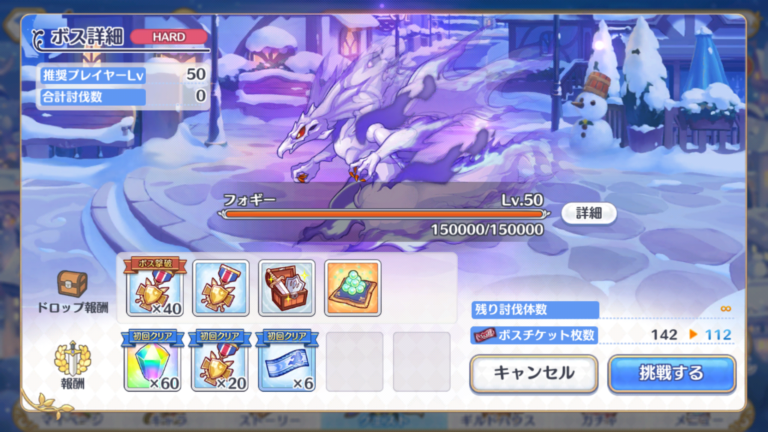
Luckily, the Very Hard boss is even easier than the last event as our characters are much stronger than before. Not to mention, it has a much lower health pool than the previous boss. Completing it in one hit is entirely possible. You get quite a bit more rewards from it and you can only complete it once a day. Don't worry, we've got you covered and will post some sample teams below.
To fight the boss you'll need to obtain enough boss tickets. Each of the stages you clear from the event will provide boss tickets. The boss will come in normal, hard, and very hard. The normal boss should be easily cleared with any team while hard may pose a bit more of a challenge. Very Hard, as previously stated will be a tough one. Clearing bosses will also provide tokens to be used on the event treasure box. This is the real reason you'll be farming the event. We'll touch on this later on in the article.

The hard and very hard boss will have a larger pool of HP and also additional skills. Of course, with the more difficult boss, the rewards will also be greater. This version of the boss also does more damage and has a more difficult attack pattern once below 40% HP. (Think of it as them hitting their limit break.) We will recommend some potential parties below for those struggling to clear the hard and very hard versions of the boss.
| Difficulty | HP | Union Burst | Skill 1 | Skill 2 |
|---|---|---|---|---|
 Normal NormalLvl. 25 |
35,000 | Large magical damage to all enemies and damage increases if the enemy is cursed. | Deals medium magical damage to all enemies and curses them. | Summons a Purple Spirit or Red Spirit and knocks enemies back.
Purple Spirit: Summons with a physical/magical damage absorption barrier. Red Spirit: Deals magical damage to all enemies. |
|
Hard Lvl. 50 |
150,000 | Large magical damage to all enemies and damage increases if the enemy is cursed. | Deals medium magical damage to all enemies and curses them. | Summons a Purple Spirit or Red Spirit and knocks enemies back.
Purple Spirit: Summons with a physical/magical damage absorption barrier. Red Spirit: Deals magical damage to all enemies. |
|
Very Hard Lvl. 90 |
700,000 | Large magical damage to all enemies and damage increases if the enemy is cursed. | Deals medium magical damage to all enemies and curses them. | Summons a Purple Spirit, Red Spirit, or Blue Spirit and knocks enemies back.
Purple Spirit: Summons with a physical/magical damage absorption barrier. Red Spirit: Deals magical damage to all enemies. Blue Spirit: Deals magical damage to all enemies & curses them. (When this spirit is below 30% HP, the boss regains TP.) |
As you can see above, Very Hard can still pose a bit of a challenge. The boss may have less HP but it summons enemies that you have to deal with. Just note the boss does a lot of AOE magic damage and also curses your units. The curse not only does damage over time but also enables the boss to deal more damage when it UBs. Also, don't forget about the 40% enrage mechanic for the Hard and Very Hard boss. Defeating the Very Hard boss will also drop a large number of rewards and a Kurumi (Holiday) memory shard. Remember, you can only defeat the Very Hard boss once daily.
Suggested Teams
At this point, hard bosses should be pretty straightforward. The boss is only level 50 and doesn't hit too hard. The enemies haven't been upgraded too much compared to our level cap and rank increases. This worked in JP assuming your characters are rank 9 and above and around level 90 or so. You may need to level up your characters or try different combinations to get a decent clear. The boss move set for Hard is the same as the normal boss with a higher health bar and more damage. Be aware of all the AOE damage from the UB and the curse status effect. If you're unprepared, your entire party can wipe.
 Yui Yui |
 Maho Maho |
 Karyl Karyl |
 Kokkoro Kokkoro |
 Pecorine Pecorine |
|---|
Honestly, at this point, the Hard boss should be pretty easy. We've provided one of the easiest boss-killing teams with units you already most likely have. You can easily replace any of the units above with stronger units. You effectively need one tank and some damage in the back. Magic damage dealers are recommended at the boss has a lot more physical defense than magical defense.
Very Hard Boss
The Very Hard boss is where the challenge is. You can still clear it using a single team. Just beware of the boss using their UB more often and also them summoning one more enemy to deal with. On the bright side, you can generate TP easier this way. Once again, watch your HP bars and the curse status. You don't want to take too much magic damage against this boss. Again, a magic team is recommended.
 Kyoka Kyoka |
 Karyl Karyl (Summer) |
Karyl |
 Misato Misato |
 Yukari Yukari |
|---|
Our first team here is pretty much a standard magical damage composition. Here, you'll be using Kyoka, Karyl, and Karyl (Summer) as your main magic damage dealers. Misato and Yukari are there to provide much-needed survivability, heals, and magic defense up. You can play around with the mages on this team such as adding Nanaka. Illya is not recommended as she can easily die from all the AOE damage. An unlucky crit and she may even kill herself. You can also use Akari in place of Yukari for additional magic damage.
| Kyoka |
Karyl (Summer) |
 Nanaka Nanaka |
Misato |
 Akari Akari |
|---|
With the changes to the team above, you would turn your team into a more offensive-minded magic team. This team should easily clear the Very Hard boss on a single clear.
| Yui |
 Christina Christina |
 Tomo Tomo |
 Makoto Makoto |
 Jun Jun |
|---|
Physical teams will also still work against this boss but just beware the boss has more physical defense so a magic damage team will more easily clear the boss. Our units are pretty high up in level and ranks so a standard team consisting of the following members should work. You can also replace Yui with Misato to boost the magic defense of your team.
Rewards

We're finally onto the main point of each of these events: the rewards that come along with it. In addition to the first clear bonuses, there are also a set number of event treasure boxes. Think of it as a mini gacha machine but each one has a set number of items. To roll this treasure gacha box, you get pulls from defeating the event boss and completing daily missions. You do not need to clear out every single item in each box to move on to the next one. However, you will need to obtain the main items in the box. In this case, the main items are the memory shards for the characters. (You would want to collect these anyway.) The contents of each of the boxes are listed below. You may want to consider farming the event for the endless box since you can obtain more memory shards for Kurumi (Holiday) since she can't be farmed until the next re-run of the event.
| Box One | |
|---|---|
| Item | Quantity |
 Nozomi Memory Shards x 20 Nozomi Memory Shards x 20 |
1 |
 Jewels x 5 Jewels x 5 |
5 |
 Divine Amulets Divine Amulets |
20 |
 Skip Tickets Skip Tickets |
15 |
 Mana x 7,000 Mana x 7,000 |
20 |
 Rupies x 100 Rupies x 100 |
10 |
 Random Equipment Random Equipment |
300 |
 Superior Refinement Crystals Superior Refinement Crystals |
5 |
 Enhanced Refinement Crystals Enhanced Refinement Crystals |
10 |
 Refinement Crystals Refinement Crystals |
15 |
 Super EXP Potion Super EXP Potion |
5 |
 EXP Potion EXP Potion |
10 |
 Mini EXP Potion Mini EXP Potion |
15 |
| Total | 431 |
| Box Two | |
|---|---|
| Item | Quantity |
 Kurumi (Holiday) Memory Shards x 25 Kurumi (Holiday) Memory Shards x 25 |
1 |
|
Jewels x 10 |
10 |
|
Divine Amulets |
25 |
|
Skip Tickets |
20 |
|
Mana x 8,000 |
30 |
|
Rupies x 200 |
15 |
|
Random Equipment |
380 |
|
Superior Refinement Crystals |
7 |
|
Enhanced Refinement Crystals |
12 |
|
Refinement Crystals |
17 |
|
Super EXP Potion |
7 |
|
EXP Potion |
12 |
|
Mini EXP Potion |
17 |
| Total | 553 |
| Box Three | |
|---|---|
| Item | Quantity |
|
Nozomi Memory Shards x 30 |
1 |
|
Jewels x 15 |
15 |
|
Divine Amulets |
30 |
|
Skip Tickets |
20 |
|
Mana x 9,000 |
40 |
|
Rupies x 300 |
20 |
|
Random Equipment |
480 |
|
Superior Refinement Crystals |
9 |
|
Enhanced Refinement Crystals |
14 |
|
Refinement Crystals |
19 |
|
Super EXP Potion |
9 |
|
EXP Potion |
14 |
|
Mini EXP Potion |
19 |
| Total | 690 |
| Box Four | |
|---|---|
| Item | Quantity |
|
Kurumi (Holiday) Memory Shards x 40 |
1 |
|
Jewels x 25 |
20 |
|
Divine Amulets |
35 |
|
Skip Tickets |
25 |
|
Mana x 10,000 |
50 |
|
Rupies x 250 |
30 |
|
Random Equipment |
550 |
|
Superior Refinement Crystals |
11 |
|
Enhanced Refinement Crystals |
16 |
|
Refinement Crystals |
21 |
|
Super EXP Potion |
11 |
|
EXP Potion |
16 |
|
Mini EXP Potion |
21 |
| Total | 807 |
| Box Five+ | |
|---|---|
| Item | Quantity |
|
Kurumi (Holiday) Memory Shards x 3 |
1 |
|
Skip Tickets |
10 |
|
Mana x 10,000 |
30 |
|
Rupies x 250 |
20 |
|
Random Equipment |
100 |
|
Superior Refinement Crystals |
5 |
|
Enhanced Refinement Crystals |
10 |
|
Refinement Crystals |
15 |
|
Super EXP Potion |
5 |
|
EXP Potion |
10 |
|
Mini EXP Potion |
15 |
| Total | 226 |
Total Memory Shards
A breakdown of all the possible memory shards gained from missions, story, and the boxes are listed here:
| Location | Nozomi | Kurumi (Holiday) |
|---|---|---|
| Story Reward | 4 | 4 |
| Normal Quests | 2 | 2 |
| Hard Quests | 6 | 9 |
| Treasure Box | 50 | 65 |
| Event Missions | N/A | 20 |
| Total | 62 | 100 |
Note: This does not include memory shards from hard mission drops. These only include the ones you are guaranteed to get assuming you complete the tasks.
You should be able to obtain quite a few shards for Nozomi and Kurumi (Holiday) from this event. Best of luck to you if you plan to roll for Chika (Holiday)! See you in our next article.
Last Update: November 22, 2021