
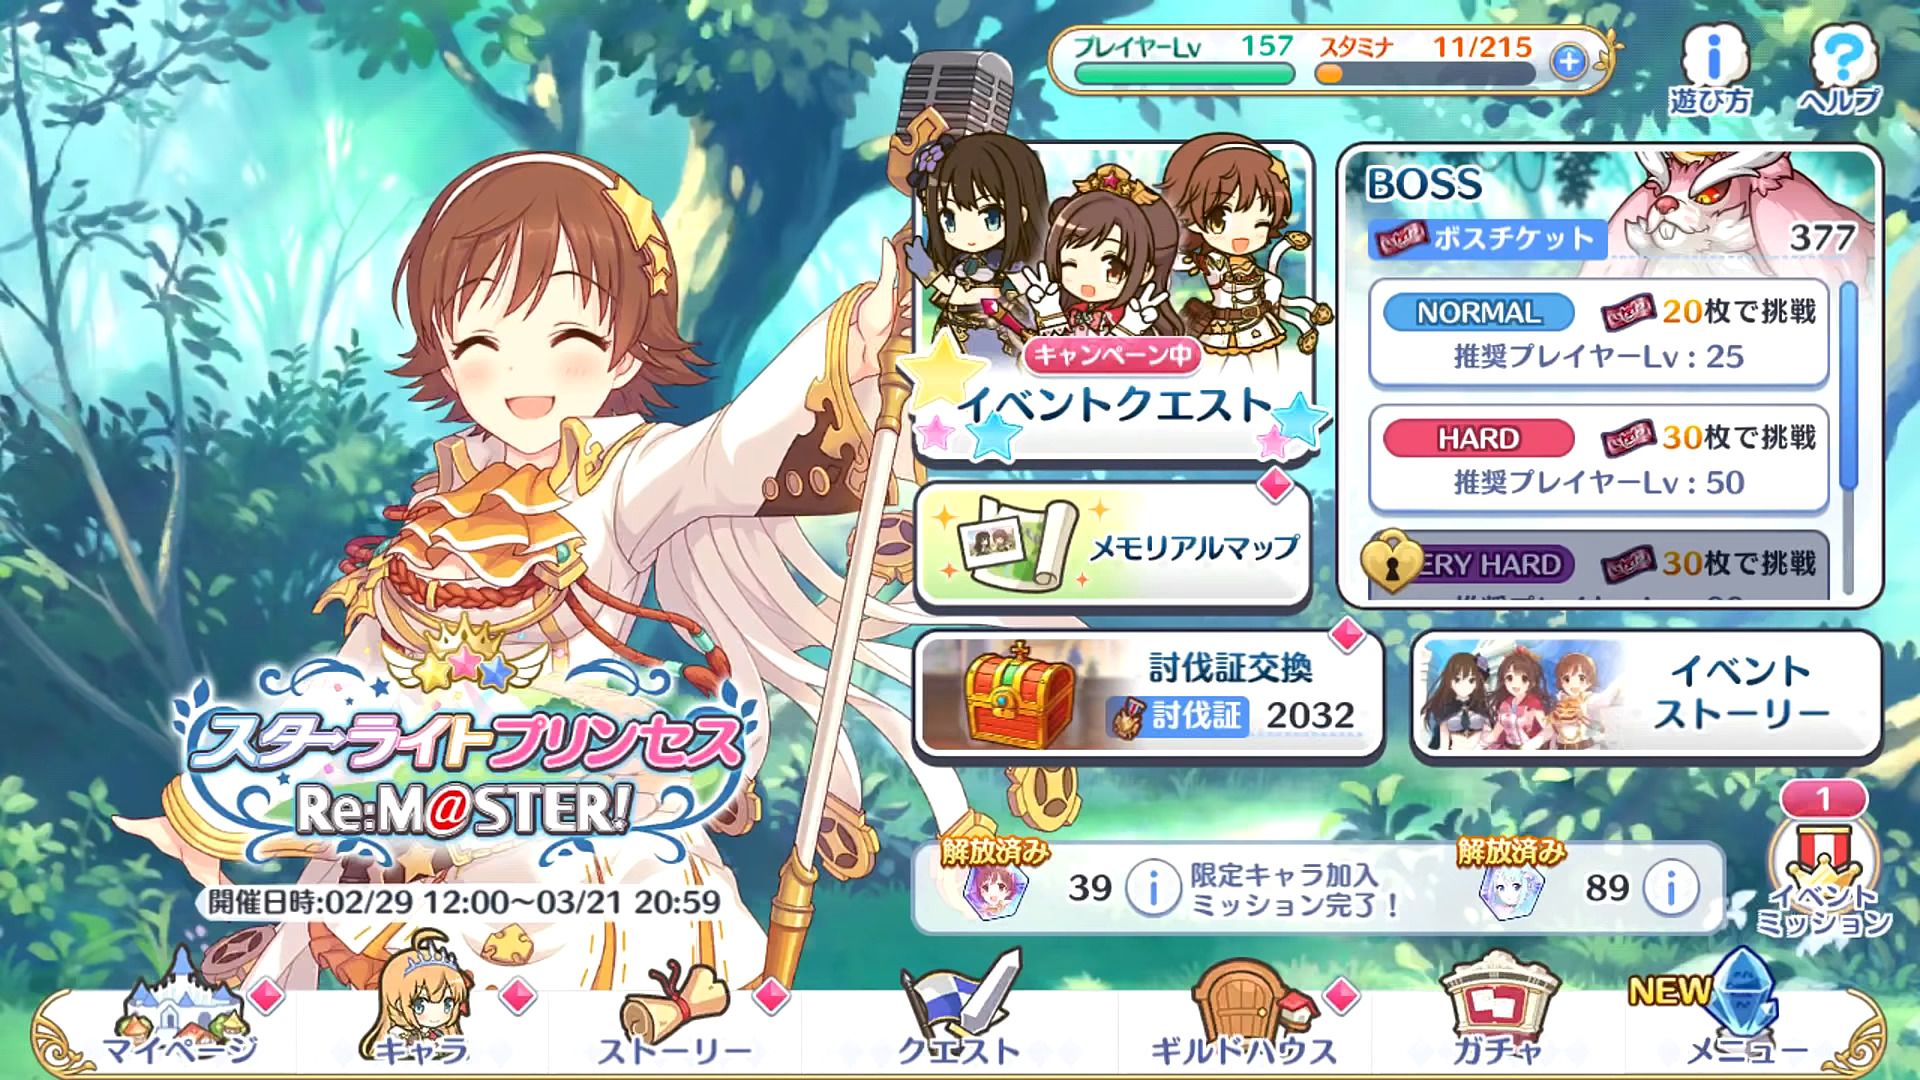
Welcome back to another edition of our Princess Connect! Re: Dive story event guides! You're in for a treat with another cross-over event featuring characters from THE iDOLM@STER Cinderella Girls Starlight Stage. This event will also feature two parts with part 2 starting on 2/13/2023. Watch as Mio, Uzuki, and Rin take over the stage in Landosol! We'll also be trying out a abbreviated format for this guide. If you need additional details, please see our previous guide here.
Uzuki (IM@S CG) Focus Gacha
Uzuki (IM@S CG) is the first limited gacha banner for this cross-over event. She's a solid unit and might be worth a pull if you're really into iDOLM@STER Cinderella Girls. You might want to consider saving your jewels for other banners though.
Rin (IM@S CG) Focus Gacha

Rin (IM@S CG) is the second limited gacha banner that runs during the cross-over event. She is arguably the stronger character of the two and will see use in arena and future events. Just be sure you'll have enough jewels for other characters you may want to roll.
Starlight Princess Re:M@STER! Story Event Part 2
| Difficulty | HP | Union Burst | Skill 1 | Skill 2 |
|---|---|---|---|---|
 Normal NormalLvl. 25 |
58,000 | Deals large magical damage to all enemies and knocks them back. Decreases physical and magical defense. | Deal physical damage to enemies in range and knocks them back. | |
|
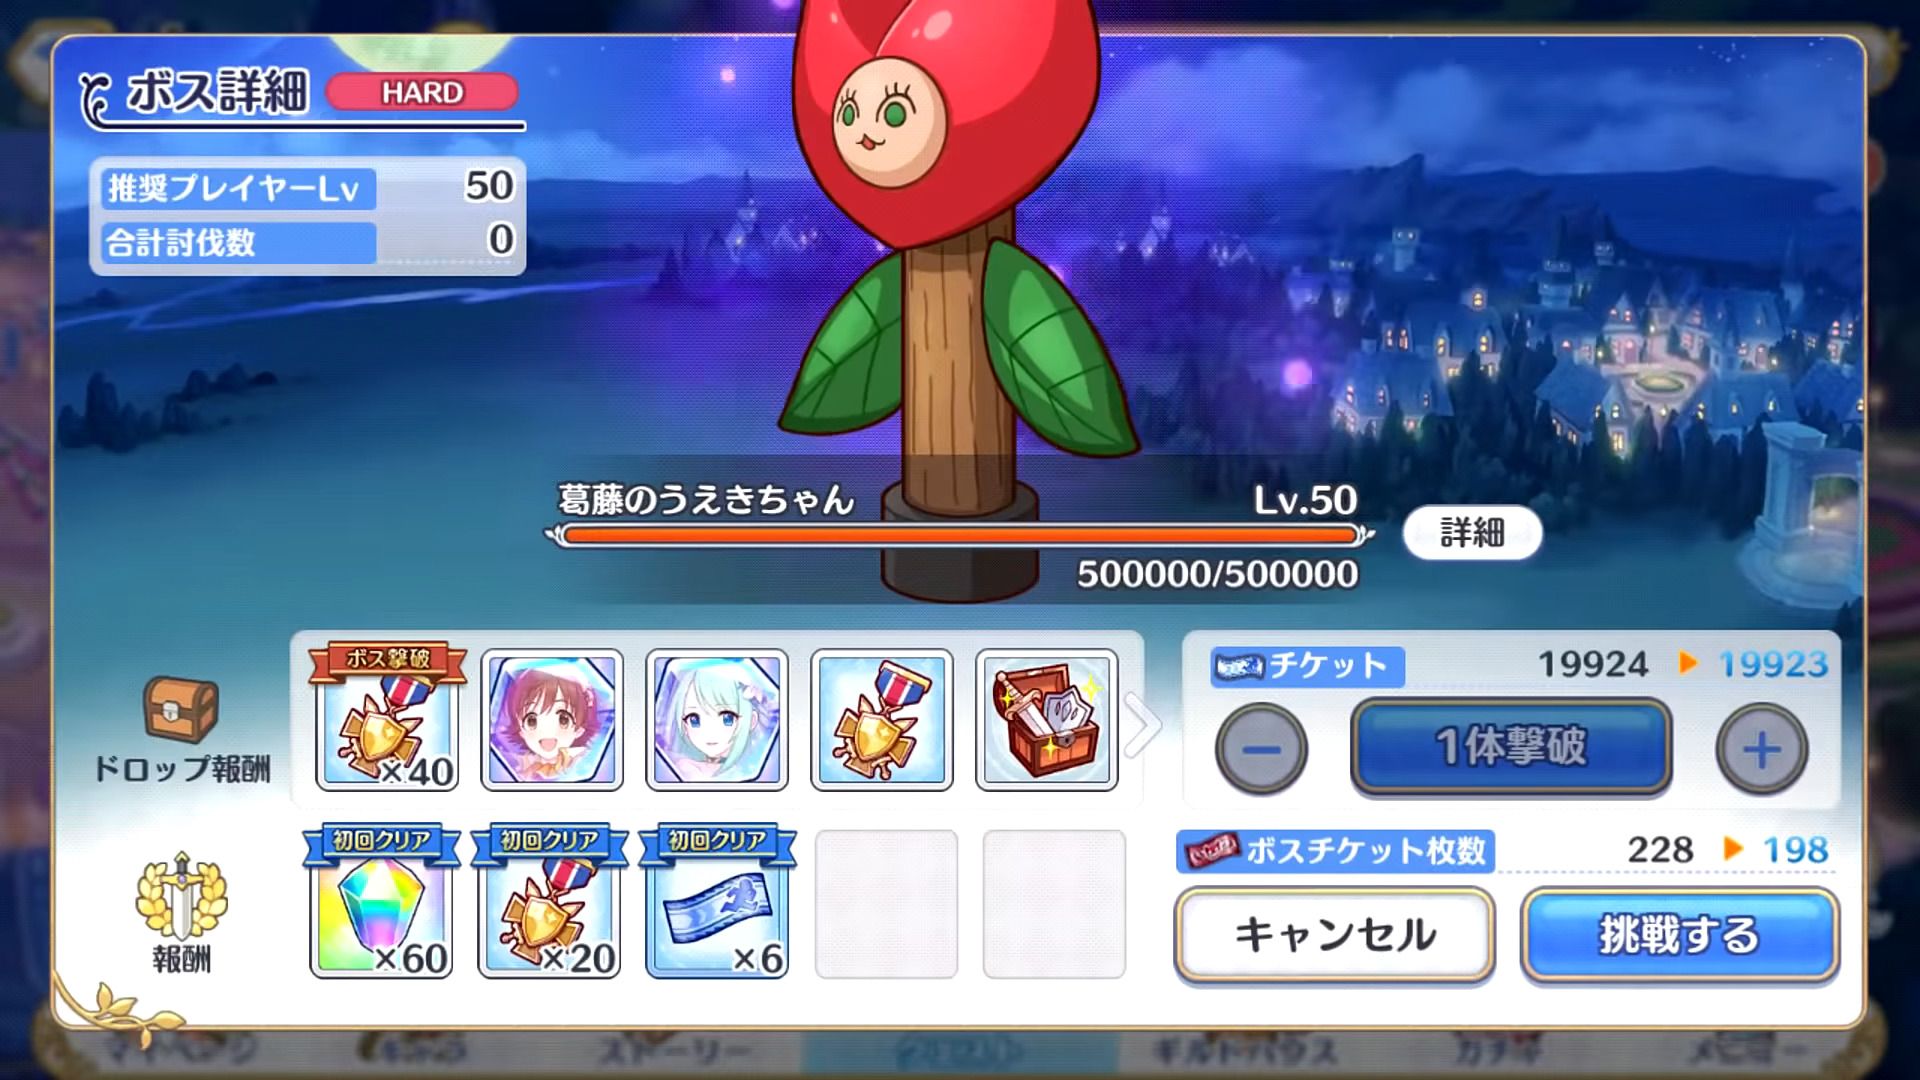
Hard Lvl. 50 |
500,000 | Deals large magical damage to all enemies and knocks them back. Decreases physical and magical defense. | Deal physical damage to enemies in range and knocks them back. | Summons a wood thing that can't be targeted. The summon will explode and deal magic damage to all enemies in range of it. |
|
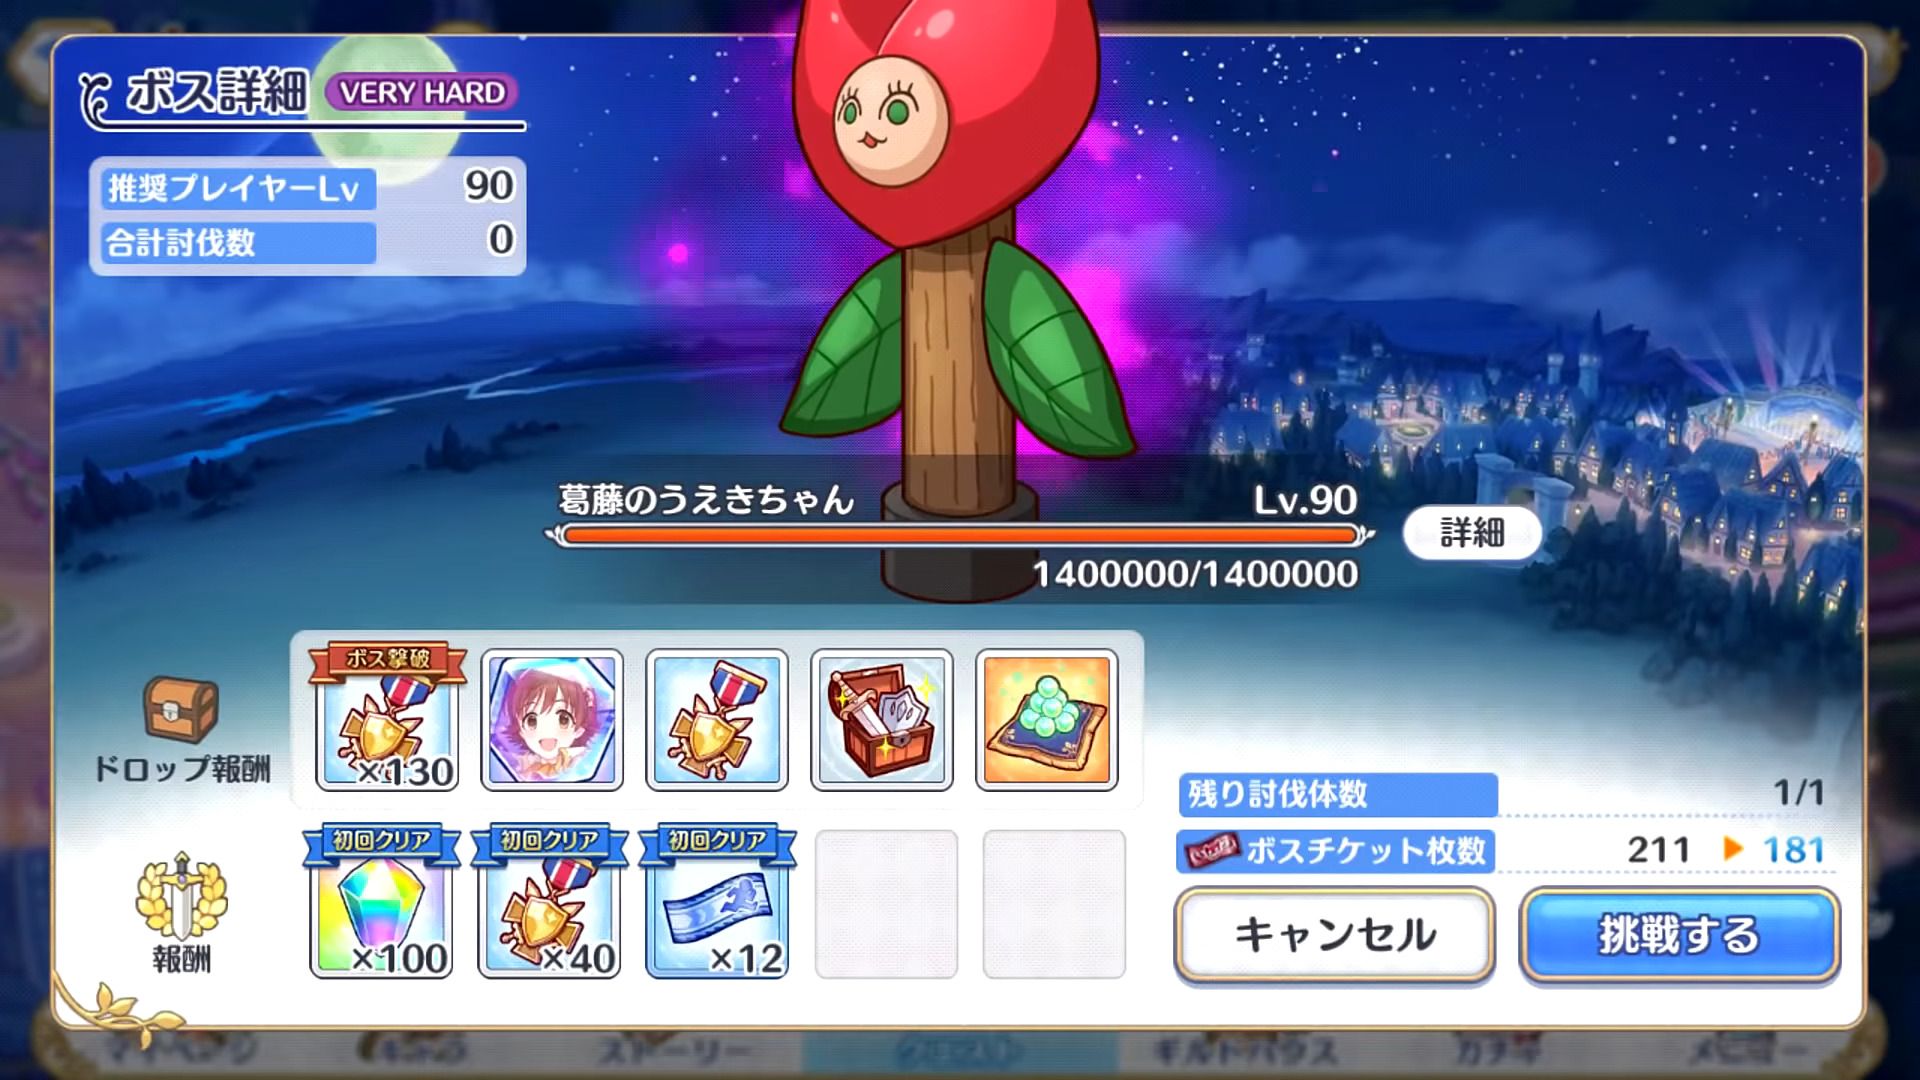
Very Hard Lvl. 90 |
1,400,000 | Deals large magical damage to all enemies and knocks them back. Decreases physical and magical defense. | Deal physical damage to enemies in range and knocks them back. | Summons a wood thing that can't be targeted. The summon will explode and deal magic damage to all enemies in range of it. |
|
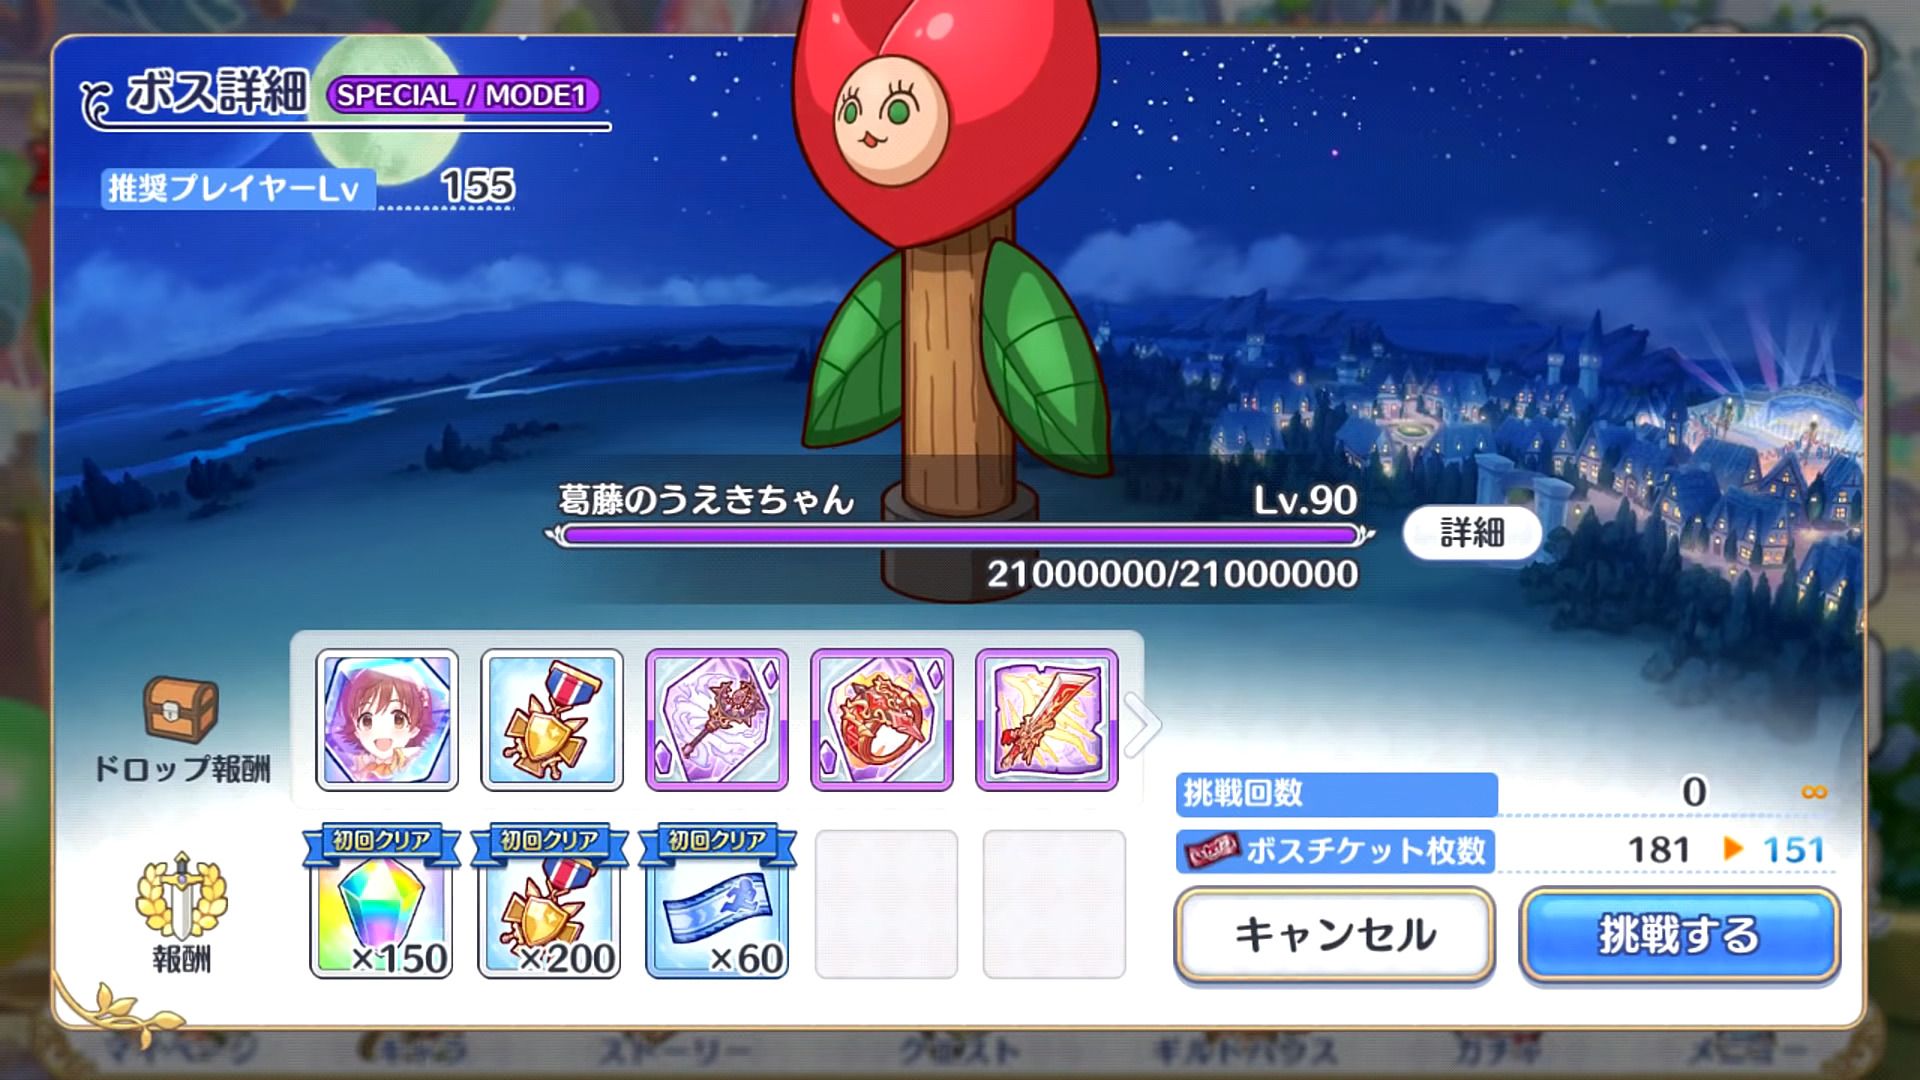
Special Lvl. 90 |
2,100,000 | Deals large magical damage to all enemies and knocks them back. Decreases physical and magical defense. | Deal physical damage to enemies in range and knocks them back. | Summons a wood thing that can't be targeted. The summon will explode and deal magic damage to all enemies in range of it. |
This boss is a multi-target boss so dealing damage to its parts will reduce the defensive stats of the boss. None of the skills are too scary or hard to deal with.
Suggested Teams
Hard Boss
 Yui Yui |
 Shiori Shiori |
 Kokkoro Kokkoro |
 Kaori Kaori |
 Miyako Miyako |
|---|
This is about a F2P composition that gets used a lot. Miyako will be able to tank the frontal damage while Kaori and Shiori should provide enough damage to kill the boss. Other options are more backline damage dealers but just be aware they might get turned into reindeer.
Very Hard Boss
The Very Hard boss adds a second skill where the boss summons an enemy that cannot be attacked or targeted. When it explodes, it deals magic damage to enemies in range.
 Christina Christina |
 Makoto (w/ UE) Makoto (w/ UE) |
 Muimi Muimi |
 Nozomi (w/ UE) Nozomi (w/ UE) |
 Jun (w/ UE) Jun (w/ UE) |
|---|
This is a pretty common team to use against most bosses with some knock back and front damage. Jun and Nozomi will keep your team alive while Muimi, Makoto, and Christina will make short work of the boss.
 Yui (6★) Yui (6★) |
 Rei (6★) Rei (6★) |
 Hiyori (6★) Hiyori (6★) |
 NY Kokkoro NY Kokkoro |
 Princess Pecorine Princess Pecorine |
|---|
Remember when we said 6★ characters are very strong, especially Twinkle Wish? Yeah, this is where they shine. Against bosses and events, they really make short work of them. Obviously, not everyone can build this team but you can show how lucky you've been in farming and rolling gacha. :P
 Kyoka (w/ UE) Kyoka (w/ UE) |
 Karyl (6★) (w/ UE) Karyl (6★) (w/ UE) |
 Neneka Neneka |
 Akari (w/ UE) Akari (w/ UE) |
 Kuka (w/ UE) Kuka (w/ UE) |
|---|
A magic team will also work here against the boss. Akari and Kuka should be enough front line to help your back line mages to do enough damage to kill the boss.
Special Mode
Once you clear the Very Hard boss, you will unlock the Special difficulty. This difficulty is geared toward end-game players and is very difficult. It will likely take 3+ teams to properly clear. It is broken into 3 sections/modes.
Mode 1
| Difficulty | HP | Union Burst | Skill 1 | Skill 2 |
|---|---|---|---|---|
|
Special Lvl. 90 |
21,000,000-15,700,001 | Deals large magical damage to all enemies and knocks them back. Decreases physical and magical defense. | Generates a field that deals magical damage to all enemies and raises their TP. |
Mode 1 is pretty straightforward, the boss basically only uses their regular attack and their UB. They also generate a field that deals magic damage to all of your units but also gives you TP. This is a great place to use characters with good UBs. You'll also need a healer here.
Mode 2
| Difficulty | HP | Union Burst | Skill 1 | Skill 2 |
|---|---|---|---|---|
|
Special Lvl. 90 |
15,700,000 - 4,200,001 | Deals large magical damage to all enemies and knocks them back. Decreases physical and magical defense. | Deal physical damage to enemies in range and knocks them back. | Summons a wood thing that can't be targeted. The summon will explode and deal magic damage to all enemies in range of it. |
Essentially the same as the Very Hard boss except the boss is always 3 targets and they cannot be broken. Just take this opportunity to deal AOE damage to the boss to get rid of its high health pool.
Mode 3
| Difficulty | HP | Union Burst | Skill 1 | Skill 2 |
|---|---|---|---|---|
|
Special Lvl. 90 |
4,200,000 | Deals large magical damage to all enemies and knocks them back. Decreases physical and magical defense. | Deal physical damage to enemies in range and knocks them back. | Summons a wood thing that can't be targeted. The summon will explode and deal magic damage to all enemies in range of it. |
Just an imensively tanky version of the Very Hard boss. Realistically, this part is just a damage sponge and might take more than one team to clear just due to the high health pool once again.
Suggested Teams
Mode 1:
 Yukari (6★) Yukari (6★) |
Christina |
Rei (6★) |
Makoto (w/ UE) |
Muimi |
|---|
This is probably by far the easiest team to use. Yukari (6★) alone provides even survivability with the free TP gained from the boss' skill. Muimi will always have her UB active as well.
| Yukari (6★) |
Christina |
Rei (6★) |
Hiyori (6★) |
Makoto (w/ UE) |
|---|
If you don't have Muimi or just have Hiyori (6★) prepared, this is the team for you. This is slightly easier to farm and doesn't require Muimi.
 Maho (6★) Maho (6★) |
 Karyl (Summer) (w/ UE) Karyl (Summer) (w/ UE) |
 Yui (New Year) (w/ UE) Yui (New Year) (w/ UE) |
 Karyl (New Year) Karyl (New Year) |
Neneka |
|---|
Want to prepare for some clan battle fun? Why not throw in some New Years Bursts and call it a day?
 Luna Luna |
 Kasumi (w/ UE) Kasumi (w/ UE) |
Karyl (New Year) |
Neneka |
Yukari (6★) |
|---|
Want to try yet another clan battle-esque team? Well, look no further. Luna + Karyl (New Year), what could possibly go wrong?
Mode 2:
 Kokkoro (6★) Kokkoro (6★) |
Christina |
Hiyori (6★) |
Makoto (w/ UE) |
Muimi |
|---|
This is about as good of a physical team as you're going to be able to build. Kokkoro will keep the team alive while increasing their action speed. Since the boss is multi-target, we're using Hiyori and Muimi here. Since the boss cannot have their parts broken, we want to push as much damage as we can here while using debuffs.
 Kyoka (Halloween) Kyoka (Halloween) |
Karyl (Summer) (w/ UE) |
Yui (New Year) (w/ UE) |
Karyl (New Year) |
 Saren (w/ UE) Saren (w/ UE) |
|---|
A magic team that just pushes more damage and uses Saren to charge Karyl (New Year) for high damage hits.
| Luna |
Karyl (New Year) |
Neneka |
 Anna (w/ UE) Anna (w/ UE) |
Yukari (6★) |
|---|
At this point, most magic teams look similar to clan battle magic teams. Just watch New Years bursts go off.
Mode 3:
| Yukari (6★) |
Christina |
Rei (6★) |
Makoto (w/ UE) |
Muimi |
|---|
We can go back to using this tried and true team to finish off what is less of the boss.
| Kokkoro (6★) |
Christina |
Makoto (w/ UE) |
Muimi |
Jun (w/ UE) |
|---|
Another strong physical team that can be used with a bit more tanking as it has Jun up front. Use this team if your team is dying.
| Kyoka (Halloween) |
Maho (6★) |
Yui (New Year) (w/ UE) |
Kasumi (w/ UE) |
Karyl (New Year) |
|---|
Last but not least, we have a strong magic team you can use to easily clean up the boss. Who knew that Karyl (New Year) was a strong character?
Starlight Princess Re:M@STER! Story Event Part 1

This is the twenty-fourth story event in the EN/WW server. Events generally give a generous amount of items, mana, jewels, and character memory shards. The memory shards featured in this event are for Chika and Mio (IM@S CG). On top of the rewards, it also adds event story chapters which can be viewed as you complete the event stages.
| Difficulty | HP | Union Burst | Skill 1 | Skill 2 |
|---|---|---|---|---|
 Normal NormalLvl. 25 |
42,000 | Deals large physical damage to all enemies and knocks them back. Reduces own physical and magical defense. | Deal physical damage to an area around the front character and reduce their action speed. | |
|
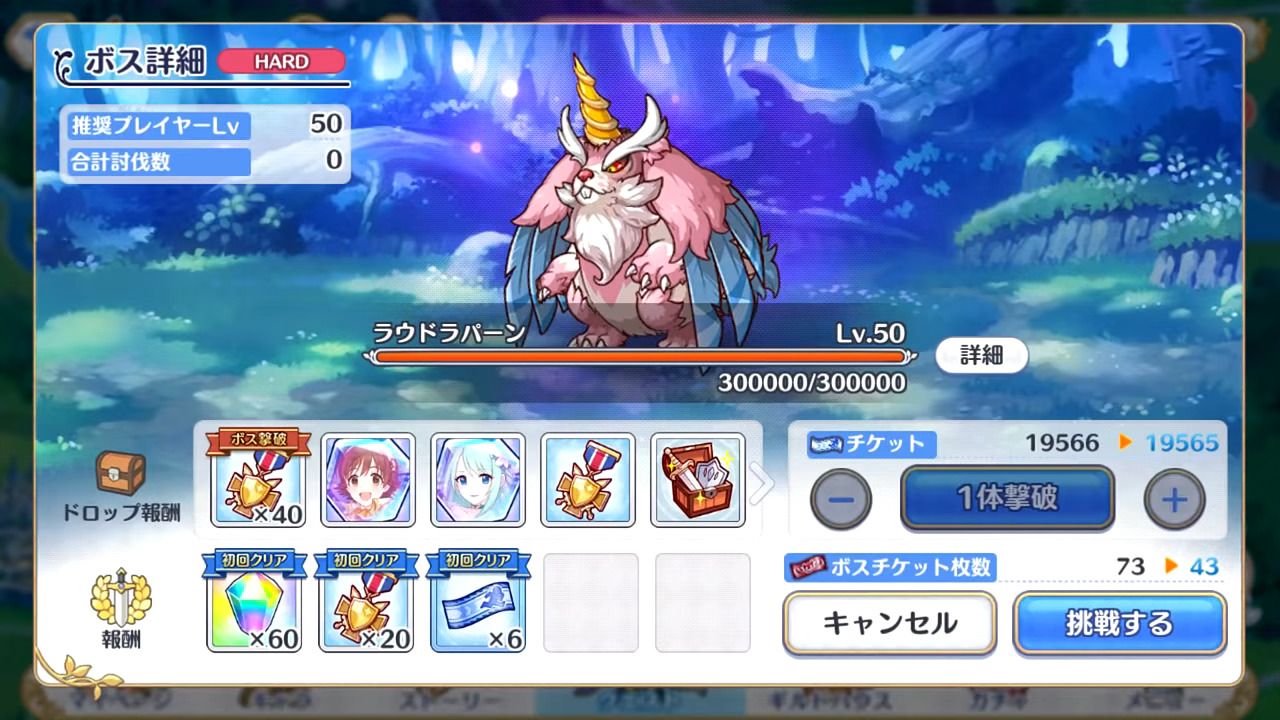
Hard Lvl. 50 |
300,000 | Deals large physical damage to all enemies and knocks them back. Reduces own physical and magical defense. | Deal physical damage to an area around the front character and reduce their action speed. | Deal small physical damage to the front 3 characters and reduce their physical defense. |
|
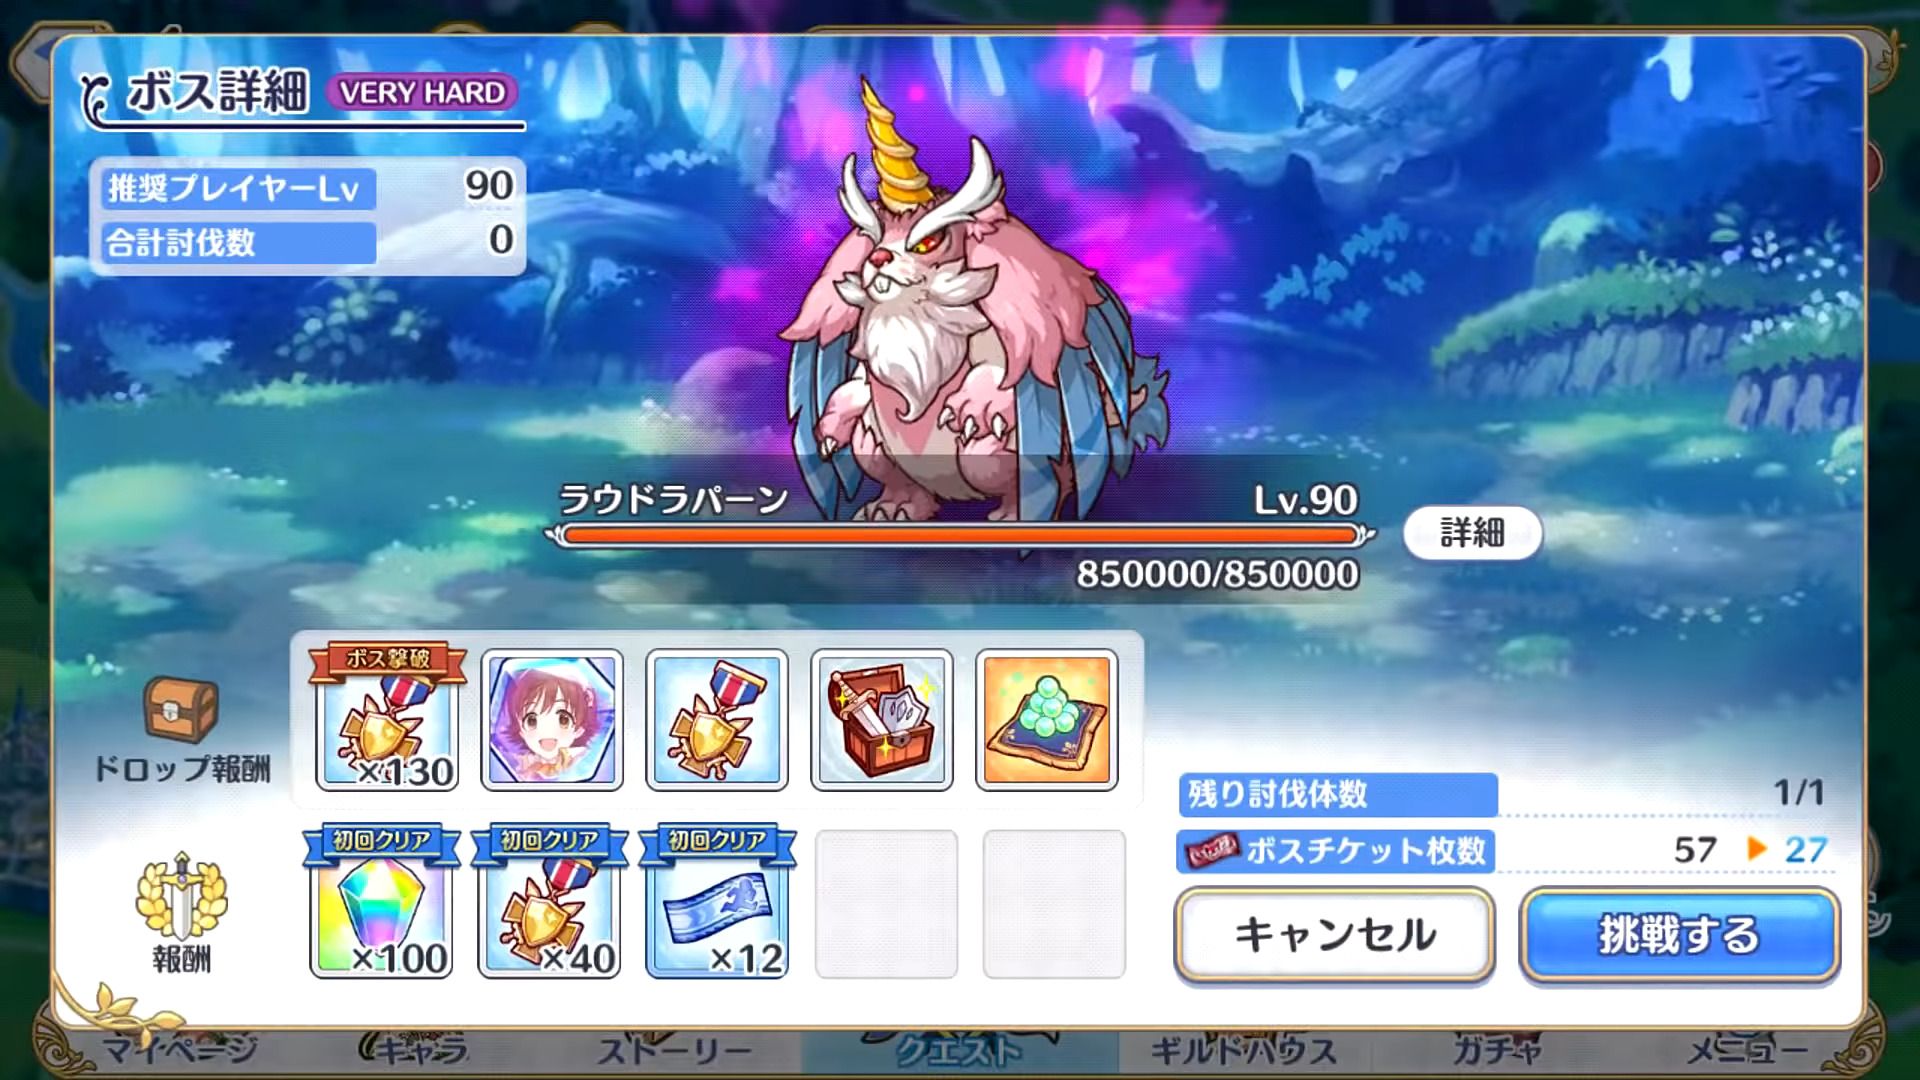
Very Hard Lvl. 90 |
850,000 | Deals large physical damage to all enemies and knocks them back. Reduces own physical and magical defense. | Deal physical damage to an area around the front character and reduce their action speed. | Deal small physical damage to the front 3 characters and reduce their physical defense. |
|
Special Lvl. 90 |
2,200,000 | Deals large physical damage to all enemies and knocks them back. Reduces own physical and magical defense. | Deal physical damage to an area around the front character and reduce their action speed. | Deal small physical damage to the front 3 characters and reduce their physical defense. |
Imagine not having to deal with RNG for once. You'll just need to be careful about unit placement since the front area is kind of a no-go.
Suggested Teams
Hard Boss
| Yui |
Shiori |
Kokkoro |
Kaori |
Miyako |
|---|
This is about a F2P composition that gets used a lot. Miyako will be able to tank the frontal damage while Kaori and Shiori should provide enough damage to kill the boss. Other options are more backline damage dealers.
Very Hard Boss
The Very Hard boss adds another skill which further reduces your physical defense. If you use the right units, this shouldn't be too big of a deal.
| Yui (New Year) (w/ UE) |
Christina |
 Djeeta (w/ UE) Djeeta (w/ UE) |
Makoto (w/ UE) |
Jun (w/ UE) |
|---|
We're back to our standard team. Having Jun up front and Yui (New Year) as a healer will help protect your team. Makoto, Djeeta, and Christina will deal enough damage to take down the boss.
| Shiori (w/ UE) |
 Rino (6★) (w/ UE) Rino (6★) (w/ UE) |
 Arisa (w/ UE) Arisa (w/ UE) |
Kokkoro (6★) (w/ UE) |
Jun (w/ UE) |
|---|
If you want to not have to deal with all the front based damage and debuffs, you can use a strong archer team here. Just slot in 3 archers with Kokkoro and Jun.
| Karyl (Summer) (w/ UE) |
Kasumi (w/ UE) |
Neneka |
Kokkoro (6★) (w/ UE) |
 Lima (6★) (w/ UE) Lima (6★) (w/ UE) |
|---|
A magic team will also work well here. This team will basically help disable the boss while Karyl (Summer) and Neneka make short work of the boss.
Special Mode
Once you clear the Very Hard boss, you will unlock the Special difficulty. This difficulty is geared toward end-game players and is very difficult. It will likely take 3+ teams to properly clear. It is broken into 3 sections/modes.
Mode 1
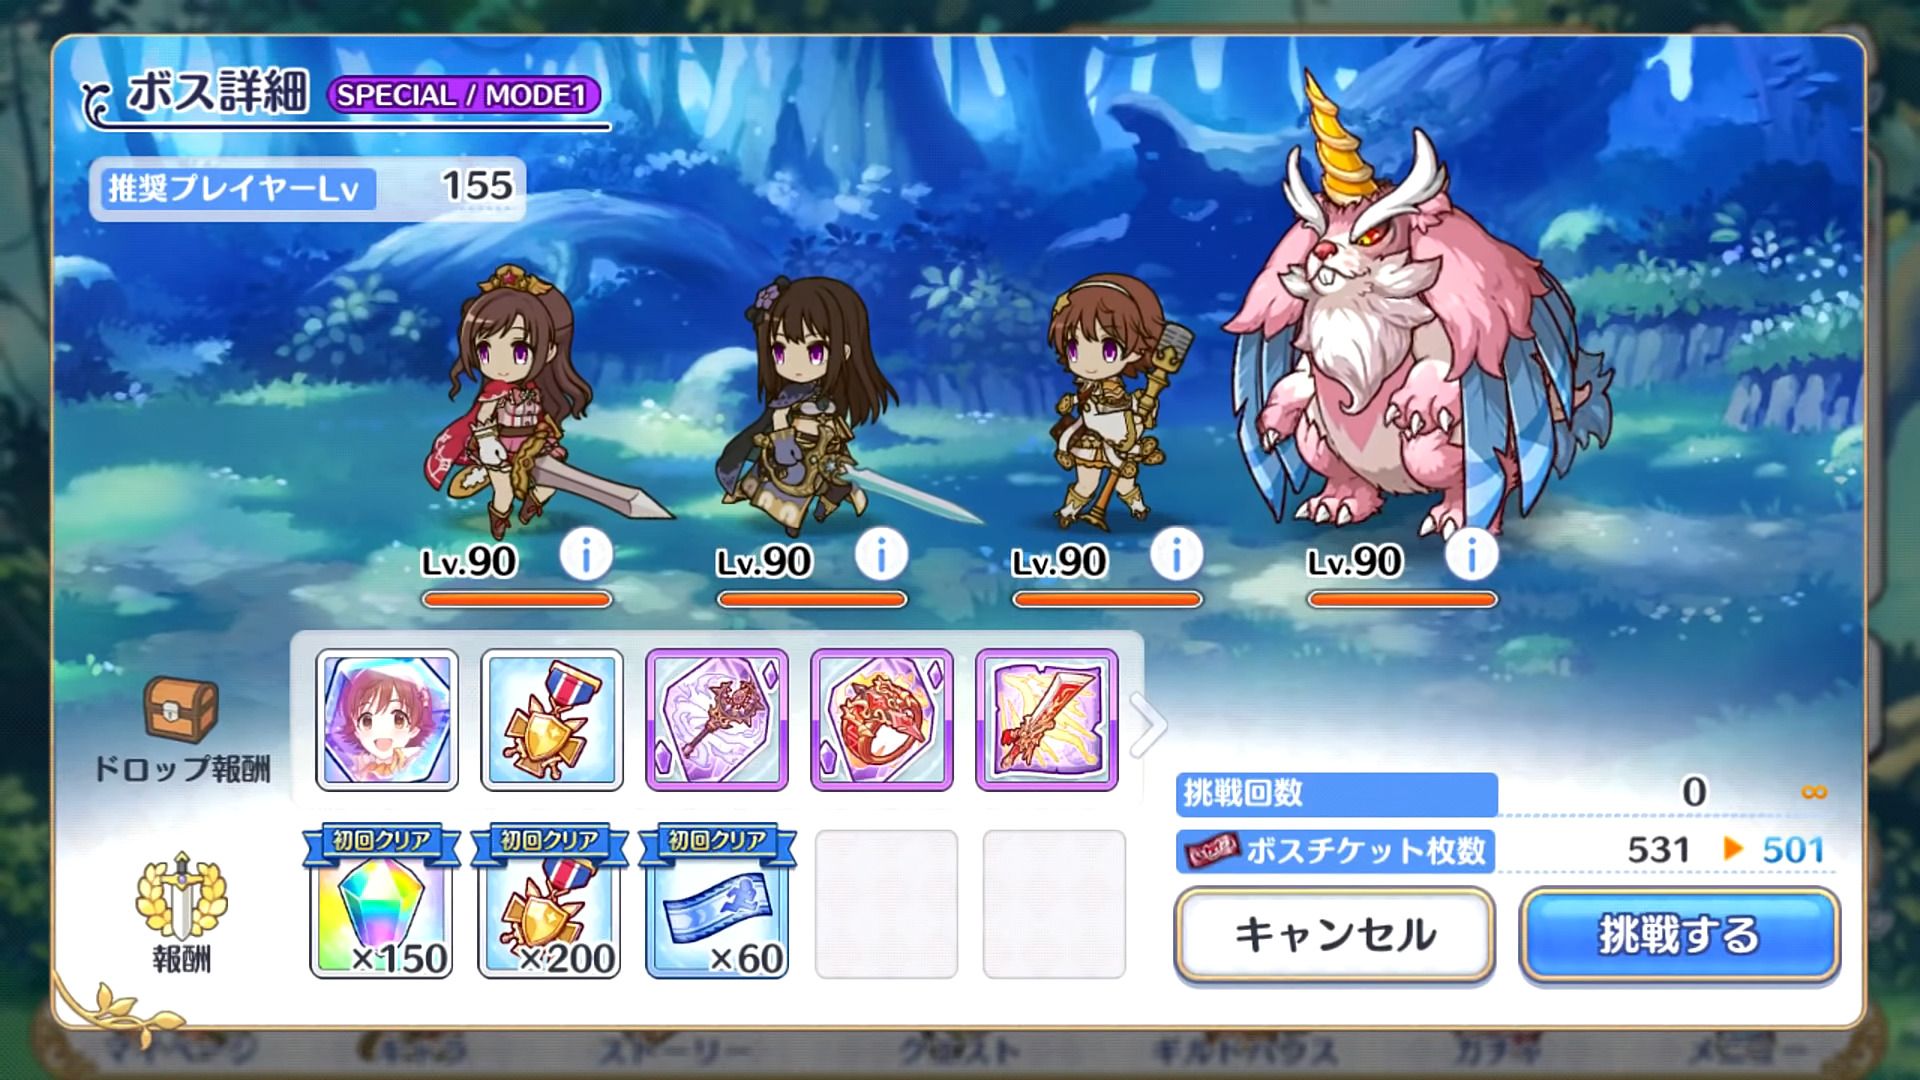
 Shadow Rin (IM@S CG) (Lvl. 90) Shadow Rin (IM@S CG) (Lvl. 90)670,000 HP |
 Shadow Uzuki (IM@S CG) (Lvl. 90) Shadow Uzuki (IM@S CG) (Lvl. 90)870,000 HP |
 Shadow Mio (IM@S CG) (Lvl. 90) Shadow Mio (IM@S CG) (Lvl. 90)600,000 HP |
 Boss (Lvl. 90) Boss (Lvl. 90)2,200,000 HP |
|---|
Mode 1 is dealing with the Shadow units from the IM@S CG collab. It's actually a fairly annoying combination of units, so having the right set of units is important.
Mode 2
 Golem (Lvl. 90) Golem (Lvl. 90)750,000 HP |
 Viper (Lvl. 90) Viper (Lvl. 90)600,000 HP |
 Bird (Lvl. 90) Bird (Lvl. 90)380,000 HP |
 Bird 2 (Lvl. 90) Bird 2 (Lvl. 90)140,000 HP |
Boss (Lvl. 90) 2,200,000 HP |
|---|
Mode 2 is just dealing with a bunch of mobs. Again, pretty easy to deal with here.
Mode 3
| Difficulty | HP | Union Burst | Skill 1 | Skill 2 |
|---|---|---|---|---|
|
Special Lvl. 90 |
2,200,000 | Deals large physical damage to all enemies and knocks them back. Reduces own physical and magical defense. | Deal physical damage to an area around the front character and reduce their action speed. | Deal small physical damage to the front 3 characters and reduce their physical defense. |
Mode 3 is just a souped up version of the Very Hard boss.
Suggested Teams
Mode 1:
| Yukari (6★) (w/ UE) |
Christina |
Makoto (w/ UE) |
Muimi |
Jun (w/ UE) |
|---|
We can use our standard physical team here with Yukari as the healer and support. Jun makes a very strong front line here.
| Karyl (6★) (w/ UE) |
Kasumi (w/ UE) |
Neneka |
Yukari (6★) (w/ UE) |
Kuka (w/ UE) |
|---|
A magic team is also appropriate here. This team will help you easily clear the Shadow units and move you to Mode 2.
Mode 2:
| Karyl (6★) (w/ UE) |
Yui (New Year) (w/ UE) |
Kasumi (w/ UE) |
Neneka |
Yukari (6★) (w/ UE) |
|---|
We're back with another magic team to help clear the mobs. The magic team will give you more overflow time moving into Mode 3.
| Yukari (6★) (w/ UE) |
Christina |
Makoto (w/ UE) |
Muimi |
Jun (w/ UE) |
|---|
You can still use the physical team from Mode 1 but it will take you more time and leave less time for you in Mode 3.
Mode 3:
| Kyoka (w/ UE) |
Yui (New Year) (w/ UE) |
Kasumi (w/ UE) |
Neneka |
Yukari (6★) (w/ UE) |
|---|
A magic team is the best way to clear out the boss in Mode 3. It just does more damage and accumulates faster this way. It also helps that most of your units are further in the back and less affected by the boss' debuffs.
| Kyoka (w/ UE) |
Maho (6★) (w/ UE) |
Karyl (Summer) (w/ UE) |
Kasumi (w/ UE) |
Yukari (6★) (w/ UE) |
|---|
You can also use a team that combines Maho and Karyl (Summer) instead of Neneka and Yui (New Year). Both of these should help clear the boss in a single hit.
Part 1 & Part 2 Rewards
We're finally onto the main point of each of these events: the rewards that come along with it. In addition to the first clear bonuses, there are also a set number of event treasure boxes. Think of it as a mini gacha machine but each one has a set number of items. To roll this treasure gacha box, you get pulls from defeating the event boss and completing daily missions. You do not need to clear out every single item in each box to move on to the next one. However, you will need to obtain the main items in the box. In this case, the main items are the memory shards for the characters. (You would want to collect these anyway.) The contents of each of the boxes are listed below. The endless box also contains shards for Mio (IM@S CG) so if you're down to farm waifu, there is no better way to do so.
| Box One | |
|---|---|
| Item | Quantity |
 Chika Memory Shards x 20 Chika Memory Shards x 20 |
1 |
 Jewels x 5 Jewels x 5 |
5 |
 Divine Amulets Divine Amulets |
20 |
 Skip Tickets Skip Tickets |
15 |
 Mana x 7,000 Mana x 7,000 |
20 |
 Rupies x 100 Rupies x 100 |
10 |
 Random Equipment Random Equipment |
300 |
 Superior Refinement Crystals Superior Refinement Crystals |
5 |
 Enhanced Refinement Crystals Enhanced Refinement Crystals |
10 |
 Refinement Crystals Refinement Crystals |
15 |
 Super EXP Potion Super EXP Potion |
5 |
 EXP Potion EXP Potion |
10 |
 Mini EXP Potion Mini EXP Potion |
15 |
| Total | 431 |
| Box Two | |
|---|---|
| Item | Quantity |
 Mio (IM@S CG) Memory Shards x 25 Mio (IM@S CG) Memory Shards x 25 |
1 |
|
Jewels x 10 |
10 |
|
Divine Amulets |
25 |
|
Skip Tickets |
20 |
|
Mana x 8,000 |
30 |
|
Rupies x 200 |
15 |
|
Random Equipment |
380 |
|
Superior Refinement Crystals |
7 |
|
Enhanced Refinement Crystals |
12 |
|
Refinement Crystals |
17 |
|
Super EXP Potion |
7 |
|
EXP Potion |
12 |
|
Mini EXP Potion |
17 |
| Total | 553 |
| Box Three | |
|---|---|
| Item | Quantity |
|
Chika Memory Shards x 30 |
1 |
|
Jewels x 15 |
15 |
|
Divine Amulets |
30 |
|
Skip Tickets |
20 |
|
Mana x 9,000 |
40 |
|
Rupies x 300 |
20 |
|
Random Equipment |
480 |
|
Superior Refinement Crystals |
9 |
|
Enhanced Refinement Crystals |
14 |
|
Refinement Crystals |
19 |
|
Super EXP Potion |
9 |
|
EXP Potion |
14 |
|
Mini EXP Potion |
19 |
| Total | 690 |
| Box Four | |
|---|---|
| Item | Quantity |
|
Mio (IM@S CG) Memory Shards x 40 |
1 |
|
Jewels x 25 |
20 |
|
Divine Amulets |
35 |
|
Skip Tickets |
25 |
|
Mana x 10,000 |
50 |
|
Rupies x 250 |
30 |
|
Random Equipment |
550 |
|
Superior Refinement Crystals |
11 |
|
Enhanced Refinement Crystals |
16 |
|
Refinement Crystals |
21 |
|
Super EXP Potion |
11 |
|
EXP Potion |
16 |
|
Mini EXP Potion |
21 |
| Total | 807 |
| Box Five+ | |
|---|---|
| Item | Quantity |
|
Mio (IM@S CG) Memory Shards x 3 |
1 |
|
Skip Tickets |
10 |
|
Mana x 10,000 |
30 |
|
Rupies x 250 |
20 |
|
Random Equipment |
100 |
|
Superior Refinement Crystals |
5 |
|
Enhanced Refinement Crystals |
10 |
|
Refinement Crystals |
15 |
|
Super EXP Potion |
5 |
|
EXP Potion |
10 |
|
Mini EXP Potion |
15 |
| Total | 226 |
Total Memory Shards
A breakdown of all the possible memory shards gained from missions, story, and the boxes are listed here:
| Location | Chika | Mio (IM@S CG) |
|---|---|---|
| Story Reward | 4 | 4 |
| Normal Quests | 2 | 2 |
| Hard Quests | 6 | 9 |
| Treasure Box | 50 | 65 |
| Event Missions | N/A | 26 |
| Total | 62 | 106 |
Note: This does not include memory shards from hard mission drops. These only include the ones you are guaranteed to get assuming you complete the tasks.
That brings us to the end of the Starlight Princess Re:M@STER! story event guide. Good luck to everyone pulling for for the IM@S CG characters!
Last Update: February 12, 2023