Welcome back to another edition of our Princess Connect! Re: Dive story event guides! It might be a bit early for Halloween but Little Lyrical is all dressed up to go collect some candy! All the information is from the JP server when they first ran the event, and if past events are anything to go by, we should be following the same reward chart. Let the lessons begin!
Kyoka (Halloween) Limited Focus Gacha
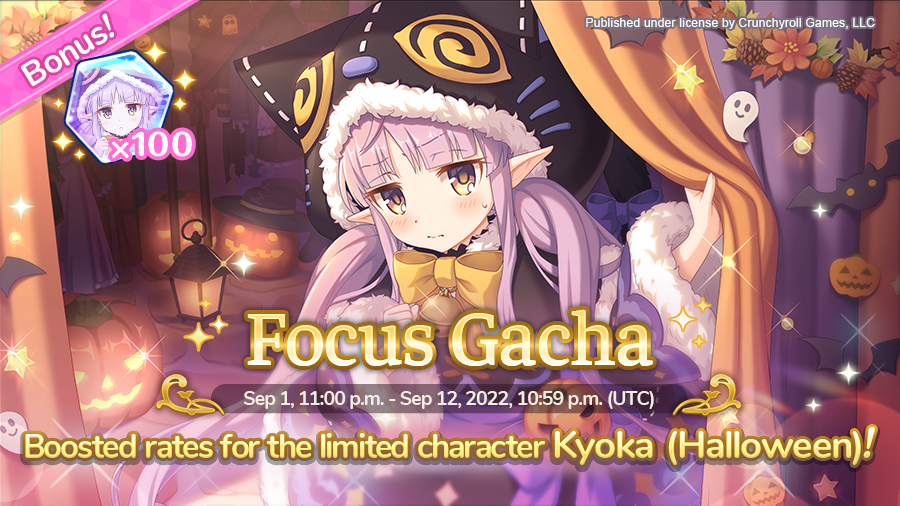
This marks the start of the second year Halloween banners. Of the two, Kyoka (Halloween) is by far the stronger of the two. She is a strong magic support and solely exists to buff your magic attack and lower the enemy's magic defense. Put it simply, she is a very strong support character for your mage team. If you're competitive in CB, this is a unit you'll want to pull. If you do roll her, you'll get 100 memory shards too.
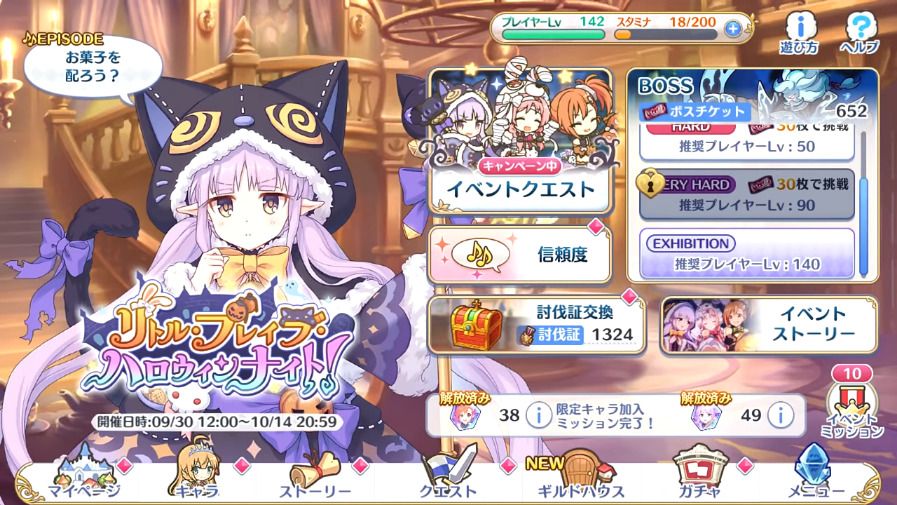
Little Brave Halloween Night! Story Event
This is the nineteenth story event in the EN/WW server. Events generally give a generous amount of items, mana, jewels, and character memory shards. The memory shards featured in this event are for Kyoka and Misogi (Halloween). You will also get a free character in 1* Misogi (Halloween). On top of the rewards, it also adds event story chapters which can be viewed as you complete the event stages.
Boss Battle
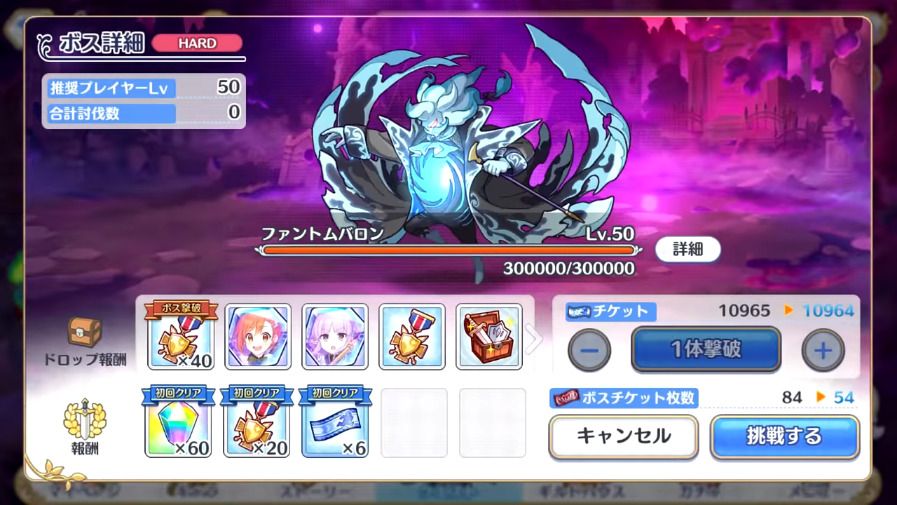
As with the previous Very Hard boss, this one is much easier just due to our wider variety of characters and increased levels and rank. Completing it in one hit is entirely possible. You get quite a bit more rewards from it and you can only complete it once a day. Don't worry, we've got you covered and will post some sample teams below.
To fight the boss you'll need to obtain enough boss tickets. Each of the stages you clear from the event will provide boss tickets. The boss will come in normal, hard, and very hard. The normal boss should be easily cleared with any team while hard may pose a bit more of a challenge. Very Hard, as previously stated will be a tougher one. Clearing bosses will also provide tokens to be used on the event treasure box. This is the real reason you'll be farming the event. We'll touch on this later on in the article.
The Hard boss can be done using skip tickets after clearing the boss 3 times. This will help speed up the process once you've done your daily Very Hard stage.
There is also another stage known as Special which you will unlock once you have beaten the Very Hard boss. This stage is where the majority of the difficulty for the event is. Clearing out missions related to this special stage will give a plethora of rewards. It'll just take a lot of boss tickets. We'll go more into it later on in the article.
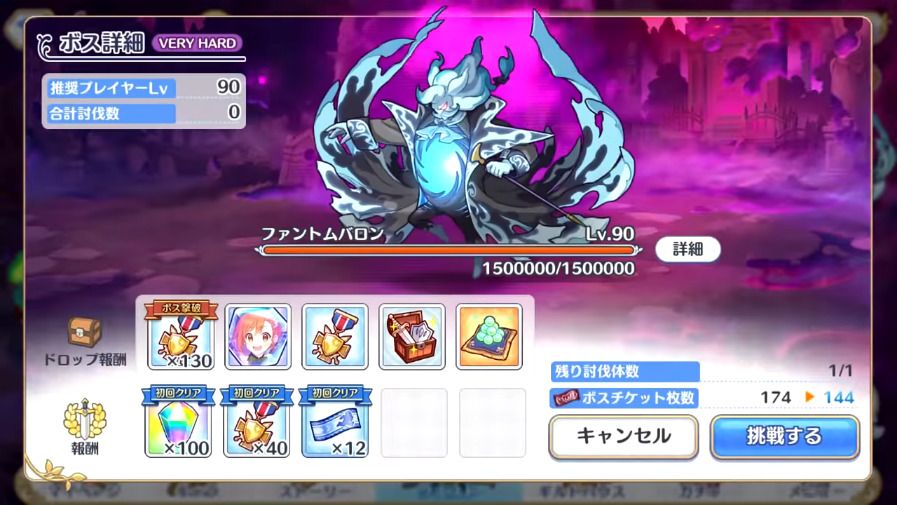
The hard, very hard, and special boss will have a larger pool of HP and also additional skills. Of course, with a more difficult boss, the rewards will also be greater. We will recommend some potential parties below for those struggling to clear the hard and very hard versions of the boss.
| Difficulty | HP | Union Burst | Skill 1 | Skill 2 |
|---|---|---|---|---|
|
Lvl. 25 |
42,000 | Deals large magic damage to all enemies according to their max HP and lowers their magic defense. | Deals medium magic damage to the front three characters and knocks them back and deals additional large magic damage to the closest enemy. | |
|
Lvl. 50 |
300,000 | Deals large magic damage to all enemies according to their max HP and lowers their magic defense. | Deals medium magic damage to the front three characters and knocks them back and deals additional large magic damage to the closest enemy. | Deals medium physical damage to the furthest(back) character, pulls them forward and, stuns them. |
|
Lvl. 90 |
1,500,000 | Deals large magic damage to all enemies according to their max HP and lowers their magic defense. | Deals medium magic damage to the front three characters and knocks them back and deals additional large magic damage to the closest enemy. | Deals medium physical damage to the furthest(back) character, pulls them forward and, stuns them. |
|
Lvl. 90 |
3,750,000 | Deals large magic damage to all enemies according to their max HP and lowers their magic defense. | Deals medium magic damage to the front three characters and knocks them back and deals additional large magic damage to the closest enemy. | Deals medium physical damage to the furthest(back) character, pulls them forward and, stuns them. |
This boss is quite annoying to say the least. The combination of displacement and pulling your back character to the front can cause problems without the right combination of units. We'll have some teams to help you clear out this boss. Just note the boss does mostly magic damage as the regular attack is also magic.
Suggested Teams
Hard Boss

Honestly, you can throw just about any of your units at this and beat the Hard version of this boss. Let's just use about the easiest to farm units for this. This worked in JP assuming your characters are rank 9 and above and around level 90 or so. You may need to level up your characters or try different combinations to get a decent clear. The boss move set for Hard is the same as the normal boss with a higher health bar and more damage.
This is about a F2P composition that gets used a lot. Miyako will be able to tank the frontal damage while Kaori and Shiori should provide enough damage to kill the boss. If your Kaori is not strong enough to tank the boss, you might want to switch her out with a second tank and place different units behind for DPS. If Yui dies due to the pull, you can use a different healer or focus more on damage.
Very Hard Boss

The Very Hard boss is where it gets a bit complicated. Juggling between the large amount of magic damage and the displacement is annoying. The boss hits mostly the front unit but also pulls in the back unit. In addition, it does magic damage to the whole team and even more to the front most unit. The good news is that there are pretty good team compositions to counter this.
This first team is probably the safest team to run. Jun excels here due to her skill and the defense down really helps your physical team get through the boss. Rin is a great healer here as she both heals and provides magical defense which is essential in this fight. She also doesn't get too affected if she gets pulled to the front compared to most other healers.
If you find the above composition to be lacking in damage a bit, you can replace Rin with Christina. Since Christina gains physical invulnerability, she can easily dodge the pull. This team will clear the boss faster but is also riskier if your team isn't fully leveled as there is no healer aside from Jun.
A magic team that runs Misato is also quite effective here since it has fairly high survivability against magic damage. Kuka can be replaced with Kuka (Oedo) who makes for an even better tank against the boss.
Special Mode
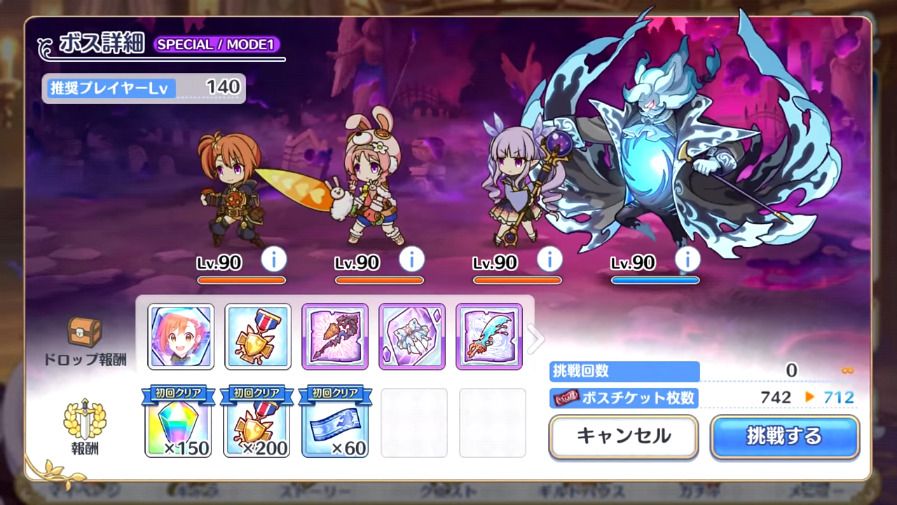
Once you clear the Very Hard boss, you will unlock the Special difficulty. This difficulty is geared toward end-game players and is very difficult. It will likely take 3+ teams to properly clear. It is broken into 3 sections/modes.
Mode 1
830,000 HP |
680,000 HP |
570,000 HP |
3,750,000 HP |
|---|
Mode 1 here is pretty standard fare. You're fighting the shadow versions of Little Lyrical with the boss hiding in the back. You'll move on to the second mode once you clear out the Little Lyrical Shadow units.
Mode 2
| Difficulty | HP | Union Burst | Skill 1 | Skill 2 |
|---|---|---|---|---|
|
Lvl. 90 |
3,750,000 to 1,875,001 | Deals large magic damage to all enemies according to their max HP and lowers their magic defense. | Deals medium physical damage to the furthest(back) character, pulls them forward and, stuns them. | Deals medium magic damage to the front three characters and lowers their TP. Increases own TP. Removes physical damage buffs and deals deals large magical damage to magic damage dealers. |
In Mode 2, you will feel pain. The boss not only displaces your furthest character in the back and pushes them up front but it also reduces the TP of your front three characters. It also removes physical damage buffs from your front units and does additional damage to mages. This is a bit tough and requires some thoughtful team building.
Mode 3
| Difficulty | HP | Union Burst | Skill 1 | Skill 2 |
|---|---|---|---|---|
|
Lvl. 90 |
1,875,000 | Deals large magic damage to all enemies according to their max HP and lowers their magic defense. | Deals medium magic damage to the front three characters and knocks them back and deals additional large magic damage to the closest enemy. | Deals medium physical damage to the furthest(back) character, pulls them forward and, stuns them. |
This is basically the Very Hard boss with more HP and overall stronger. You can use the majority of the teams from the Very Hard boss section.
Suggested Teams
Mode 1:
This team composition is probably the easiest to use as it basically takes one of the Very Hard boss teams and uses Shinobu instead. The objective is to kill the Little Lyrical Shadow units as fast as possible. This physical team will easily do the trick.
If you have a mage team built, you can also use your standard assortment of mages to clear through the Shadow units. Combining the damage from Neneka, Karyl (Summer), and Kyoka will get you through the Shadow units pretty quickly.
Mode 2:
As stated above, the second mode is probably the most annoying part of this SP mission. You can uses mages as above but you'll need to have Yukari up front to tank all the damage. You can replace Yui (New Year) with Io (Summer) if you don't have her.
If you rolled Kyoka (Halloween), she can replace Karyl (Summer) in the above team.
A physical team can also be used here but it requires pretty specific units and needs Ruka up front to tank. You can replace Makoto (Summer) with Christina or Aoi (School) if she is too squishy on your team. Kokoro must be 6★ for this. You can attempt to substitute her with Chika.
Mode 3:
If you used this team for Mode 2, you can also use it to clear out Mode 3. It's a pretty strong team against this boss.
An alternative magic team if you do not have Yui (New Year) and also want to use Kyoka (Halloween). This team uses Kasumi to help you with the boss.
You can also pretty easily use a physical team here as well. Kokoro (6★) can be replaced with Rin or Chika if you don't have her ascended yet. Otherwise, you shouldn't run into too many problems with the healing from Kokoro and Jun.
Rewards
We're finally onto the main point of each of these events: the rewards that come along with it. In addition to the first clear bonuses, there are also a set number of event treasure boxes. Think of it as a mini gacha machine but each one has a set number of items. To roll this treasure gacha box, you get pulls from defeating the event boss and completing daily missions. You do not need to clear out every single item in each box to move on to the next one. However, you will need to obtain the main items in the box. In this case, the main items are the memory shards for the characters. (You would want to collect these anyway.) The contents of each of the boxes are listed below. The endless box also contains shards for Misogi (Halloween) so if you're down to farm her, there is no better way to do so. She's pretty strong in arena and you'll be dreading her bombs soon enough.
| Box One | |
|---|---|
| Item | Quantity |
|
|
1 |
|
|
5 |
|
|
20 |
|
|
15 |
|
|
20 |
|
|
10 |
|
|
300 |
|
|
5 |
|
|
10 |
|
|
15 |
|
|
5 |
|
|
10 |
|
|
15 |
| Total | 431 |
| Box Two | |
|---|---|
| Item | Quantity |
|
|
1 |
|
|
10 |
|
|
25 |
|
|
20 |
|
|
30 |
|
|
15 |
|
|
380 |
|
|
7 |
|
|
12 |
|
|
17 |
|
|
7 |
|
|
12 |
|
|
17 |
| Total | 553 |
| Box Three | |
|---|---|
| Item | Quantity |
|
|
1 |
|
|
15 |
|
|
30 |
|
|
20 |
|
|
40 |
|
|
20 |
|
|
480 |
|
|
9 |
|
|
14 |
|
|
19 |
|
|
9 |
|
|
14 |
|
|
19 |
| Total | 690 |
| Box Four | |
|---|---|
| Item | Quantity |
|
|
1 |
|
|
20 |
|
|
35 |
|
|
25 |
|
|
50 |
|
|
30 |
|
|
550 |
|
|
11 |
|
|
16 |
|
|
21 |
|
|
11 |
|
|
16 |
|
|
21 |
| Total | 807 |
| Box Five+ | |
|---|---|
| Item | Quantity |
|
|
1 |
|
|
10 |
|
|
30 |
|
|
20 |
|
|
100 |
|
|
5 |
|
|
10 |
|
|
15 |
|
|
5 |
|
|
10 |
|
|
15 |
| Total | 226 |
Total Memory Shards
A breakdown of all the possible memory shards gained from missions, story, and the boxes are listed here:
| Location | Kyoka | Misogi (Halloween) |
|---|---|---|
| Story Reward | 4 | 4 |
| Normal Quests | 2 | 2 |
| Hard Quests | 6 | 9 |
| Treasure Box | 50 | 65 |
| Event Missions | N/A | 26 |
| Total | 62 | 106 |
Note: This does not include memory shards from hard mission drops. These only include the ones you are guaranteed to get assuming you complete the tasks.
Just like that we've reached the end of our guide for the Little Brave Halloween Night! story event. Best of luck to you if you're planning to roll for Kyoka (Halloween)! See you all next time.
Last Update: September 1, 2022
