
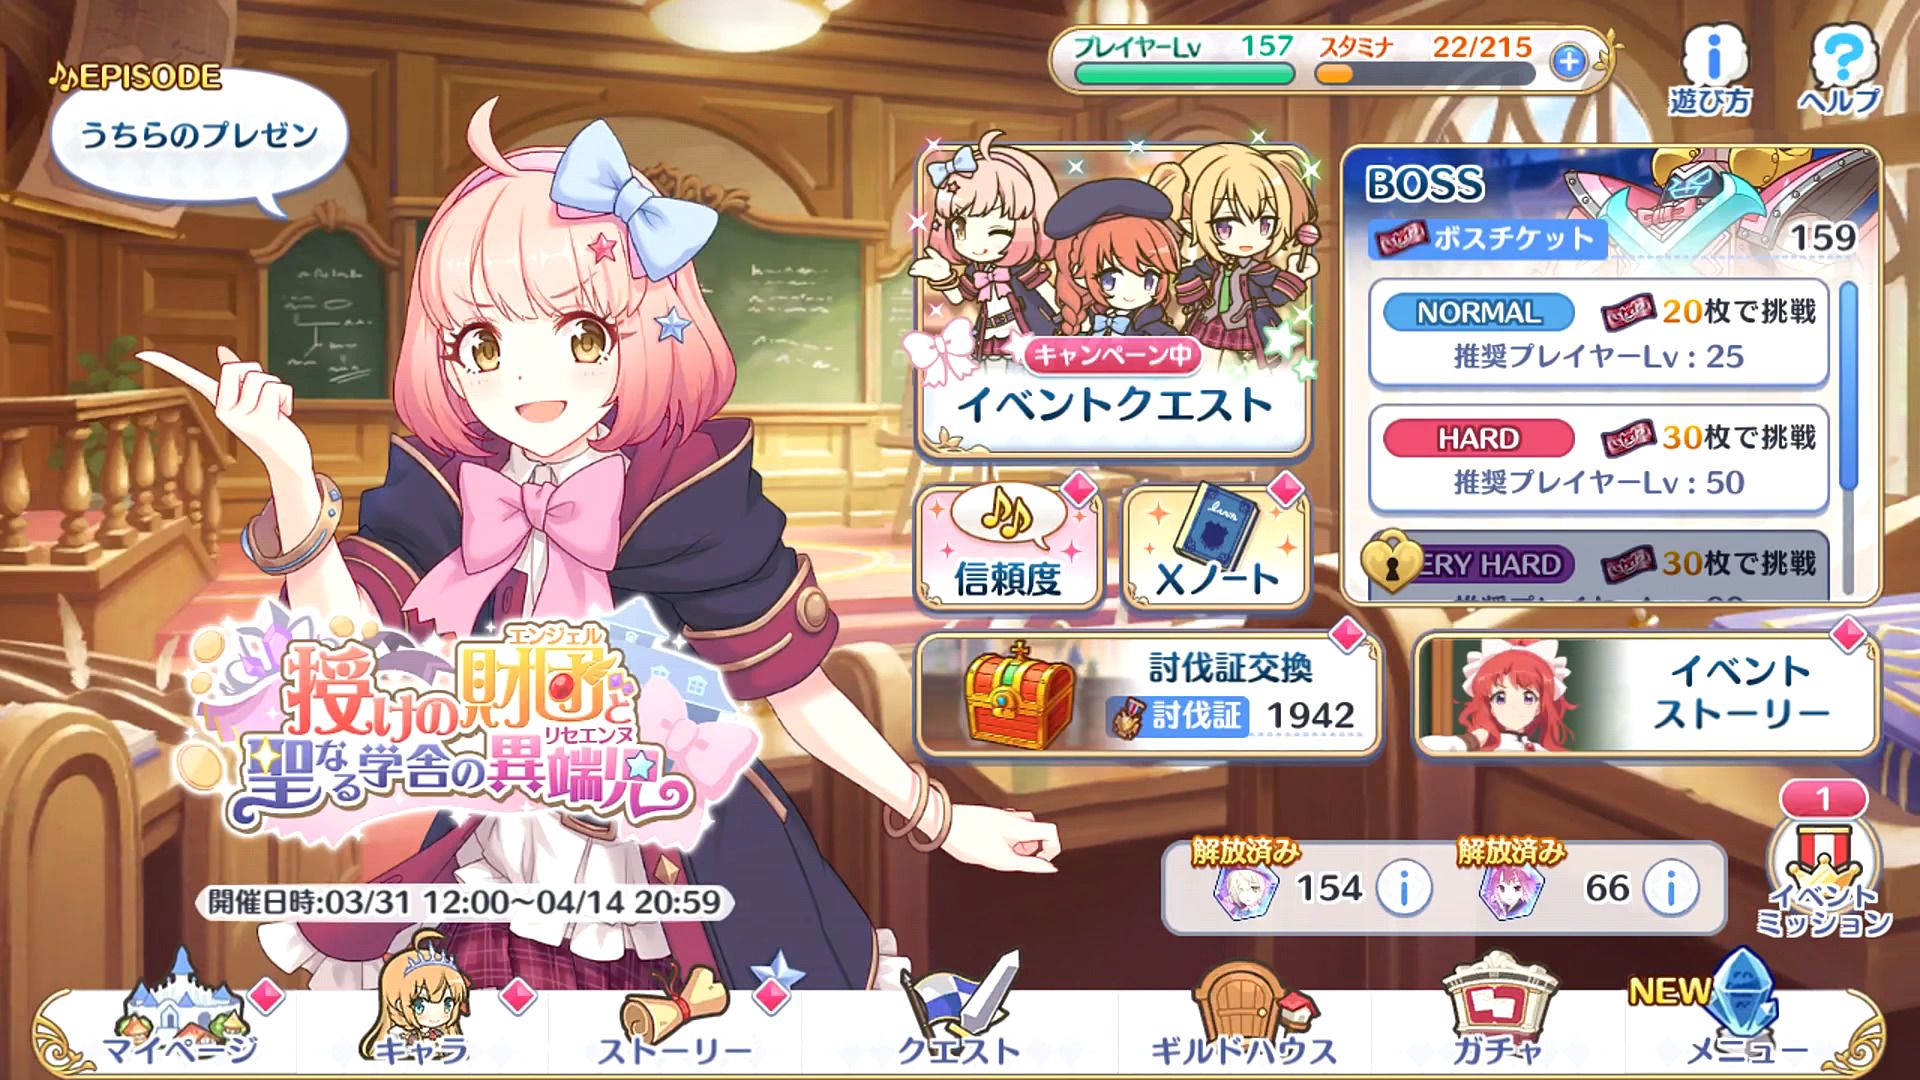
Welcome back to another edition of our Princess Connect! Re: Dive story event guides! We're here with The Angelic Foundation and the Saintly School Lycéennes featuring the Friendship Club once again! Chieru, Chieru, Chieru, and Chieru. Well maybe a splash of Chloe and Yuni. We'll be following our abbreviated format for this guide. If you need additional details, please see our previous guide with more details here.
Yuni Focus Gacha
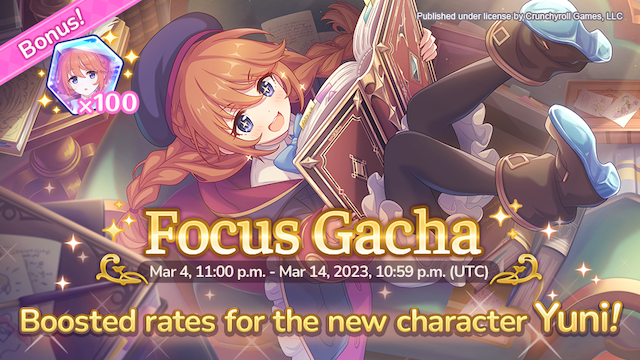
What can we say here? Yuni is a very strong support character and will see a lot of use. She's also Professor Yuni. The only negative is that she is in the permanent pool and will also have farmable shards in the future. She's strong but depending on how many jewels you have left, you might want to save your rolls for something else.
The Angelic Foundation and the Saintly School Lycéennes Story Event

This is the twenty-fifth story event in the EN/WW server. Events generally give a generous amount of items, mana, jewels, and character memory shards. The memory shards featured in this event are for Tamaki and Aoi (Student). On top of the rewards, it also adds event story chapters which can be viewed as you complete the event stages.
| Difficulty | HP | Union Burst | Skill 1 | Skill 2 |
|---|---|---|---|---|
 Normal NormalLvl. 25 |
48,000 | Deals magical damage to all enemies. | Increases own physical damage and deals physical damage to all enemies. | Deals large magic damage to the 3 front enemies and reduces their magic defense and action speed. |
|
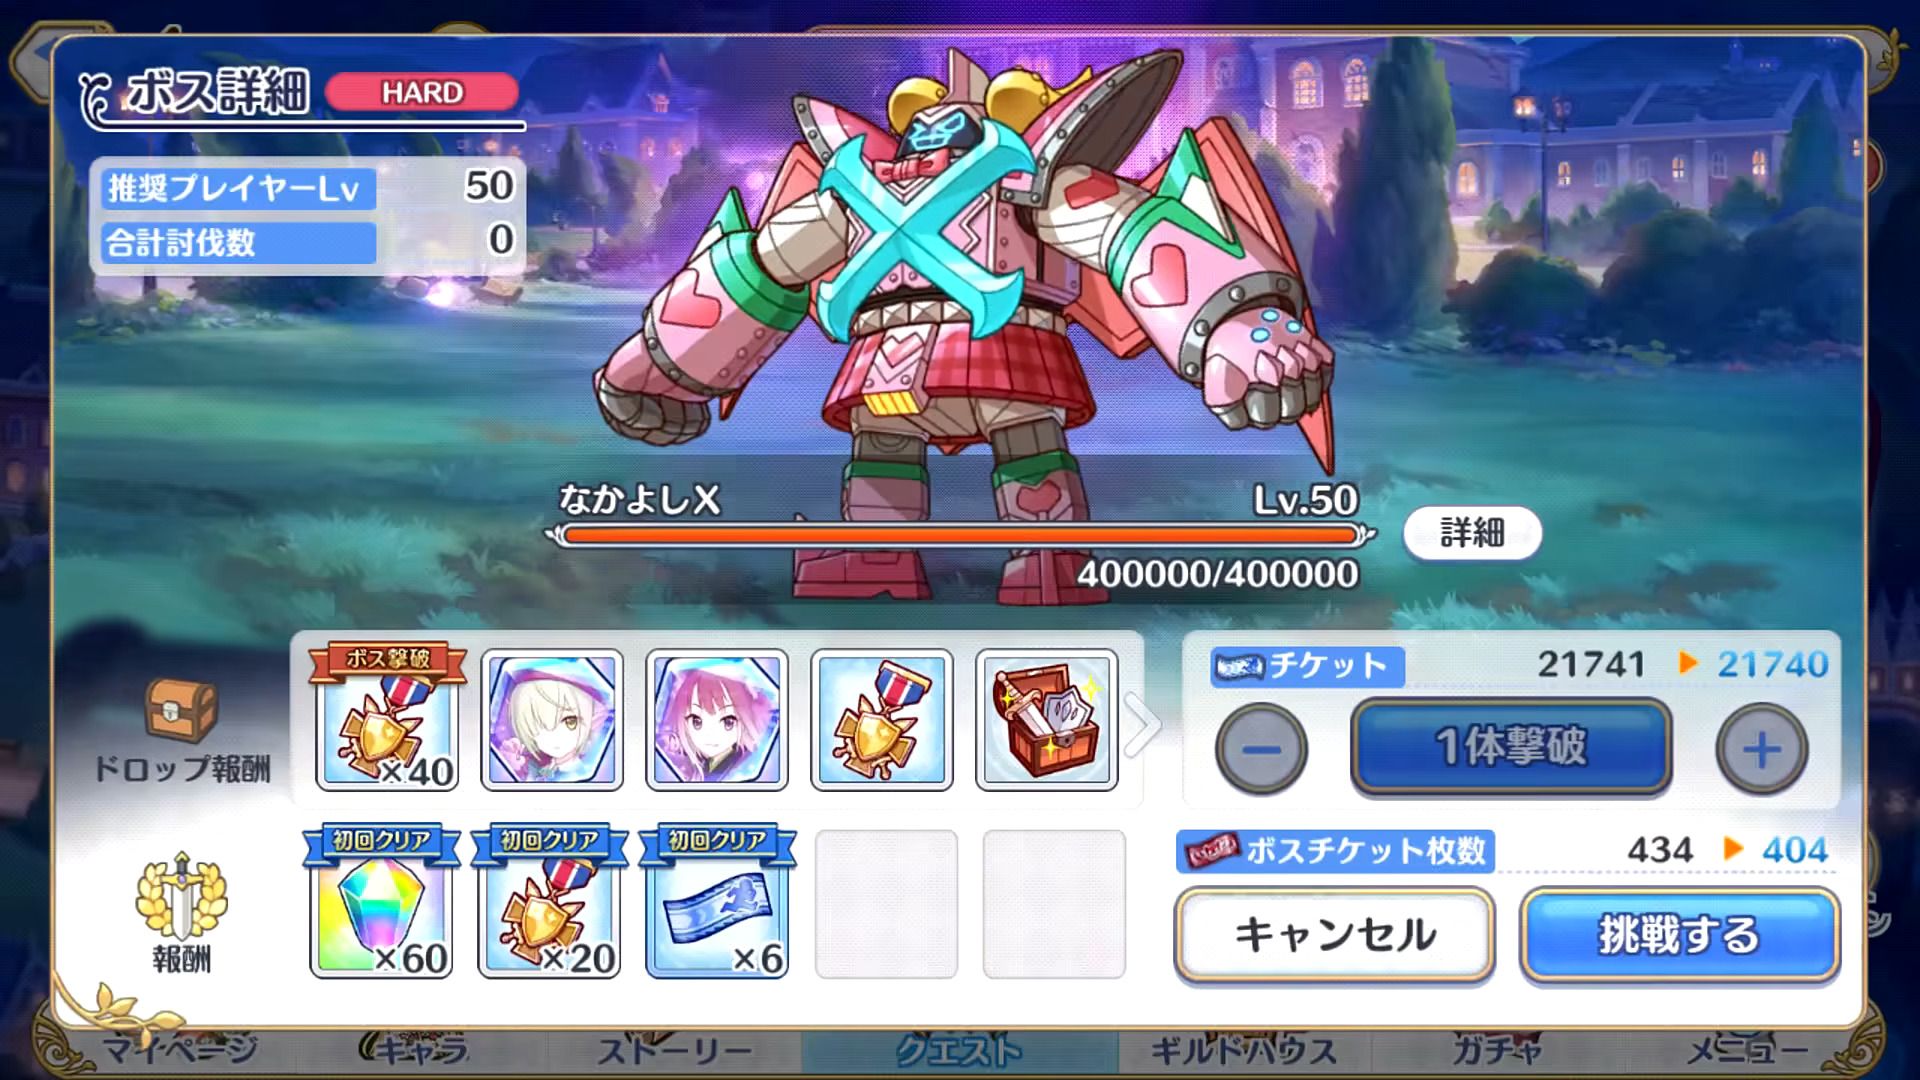
Hard Lvl. 50 |
400,000 | Deals magical damage to all enemies. | Increases own physical damage and deals physical damage to all enemies. | Deals large magic damage to the 3 front enemies and reduces their magic defense and action speed. |
|
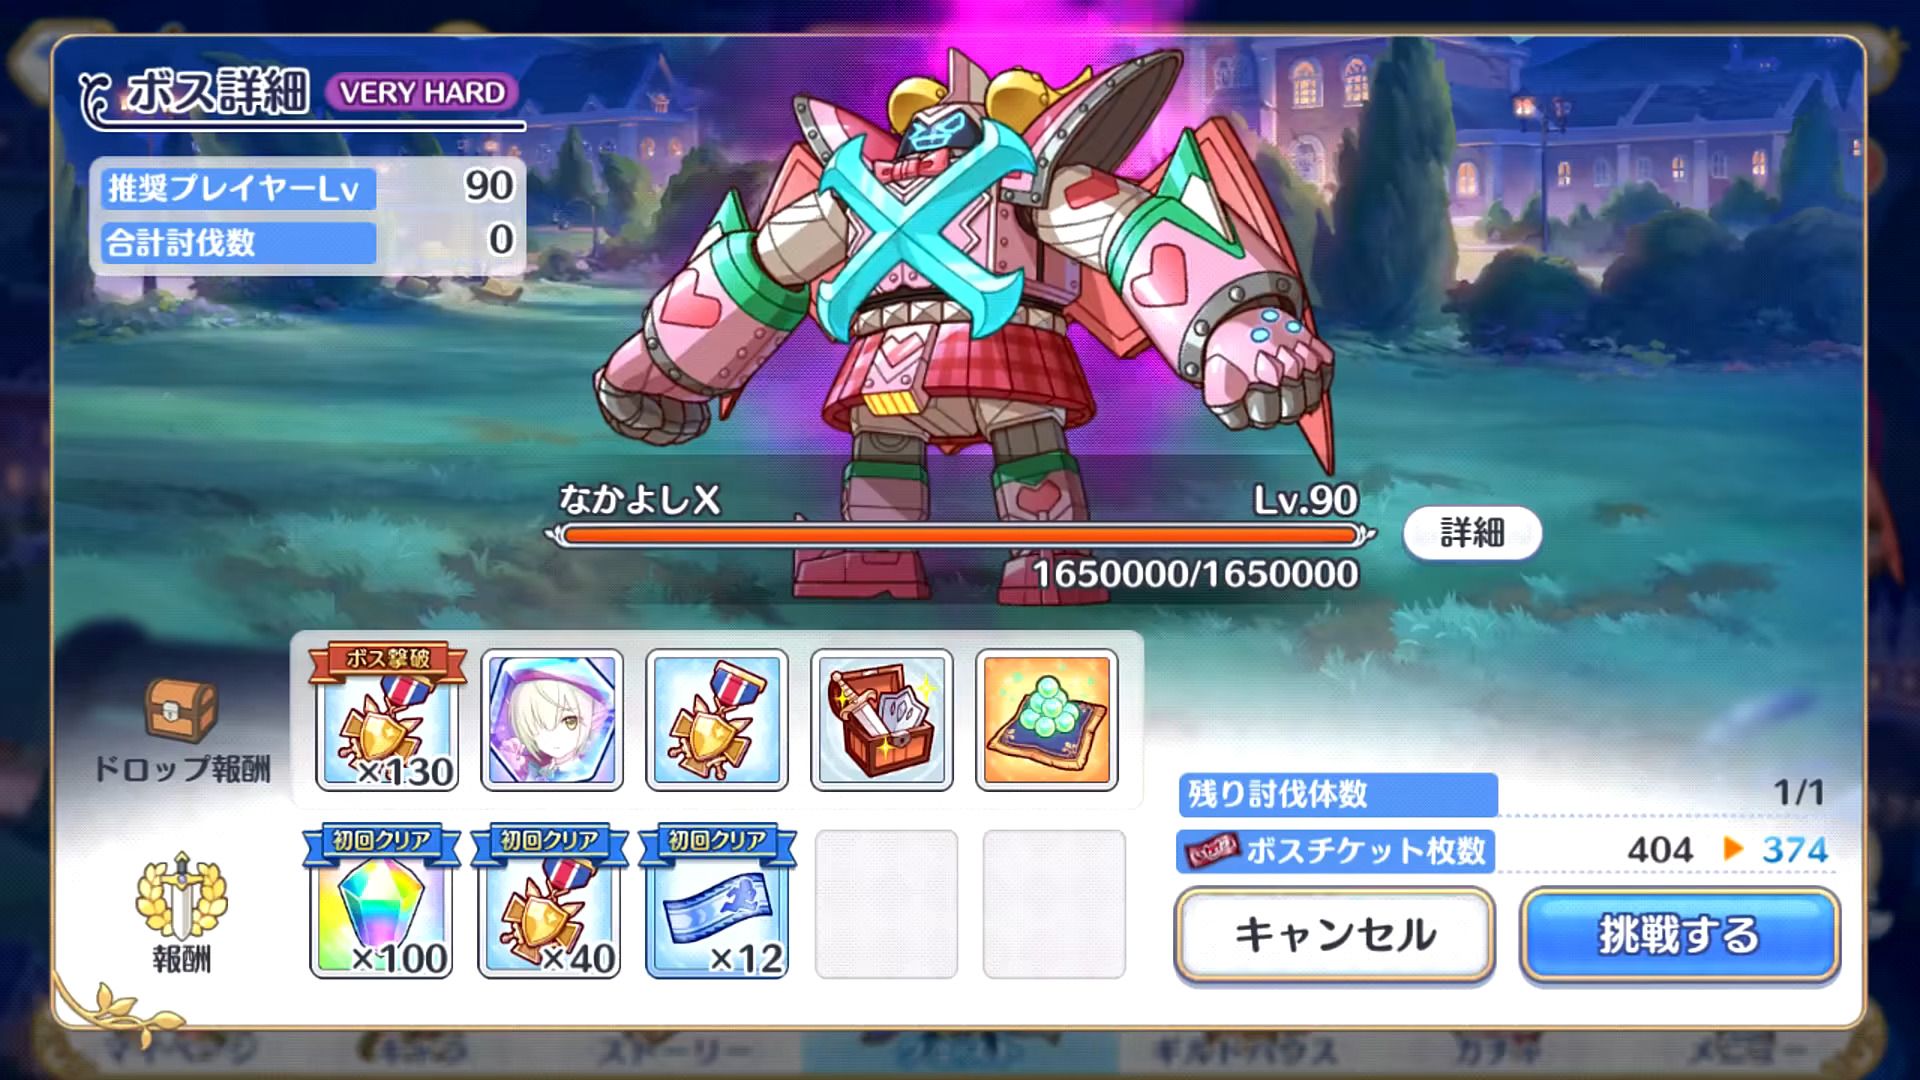
Very Hard Lvl. 90 |
1,650,000 | Deals magical damage to all enemies. | Increases own physical damage and deals physical damage to all enemies. | Deals large magic damage to the 3 front enemies and reduces their magic defense and action speed. |
|
Special Lvl. 90 |
7,100,000 | Deals magical damage to all enemies. | Increases own physical damage and deals physical damage to all enemies. | Deals large magic damage to the 3 front enemies and reduces their magic defense and action speed. |
This boss is pretty straightforward compared to some of the previous ones. Just make sure you have the right composition to deal with it. Applying poison or curse on the boss will also reduce its physical and magical defence and action speed.
Suggested Teams
Hard Boss
 Yui Yui |
 Shiori Shiori |
 Kokkoro Kokkoro |
 Eriko Eriko |
 Miyako Miyako |
|---|
This is about a F2P composition that gets used a lot. Miyako will be able to tank the frontal damage while Eriko and Shiori should provide enough damage to kill the boss. Other options are more backline damage dealers.
Very Hard Boss
 Yukari (6★) Yukari (6★) |
 Christina (w/ UE) Christina (w/ UE) |
Eriko (w/ UE) |
 Makoto (w/ UE) Makoto (w/ UE) |
 Jun (w/ UE) Jun (w/ UE) |
|---|
This team takes full advantage of the boss being especially weak to poison since it reduces both physical and magical defence on top of action speed. The combination of Makoto, Eriko, and Christina will make short work of the boss.
 Aoi (Student) Aoi (Student) |
Yukari (6★) |
 Rei (6★) Rei (6★) |
Eriko (w/ UE) |
 Hiyori (6★) Hiyori (6★) |
|---|
If your units are tanky enough, you can use this mostly damage team to kill the boss quickly. Again, the poison debuff really helps against this boss.
 Saren (Summer) Saren (Summer) |
Yukari (6★) |
Rei (6★) |
Eriko (w/ UE) |
Makoto (w/ UE) |
|---|
This modified team with mostly farmable units is also a good choice. Saren (Summer) will significantly speed up the clear since your units will UB much sooner.
 Kyoka (w/ UE) Kyoka (w/ UE) |
 Karyl (Summer) (w/ UE) Karyl (Summer) (w/ UE) |
 Neneka Neneka |
 Akari (w/ UE) Akari (w/ UE) |
Yukari (6★) |
|---|
Magic teams will also do fine against this boss. If you're a little lacking in healing even with Yukari, you can replace Akari with a dedicated healer such as Misato, Yui (New Year), or Io (Summer).
Special Mode
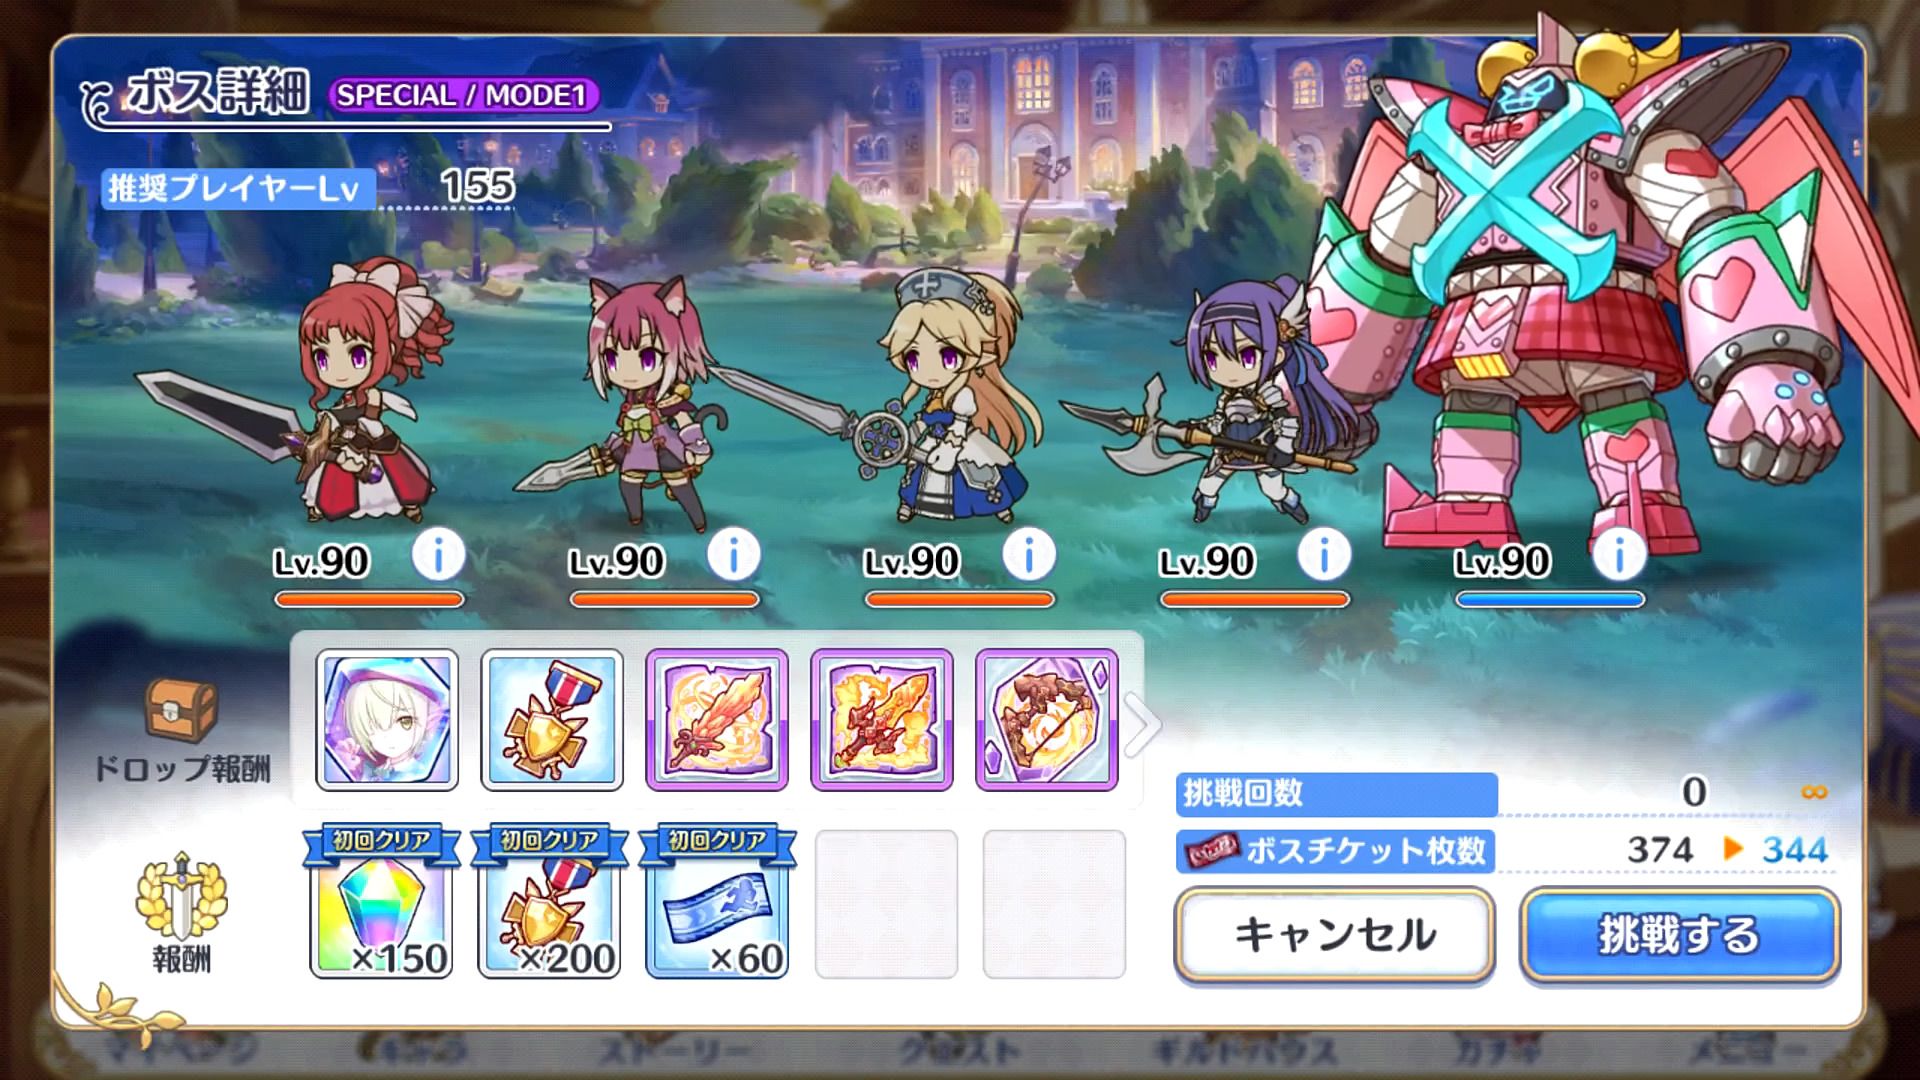
Once you clear the Very Hard boss, you will unlock the Special difficulty. This difficulty is geared toward end-game players and is very difficult. It will likely take 3+ teams to properly clear. It is broken into 3 sections/modes.
Mode 1
 Shadow Akino(Lvl. 90) Shadow Akino(Lvl. 90)1,250,000 HP |
 Shadow Tamaki (Lvl. 90) Shadow Tamaki (Lvl. 90)680,000 HP |
 Shadow Yukari (Lvl. 90) Shadow Yukari (Lvl. 90)820,000 HP |
 Shadow Mifuyu (Lvl. 90) Shadow Mifuyu (Lvl. 90)520,000 HP |
 Boss (Lvl. 90) Boss (Lvl. 90)7,100,000 HP |
|---|
Mode 1 is a set of Shadow units for you to kill. They're a little tanky and the composition can be annoying here. Just be sure not to have undefended mages here.
Mode 2
| Difficulty | HP | Union Burst | Skill 1 | Skill 2 |
|---|---|---|---|---|
|
Special Lvl. 90 |
7,100,000 - 3,900,001 | N/A | Deals medium magical damage to 1 enemy and charms and silences them. | N/A |
Welcome to the world of Chieru. Seriously, the boss only speaks in Chieru-speak and both charms and silences a single one of your units by random. Using a shield here is great and helps you deal with the boss quicker.
Mode 3
| Difficulty | HP | Union Burst | Skill 1 | Skill 2 |
|---|---|---|---|---|
|
Special Lvl. 90 |
3,900,000 | Deals magical damage to all enemies. | Increases own physical damage and deals physical damage to all enemies. | Deals large magic damage to the 3 front enemies and reduces their magic defense and action speed. |
We're back to dealing with the Very Hard boss again except with beefier stats. Similar teams will help you deal with it once again.
Suggested Teams
Mode 1:
 Maho (6★) Maho (6★) |
Christina (w/ UE) |
Rei (6★) |
Makoto (w/ UE) |
Jun (w/ UE) |
|---|
| Christina (w/ UE) |
Rei (6★) |
Eriko (w/ UE) |
Makoto (w/ UE) |
 Ruka (w/ UE) Ruka (w/ UE) |
|---|
There is a chance you may need to use two teams to deal with Mode 1. That's fine if you need to do so. The Shadow units are pretty tanky and kind of annoying to deal with. If you use the two teams above, you can move smoothly into Mode 2 with the second team.
| Saren (Summer) |
Christina (w/ UE) |
Rei (6★) |
Makoto (w/ UE) |
 Pecorine (Princess) Pecorine (Princess) |
|---|
It is possible to one punch Mode 1, it just requires a lot more premium units. Pecorine (Princess) is the tank of choice as she does damage as well. Utilizing Saren (Summer) here will increase the damage output with an earlier UB too.
Mode 2:
| Christina (w/ UE) |
Rei (6★) |
Eriko (w/ UE) |
Makoto (w/ UE) |
Ruka (w/ UE) |
|---|
You can essentially ignore what the boss is doing with Ruka taunt since the boss will only charm Ruka. However, this may prove a bit risky if the timing does not match up and your party will definitely kill itself.
| Yukari (6★) |
Christina (w/ UE) |
Hiyori (6★) |
Makoto (w/ UE) |
Ruka (w/ UE) |
|---|
If you use Yukari here, you can essentially ignore the mechanic in Mode 2.
Mode 3:
| Aoi (Student) |
Yukari (6★) |
Rei (6★) |
Eriko (w/ UE) |
Makoto (w/ UE) |
|---|
You can realistically use any of the Very Hard teams to deal with Mode 3. You basically need someone that does poison and Yukari as your core units. The rest can be any DPS or flex DPS units you may have. If you have all the 6★ Twinkle Wish characters, you can slot in Hiyori too.
Rewards
We're finally onto the main point of each of these events: the rewards that come along with it. In addition to the first clear bonuses, there are also a set number of event treasure boxes. Think of it as a mini gacha machine but each one has a set number of items. To roll this treasure gacha box, you get pulls from defeating the event boss and completing daily missions. You do not need to clear out every single item in each box to move on to the next one. However, you will need to obtain the main items in the box. In this case, the main items are the memory shards for the characters. (You would want to collect these anyway.) The contents of each of the boxes are listed below.
| Box One | |
|---|---|
| Item | Quantity |
 Tamakii Memory Shards x 20 Tamakii Memory Shards x 20 |
1 |
 Jewels x 5 Jewels x 5 |
5 |
 Divine Amulets Divine Amulets |
20 |
 Skip Tickets Skip Tickets |
15 |
 Mana x 7,000 Mana x 7,000 |
20 |
 Rupies x 100 Rupies x 100 |
10 |
 Random Equipment Random Equipment |
300 |
 Superior Refinement Crystals Superior Refinement Crystals |
5 |
 Enhanced Refinement Crystals Enhanced Refinement Crystals |
10 |
 Refinement Crystals Refinement Crystals |
15 |
 Super EXP Potion Super EXP Potion |
5 |
 EXP Potion EXP Potion |
10 |
 Mini EXP Potion Mini EXP Potion |
15 |
| Total | 431 |
| Box Two | |
|---|---|
| Item | Quantity |
 Aoi (Student) Memory Shards x 25 Aoi (Student) Memory Shards x 25 |
1 |
|
Jewels x 10 |
10 |
|
Divine Amulets |
25 |
|
Skip Tickets |
20 |
|
Mana x 8,000 |
30 |
|
Rupies x 200 |
15 |
|
Random Equipment |
380 |
|
Superior Refinement Crystals |
7 |
|
Enhanced Refinement Crystals |
12 |
|
Refinement Crystals |
17 |
|
Super EXP Potion |
7 |
|
EXP Potion |
12 |
|
Mini EXP Potion |
17 |
| Total | 553 |
| Box Three | |
|---|---|
| Item | Quantity |
|
Tamakii Memory Shards x 30 |
1 |
|
Jewels x 15 |
15 |
|
Divine Amulets |
30 |
|
Skip Tickets |
20 |
|
Mana x 9,000 |
40 |
|
Rupies x 300 |
20 |
|
Random Equipment |
480 |
|
Superior Refinement Crystals |
9 |
|
Enhanced Refinement Crystals |
14 |
|
Refinement Crystals |
19 |
|
Super EXP Potion |
9 |
|
EXP Potion |
14 |
|
Mini EXP Potion |
19 |
| Total | 690 |
| Box Four | |
|---|---|
| Item | Quantity |
|
Aoi (Student) Memory Shards x 40 |
1 |
|
Jewels x 25 |
20 |
|
Divine Amulets |
35 |
|
Skip Tickets |
25 |
|
Mana x 10,000 |
50 |
|
Rupies x 250 |
30 |
|
Random Equipment |
550 |
|
Superior Refinement Crystals |
11 |
|
Enhanced Refinement Crystals |
16 |
|
Refinement Crystals |
21 |
|
Super EXP Potion |
11 |
|
EXP Potion |
16 |
|
Mini EXP Potion |
21 |
| Total | 807 |
| Box Five+ | |
|---|---|
| Item | Quantity |
|
Jewels x 25 |
5 |
|
Divine Amulets |
35 |
|
Skip Tickets |
25 |
|
Mana x 10,000 |
50 |
|
Rupies x 250 |
30 |
|
Random Equipment |
550 |
|
Superior Refinement Crystals |
11 |
|
Enhanced Refinement Crystals |
16 |
|
Refinement Crystals |
21 |
|
Super EXP Potion |
11 |
|
EXP Potion |
16 |
|
Mini EXP Potion |
21 |
| Total | 791 |
Total Memory Shards
A breakdown of all the possible memory shards gained from missions, story, and the boxes are listed here:
| Location | Tamaki | Aoi (Student) |
|---|---|---|
| Story Reward | 4 | 4 |
| Normal Quests | 2 | 2 |
| Hard Quests | 6 | 9 |
| Treasure Box | 50 | 65 |
| Event Missions | N/A | 26 |
| Total | 62 | 106 |
Note: This does not include memory shards from hard mission drops. These only include the ones you are guaranteed to get assuming you complete the tasks.
Can you believe we haven't injected enough Chieru into this post? I know how to fix it.
Perfect! Now we're set for this event. Good luck if you plan to roll for Yuni or Chieru! Chieru-out!
Last Update: March 6, 2023